Wichita Elite Drywall logo
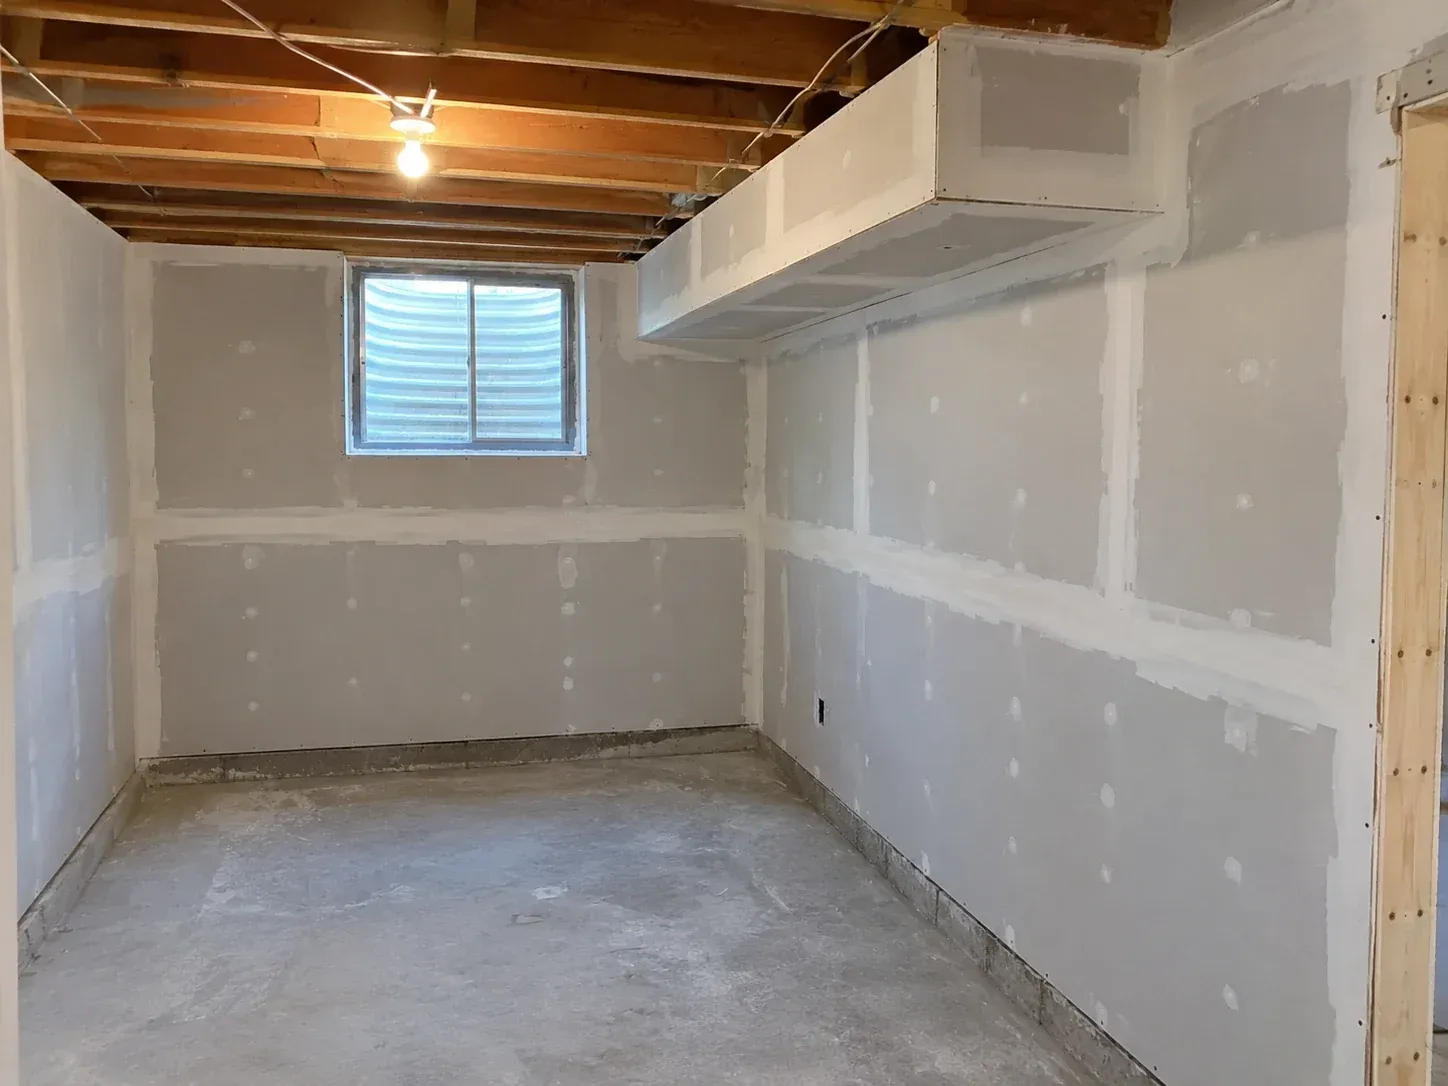
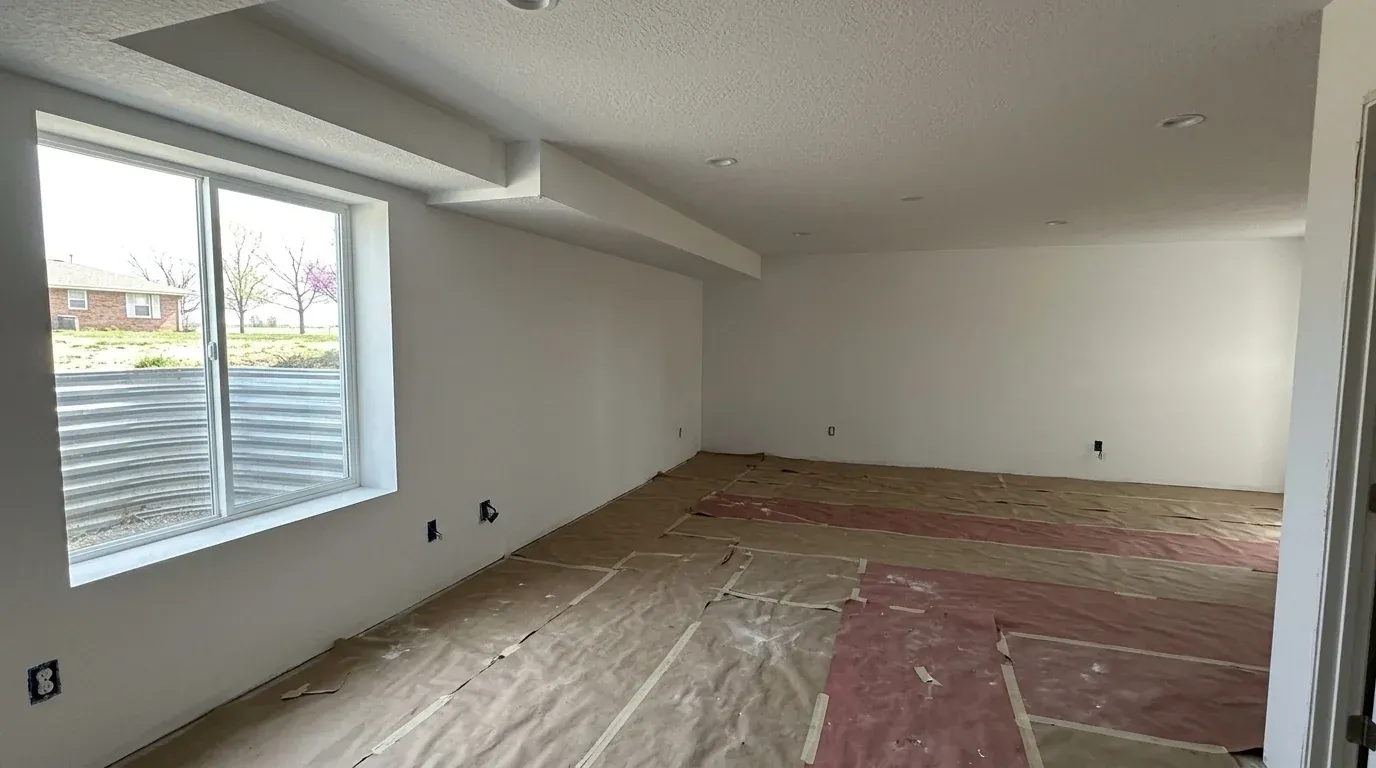
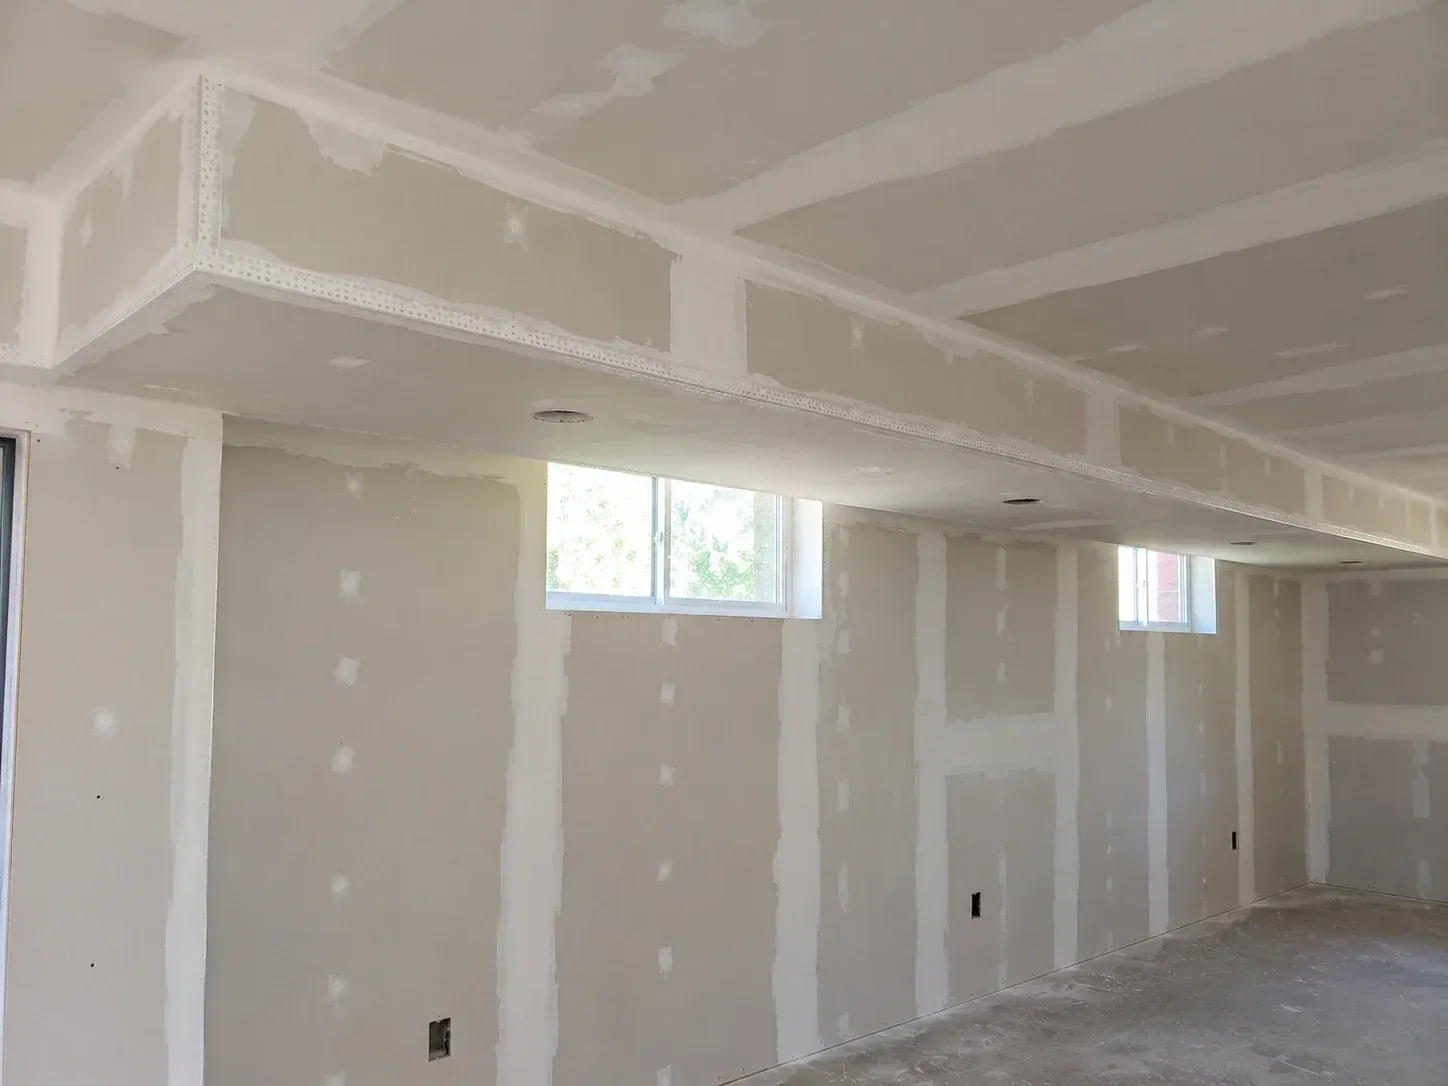
A finished basement room with smooth walls, a drywall soffit, recessed lights and a wide egress window, paper still covering the floor.

Wichita Elite Drywall: Drywall Installation and Repair for Residential & Commercial Properties

  • 2,600+ Drywall Projects Finished to Date
  • 18 Years Hanging and Finishing Drywall in Wichita, Kansas

Invisible Seams and Patches

We check every wall with a side light before the primer goes on. Knockdown and orange peel textures are matched on a sample board you approve. Corners are set straight and tight. For rooms with strong window light, we offer Level 5, the highest finish grade.

Dust Contained, Floors Swept Daily

Plastic goes up at the doorways before the first cut. Floors and air vents are covered, and our sanders are hooked to vacuums. The work area is swept before we leave each evening. Every scrap of board leaves with us.

Upfront Pricing

We're upfront about our pricing. Every project is quoted in writing before we begin, so you know exactly what you're getting. Estimates are free and itemized, and yours will say whether texture, primer, paint and haul-away are included. Projects run from $5,000 to $85,000+, and repairs start at $700. A 25% deposit puts you on the schedule, and larger projects can be financed.

Reliable Scheduling

You get real dates. Your written estimate arrives within 2 business days of our visit. It gives the day we start and the day we finish, with drying time counted. Ten hangers and finishers on our payroll keep those dates. Calls and texts get an answer the same business day.

Hidden Problems Caught First

We look inside the wall before we cover it. That means moisture readings after a leak and a straightedge across the studs. Missing insulation is pointed out while it is still easy to add. More than 350 basements have taught us where to look.

Licensed, Bonded and Insured

Every job carries a 5-year workmanship warranty, and you get the terms in writing before we start. Our crew is licensed, bonded and insured for work in homes and businesses. We walk the finished job with you and fix what you find.

Request a Free Drywall Estimate

Licensed, Bonded and Insured

Recent Drywall Projects in Wichita, KS

Before
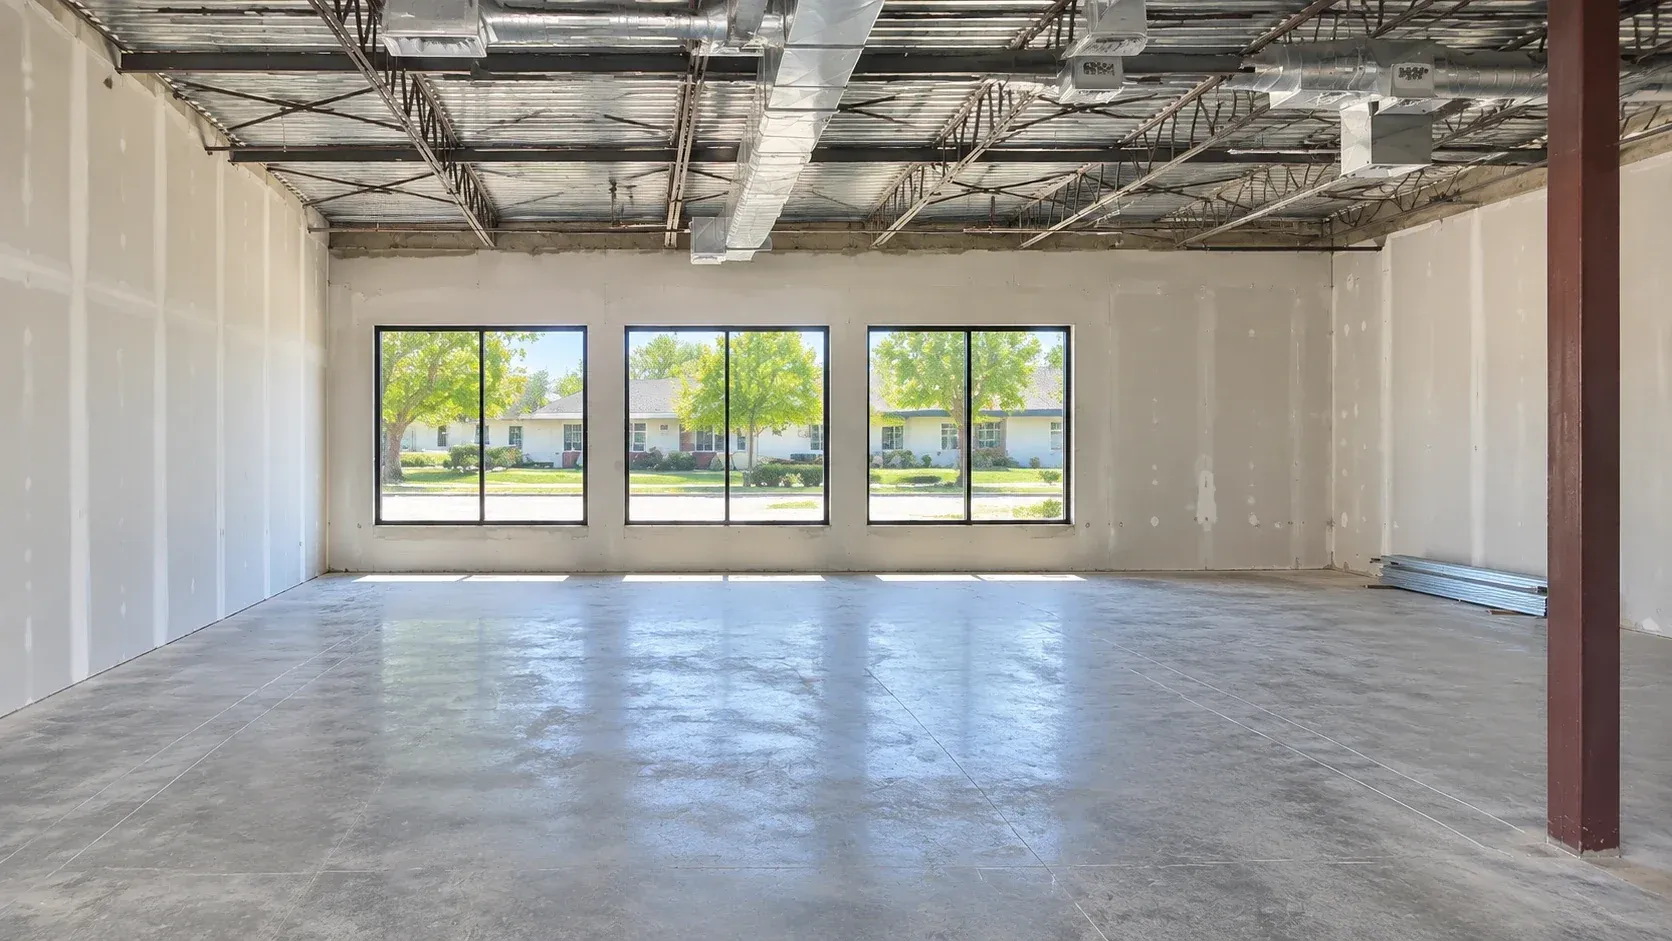
Before: an empty commercial shell with a bare concrete floor, three storefront windows, an exposed ceiling deck and a steel column.
After
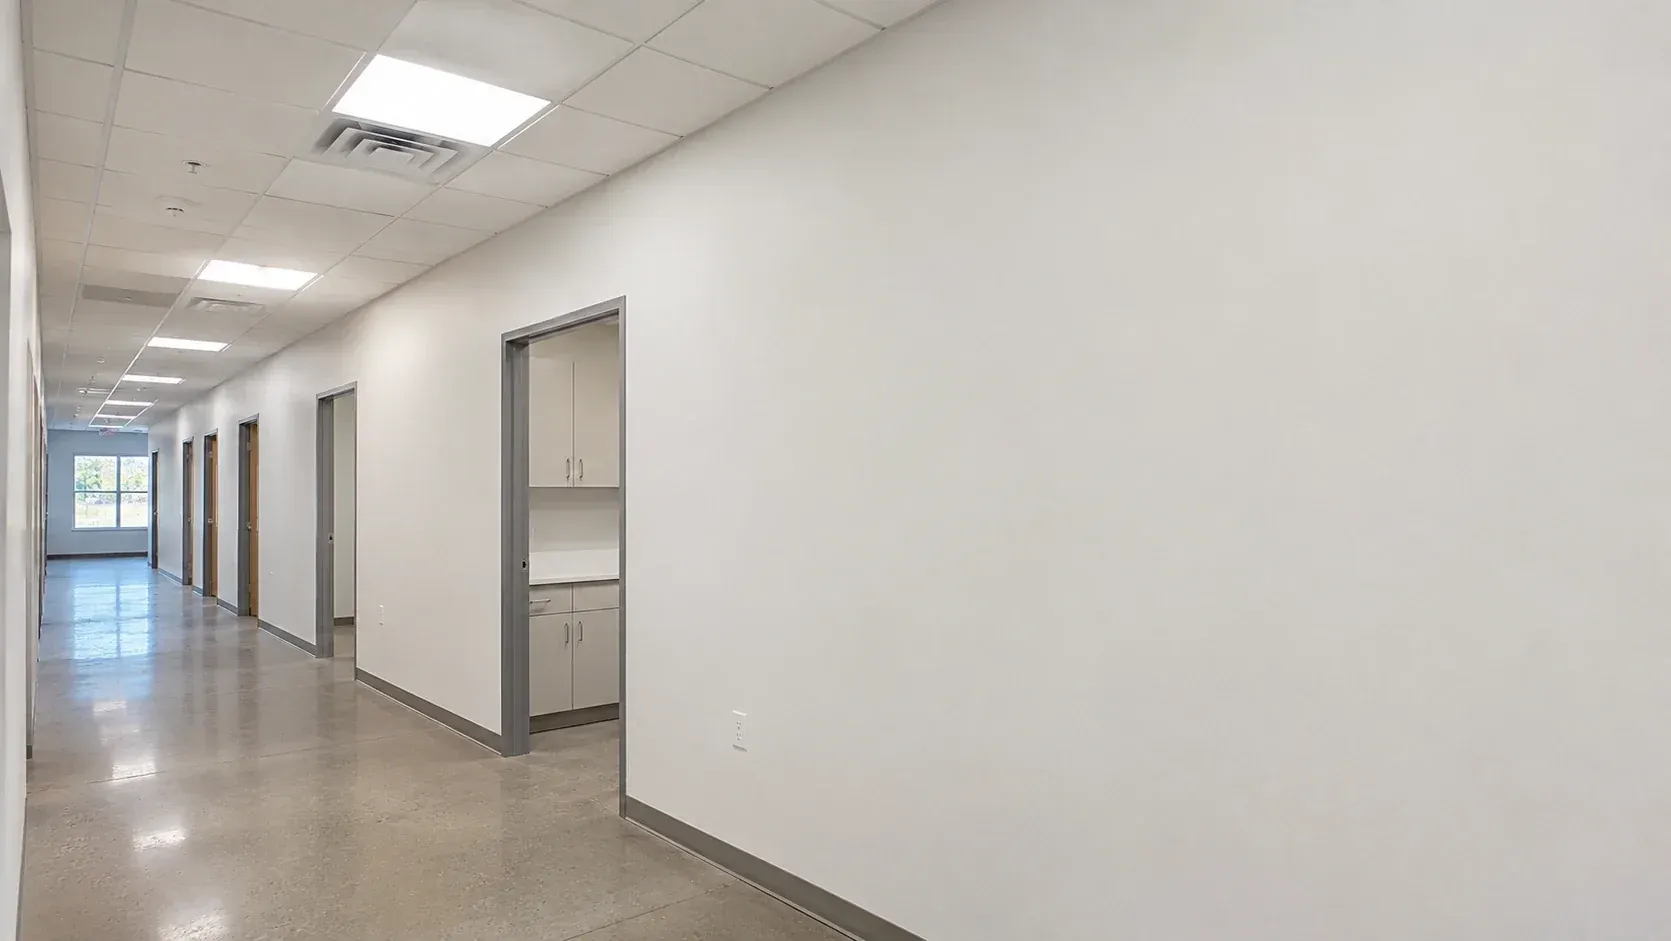
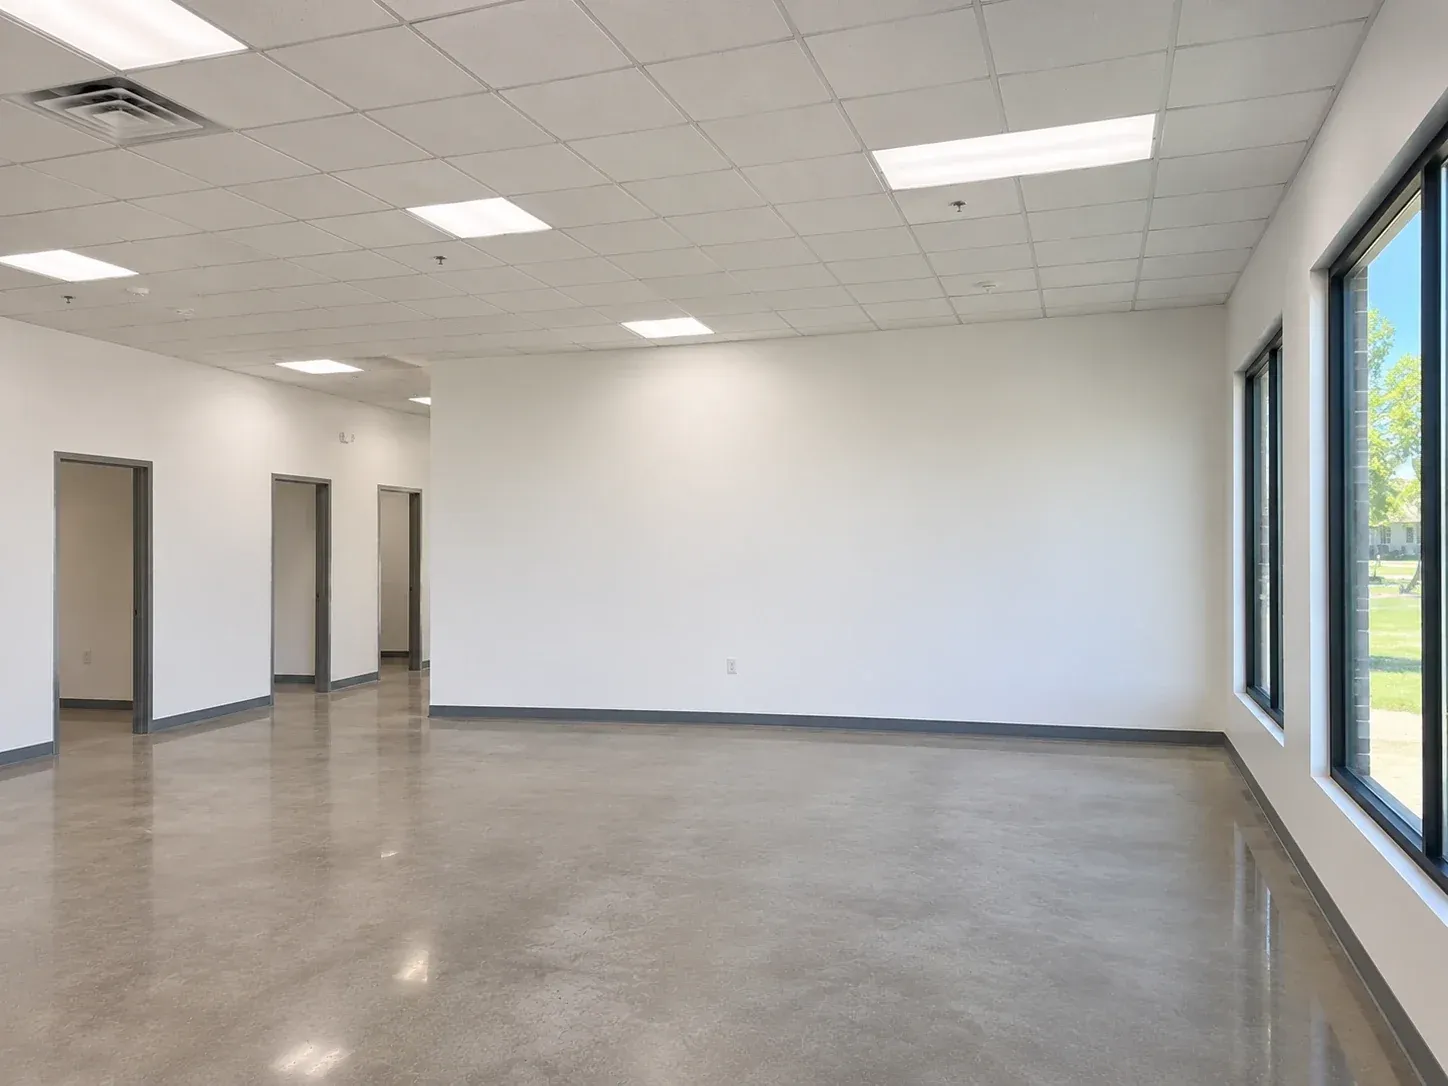
After: the finished clinic suite with smooth white walls, exam-room doorways, a ceiling grid and storefront windows along one wall.

East Wichita

Clinic Suite Framing and Drywall in East Wichita

Project: An empty shell of 7,400 square feet needed to become a 14-room clinic. We framed the suite in steel studs and added backing for every wall-mounted cabinet before the board went on. The walls between exam rooms were insulated for sound and finished to Level 4. The ceiling grid and tile followed once the walls were painted. The general contractor took the space over in 18 working days.

Project Value:$58,000

Before
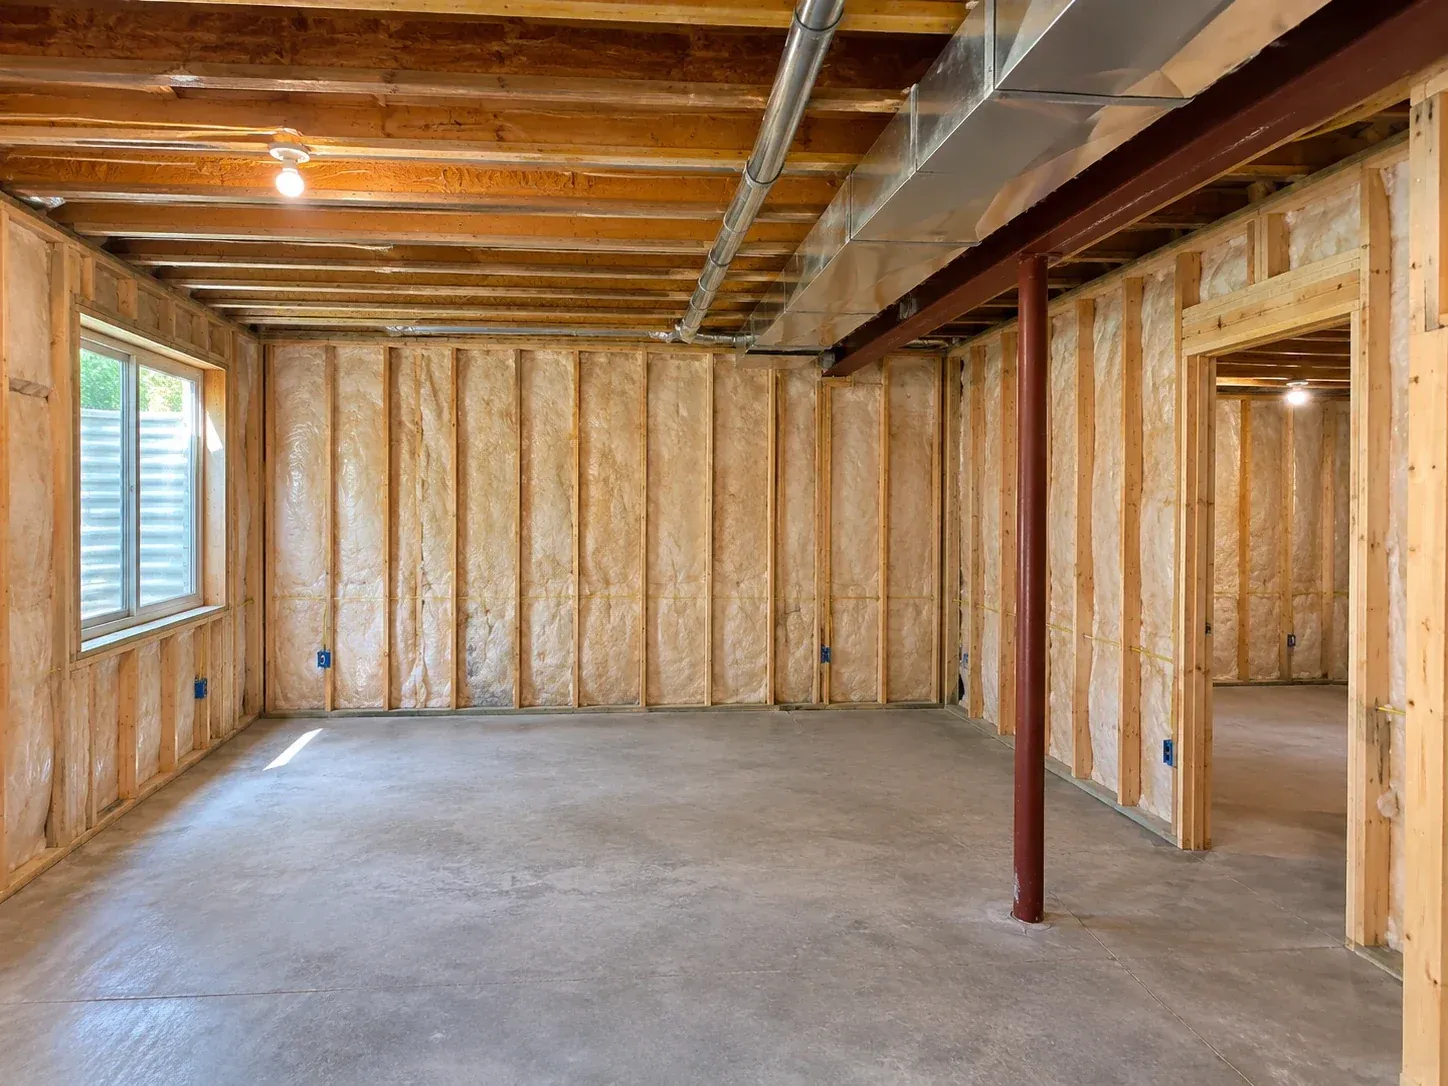
Before: an unfinished basement with insulated stud walls, open joists, a duct and steel beam overhead and an egress window.
After
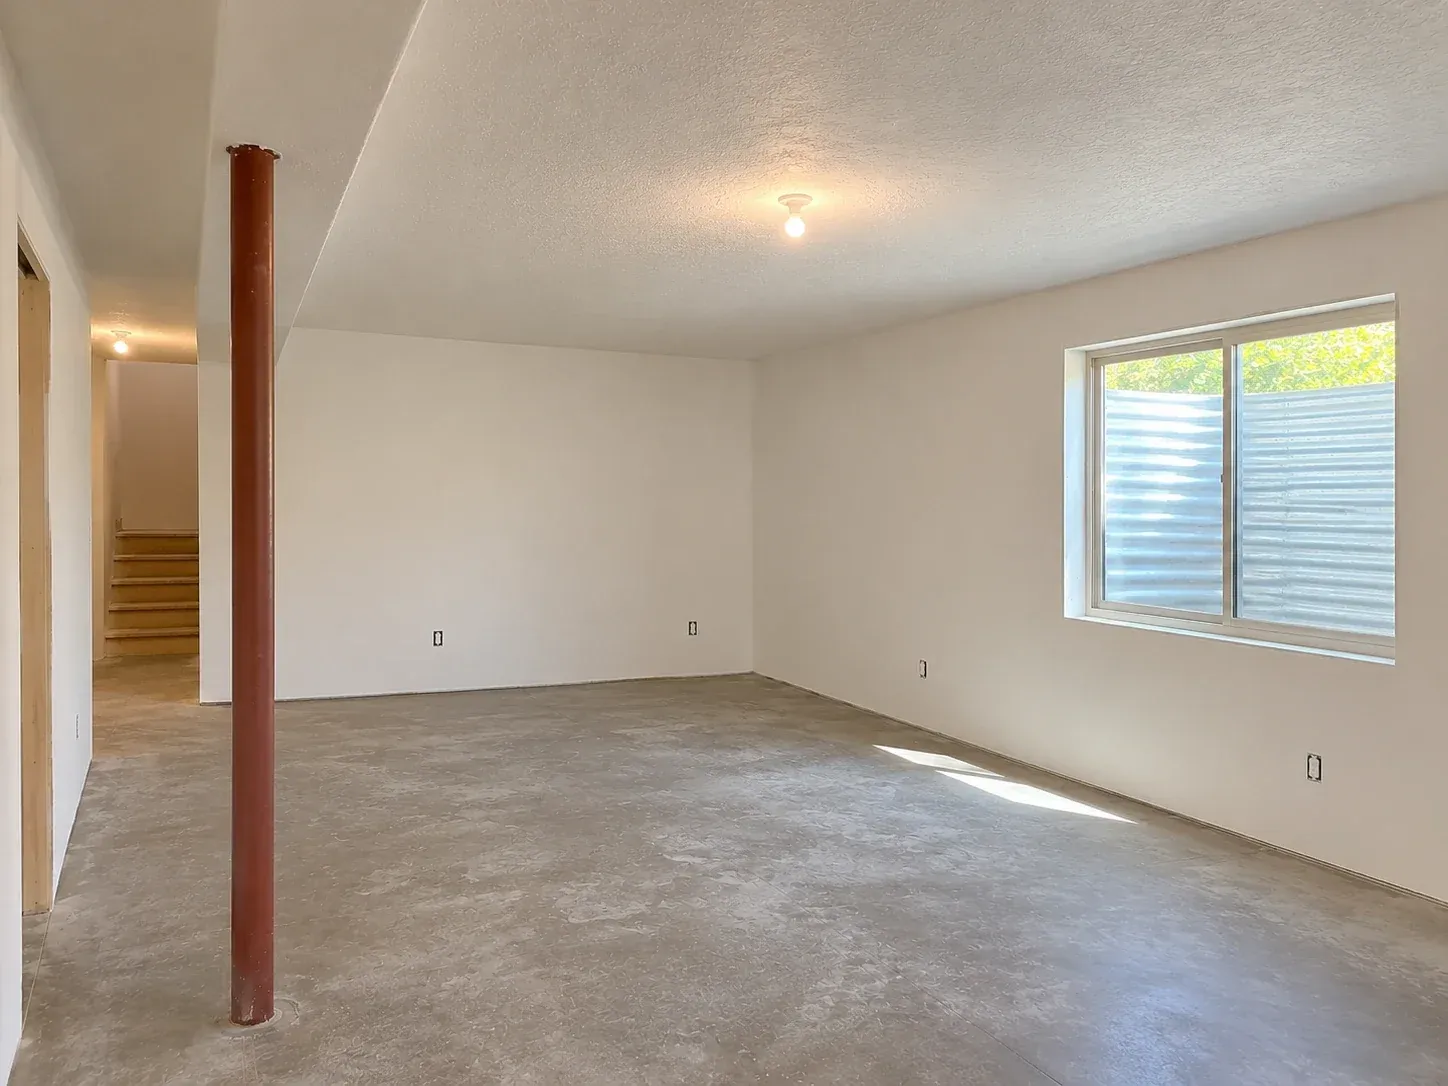
After: the same basement finished, with smooth walls, a textured ceiling, a soffit over the beam, the steel column and the egress window.

Andover

Basement Drywall and Knockdown Ceilings in Andover

Project: Bare studs and open joists covered 1,150 square feet of this Andover basement. Today it has two bedrooms and a bath beside a family room. We held the wall board half an inch off the slab and used moisture-resistant board at the bath. The main duct now sits inside a straight soffit, and the ceilings carry a knockdown texture. The job took seven working days.

Project Value:$11,800

Before
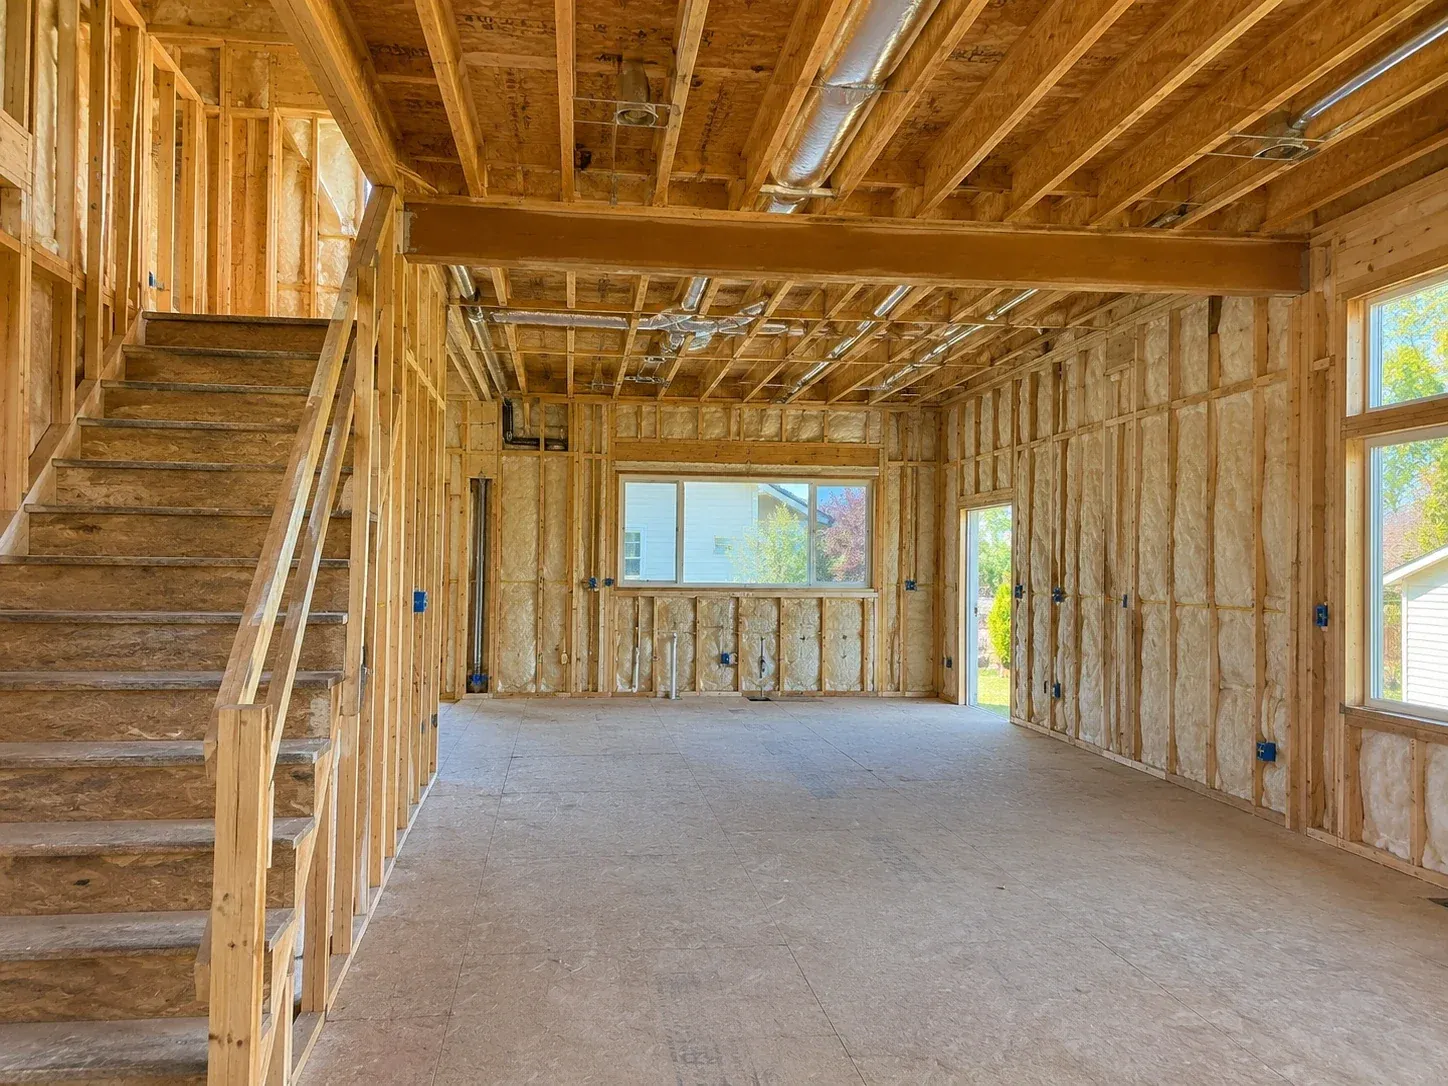
Before: a new home's great room in bare framing with insulation, open joists, a staircase and a wide kitchen window.
After
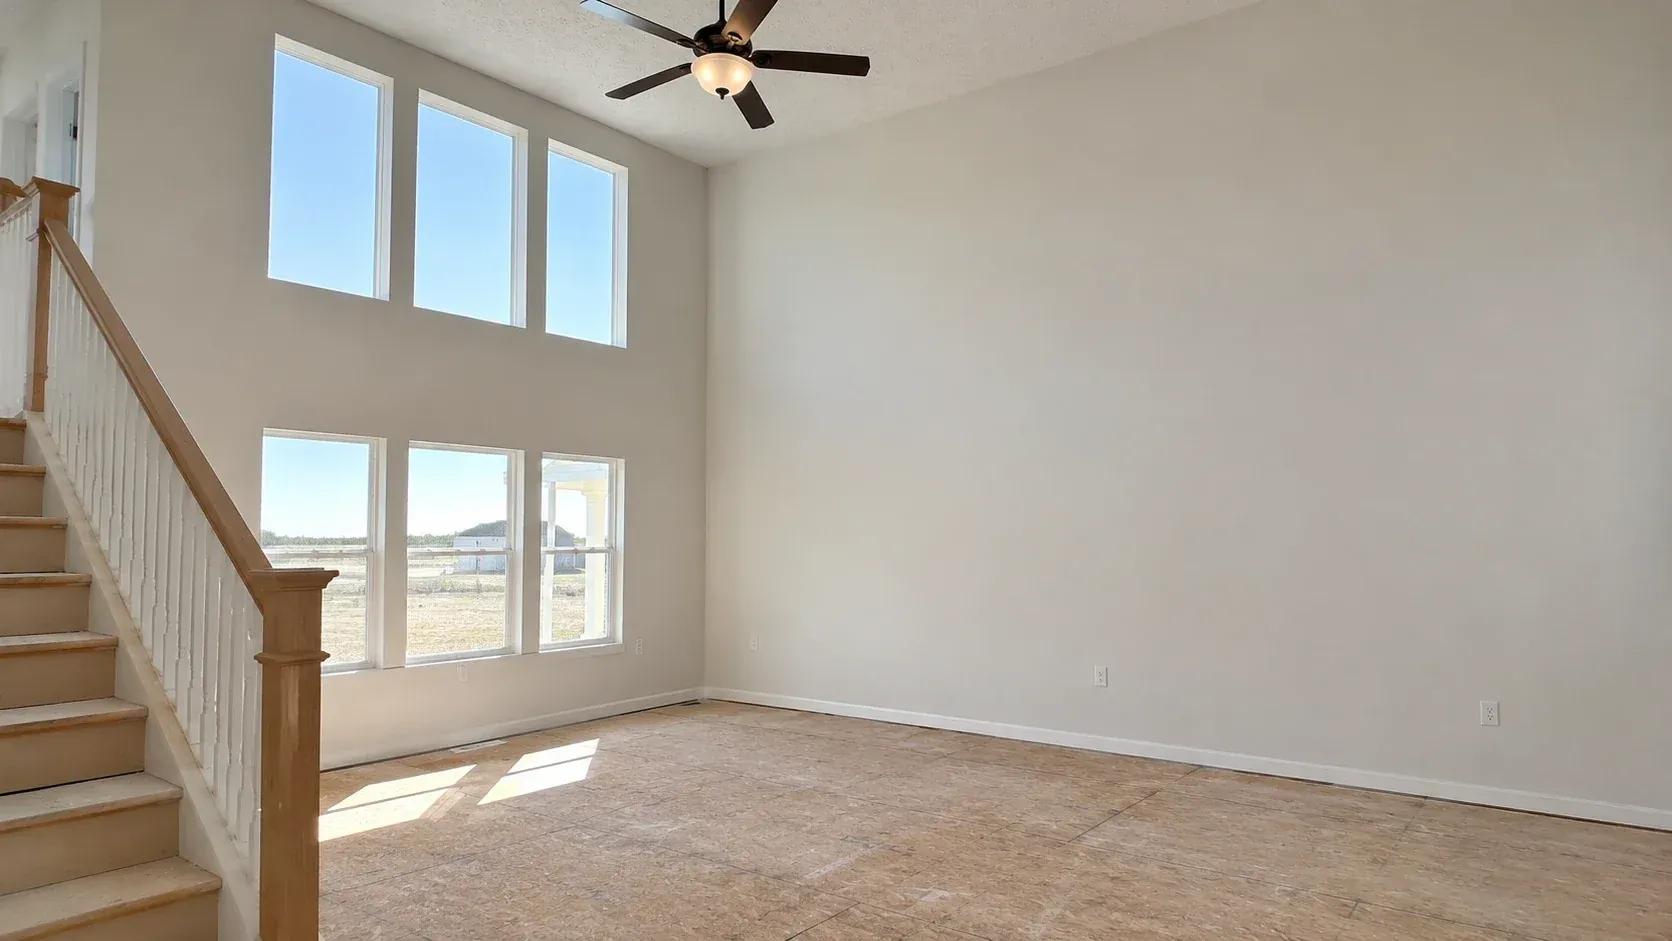
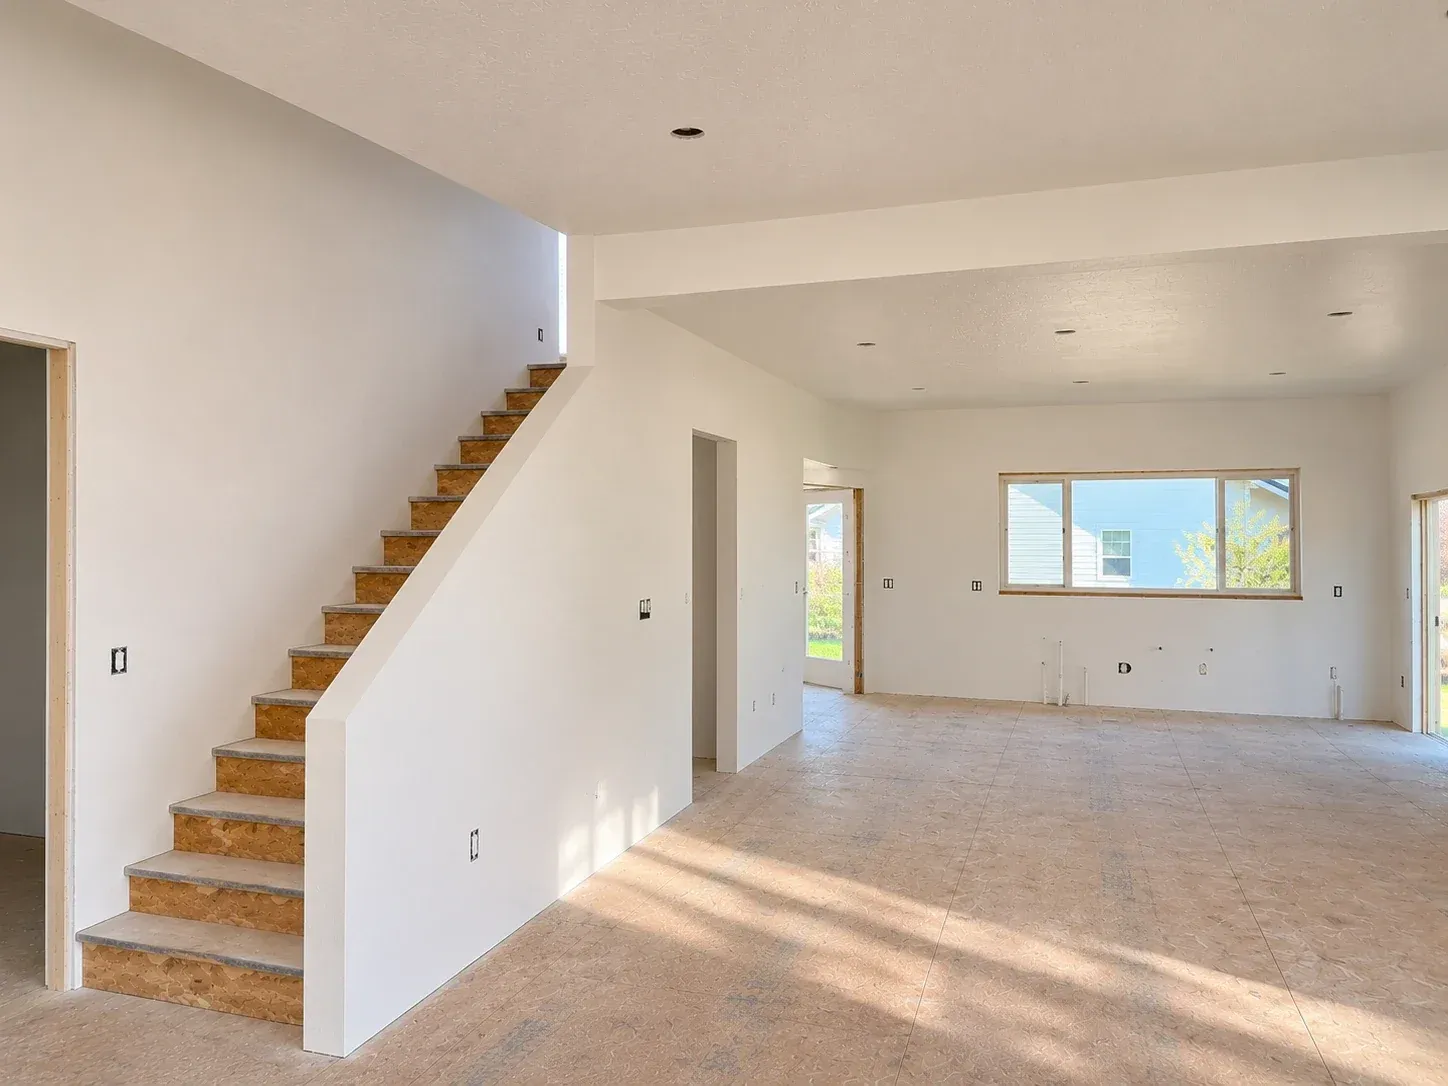
After: the same great room with drywall hung and finished, the beam wrapped, the staircase wall boarded and the kitchen window trimmed.

Maize

New-Home Drywall, Tape, Mud and Texture in Maize

Project: A local builder handed us 2,700 square feet of framing with fresh insulation. Walls took 1/2-inch sheets and ceilings took 5/8-inch, and the garage ceiling was covered in Type X. The walls got orange peel and the ceilings got knockdown. Our finishers taped and coated every seam by hand. Eight working days later, the house was cleaned out and ready for the painter.

Project Value:$15,200

Before
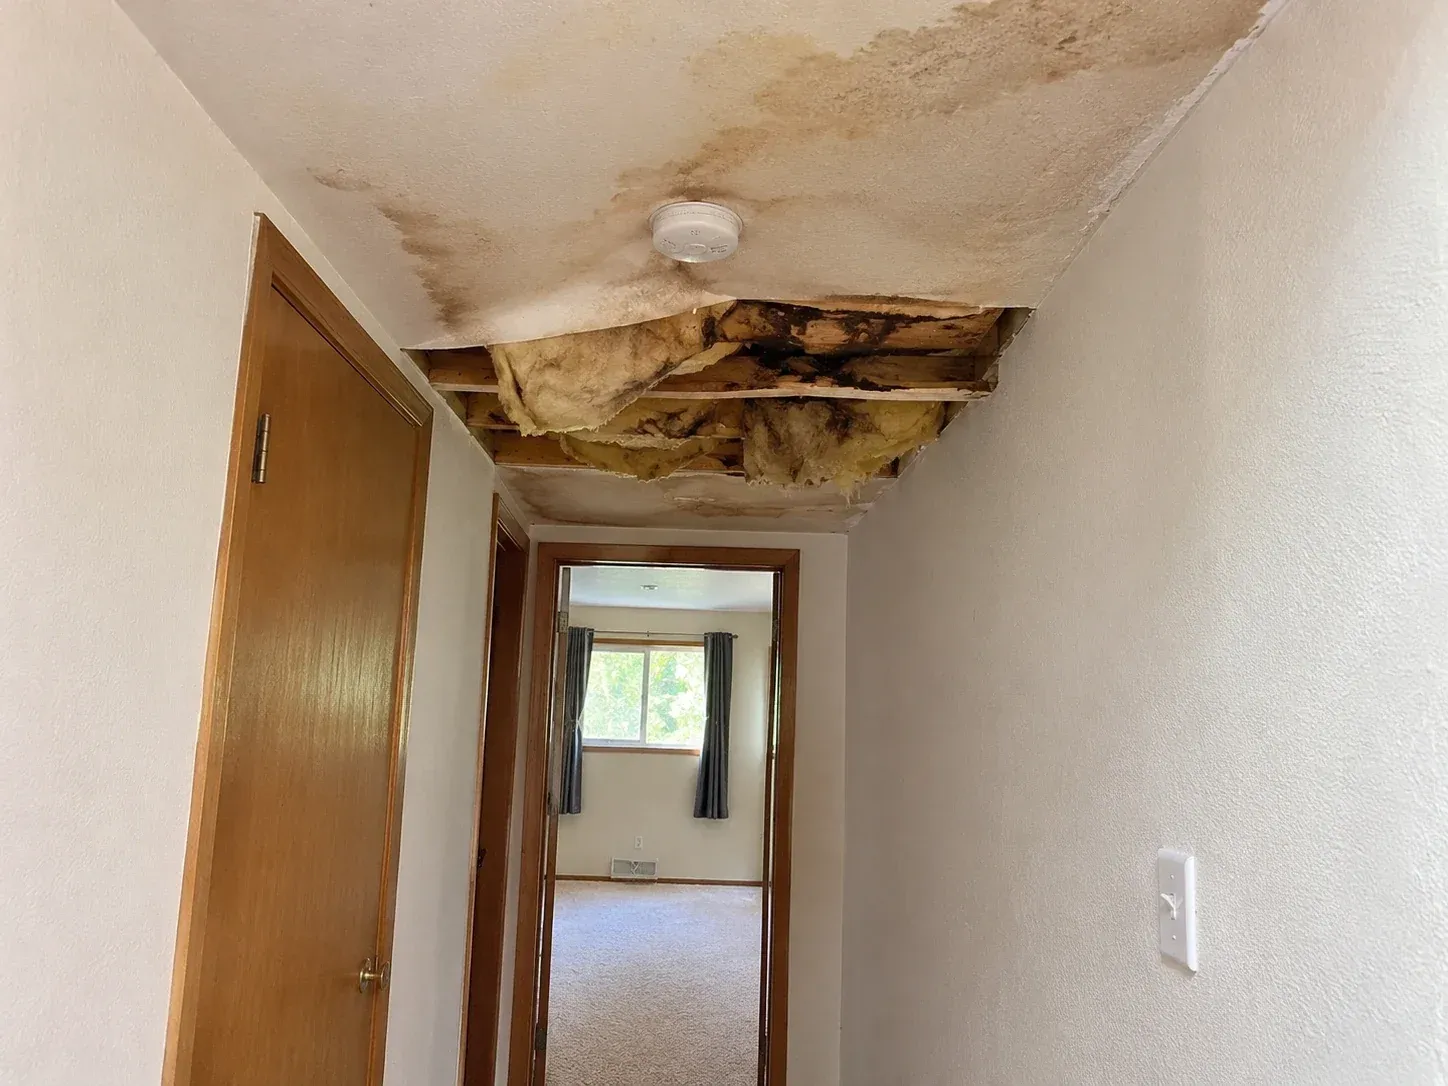
Before: a hallway ceiling stained by a roof leak and cut open to wet insulation and framing, beside the smoke detector.
After
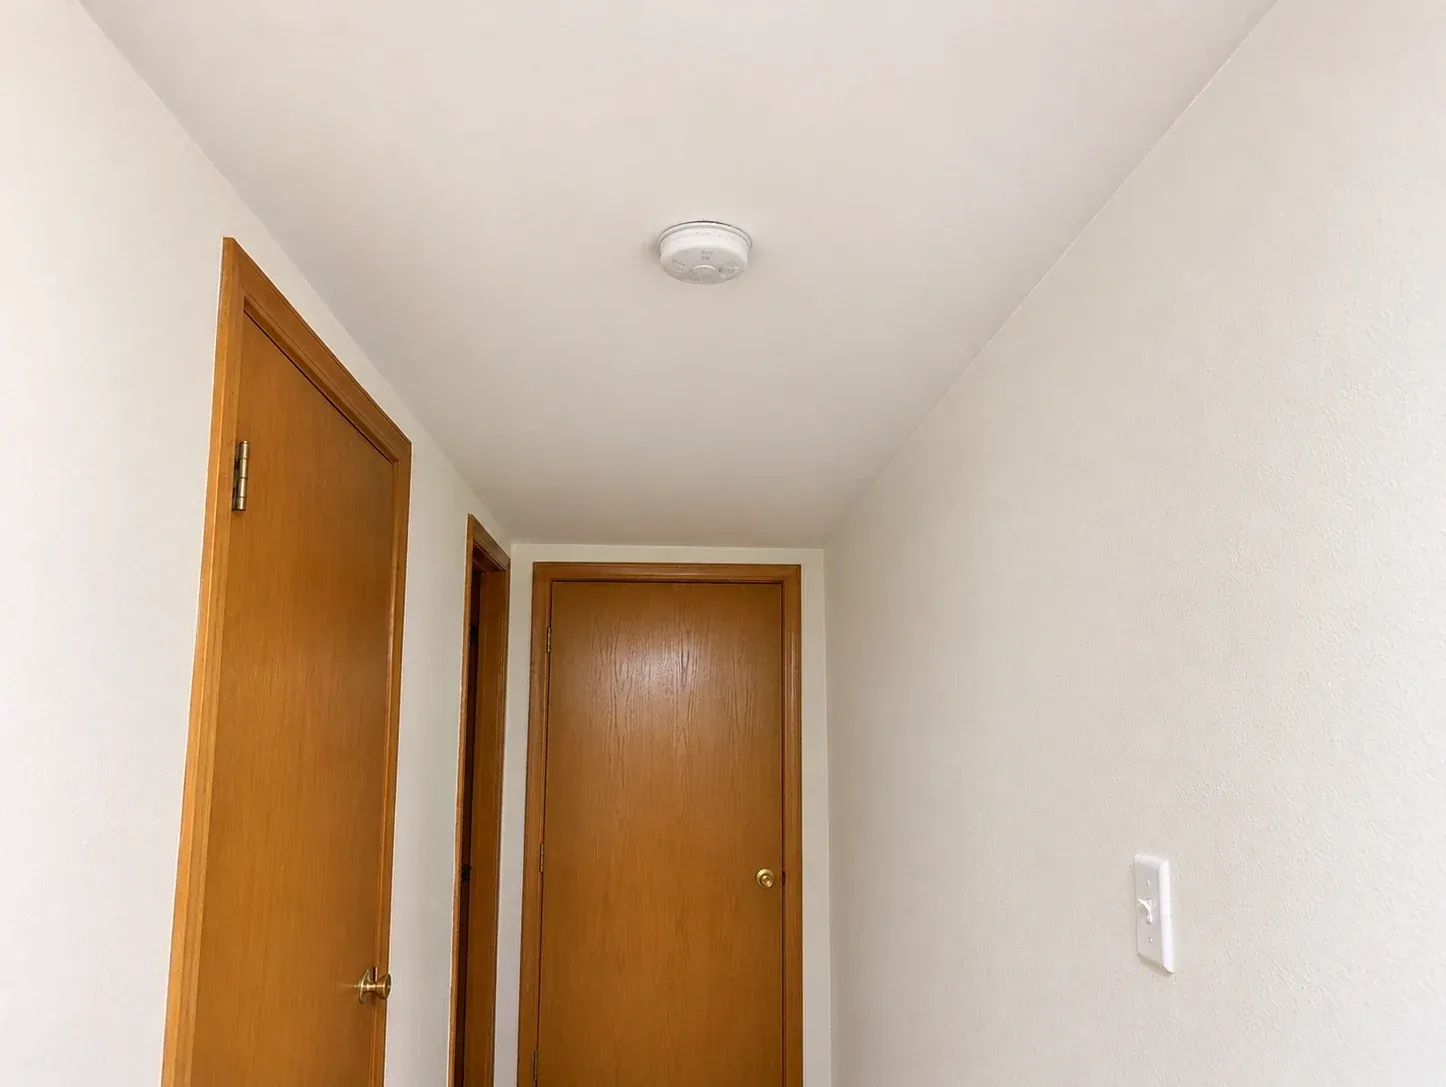
After: the same hallway with a new, clean ceiling, the smoke detector back in place and the oak doors along one side.

Derby

Ceiling Replacement After a Roof Leak in Derby

Project: A storm left water stains in three rooms and a sagging ceiling in the hallway. We waited for the roof repair, then took moisture readings on the framing. About 980 square feet of ceiling board came out, along with the wet insulation. New 5/8-inch board went up once the framing read dry. The knockdown was matched from room to room, and the ceilings were primed in four working days.

Project Value:$7,600

Before
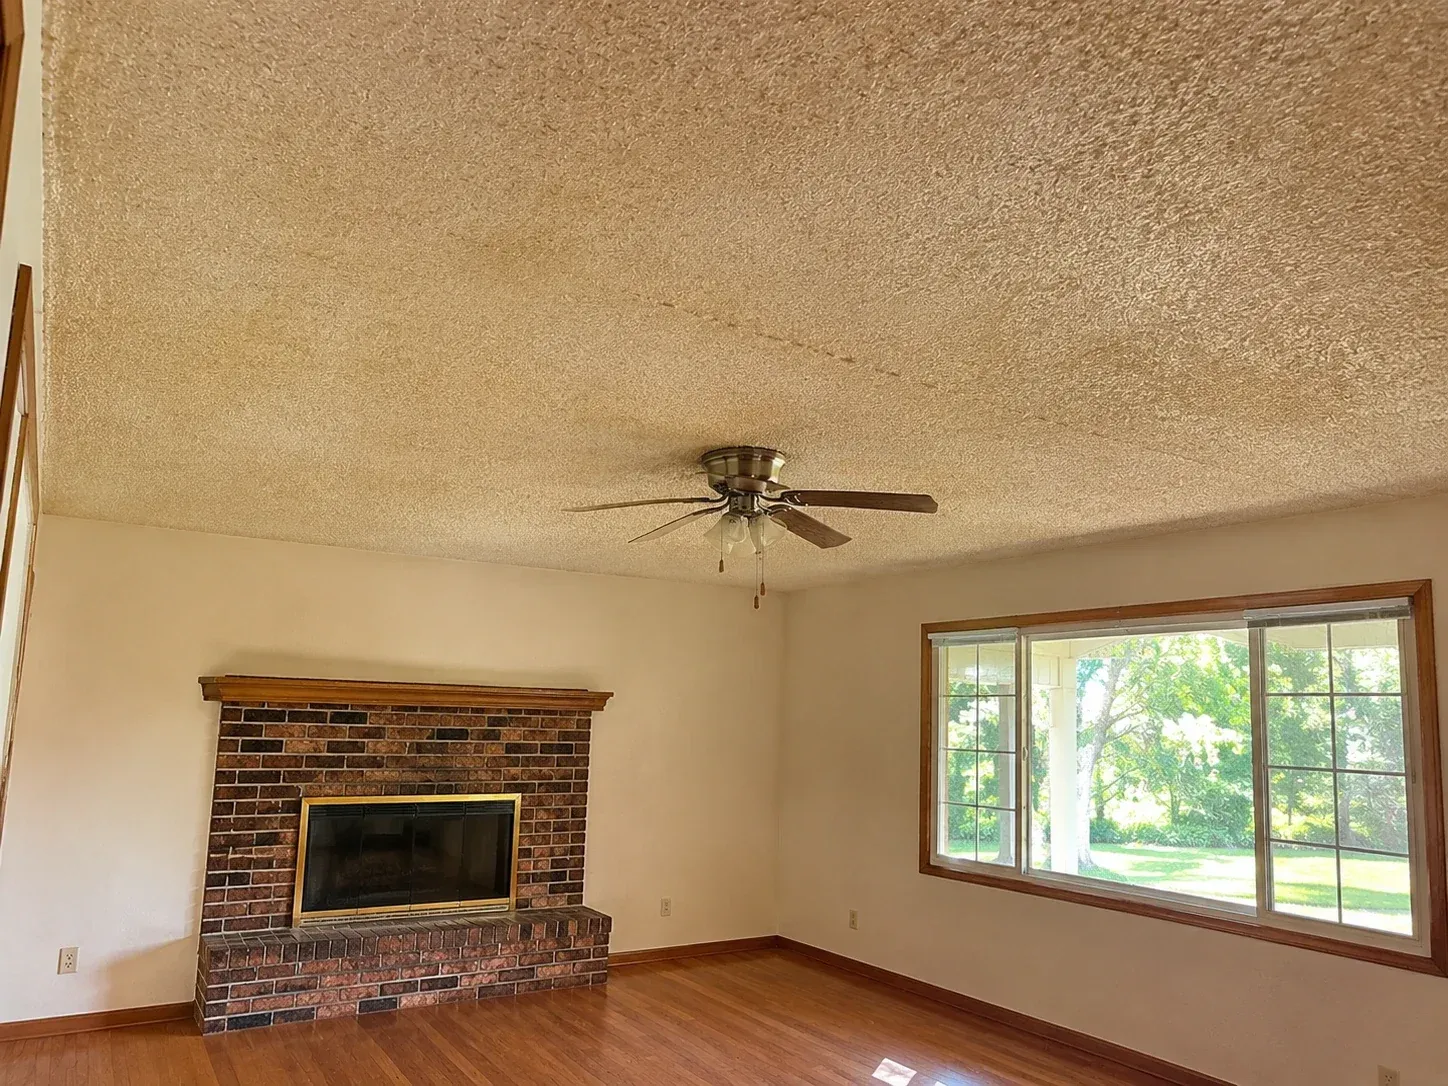
Before: a living room with a yellowed popcorn ceiling over a brick fireplace, a ceiling fan and a wide front window.
After
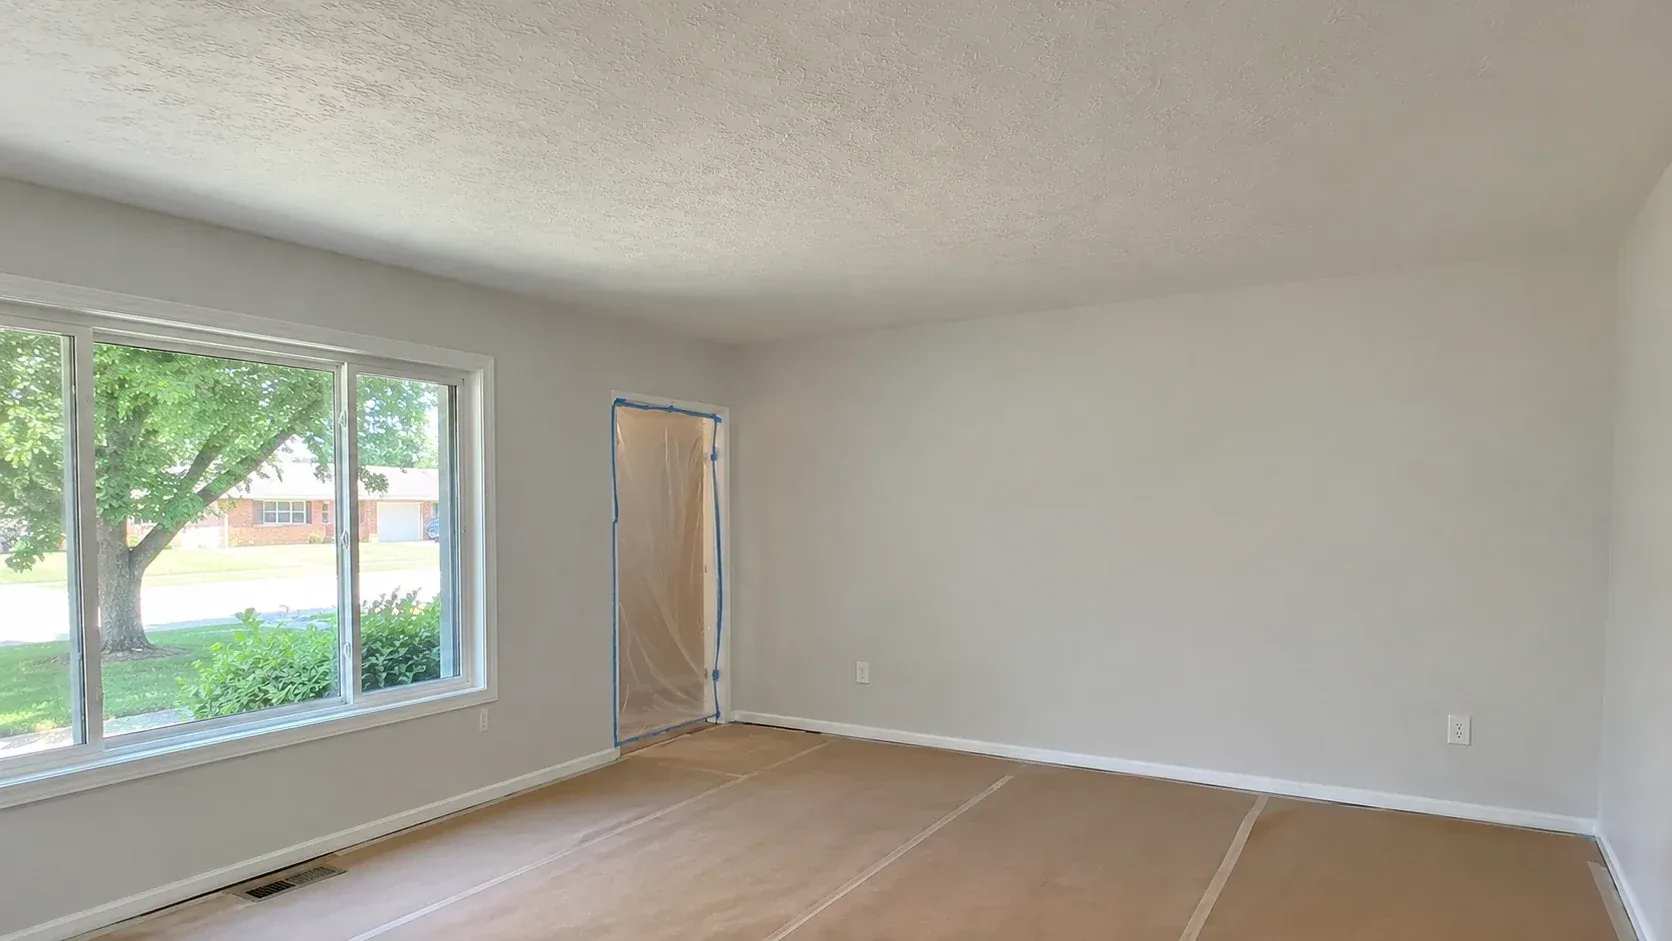
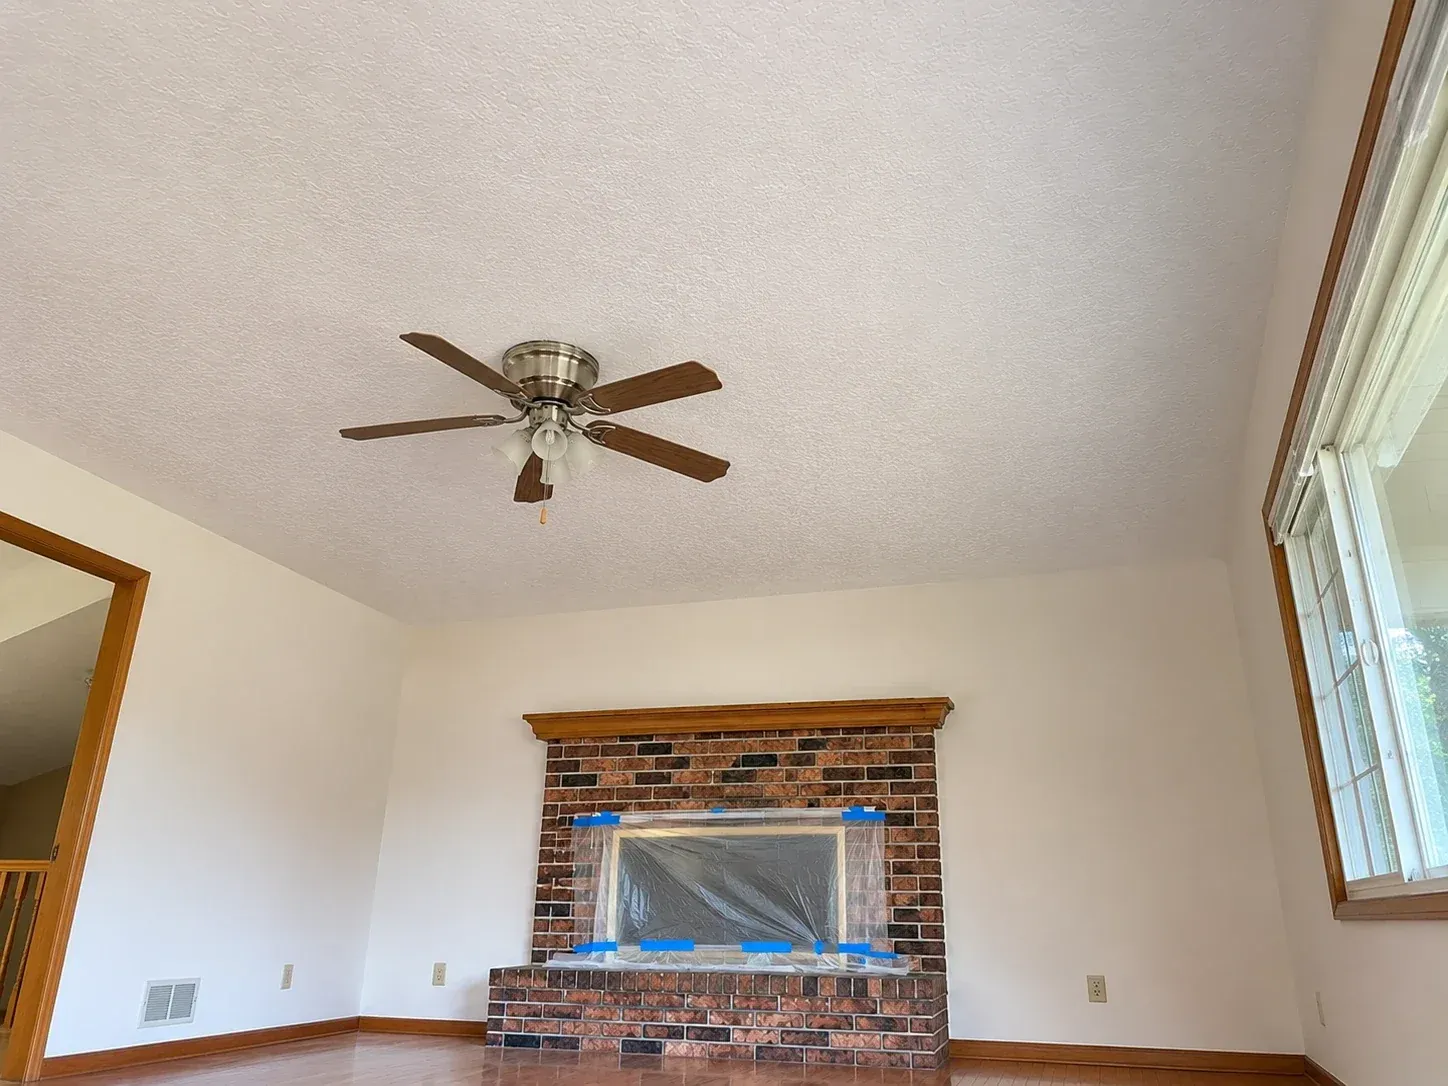
After: the same living room with the popcorn removed and a light knockdown ceiling, the fan back in place and the fireplace covered in plastic.

College Hill

Popcorn Ceiling Removal and Knockdown Texture in College Hill

Project: Every room in this older College Hill home had dated popcorn overhead, 1,900 square feet in all. The lab result came back before any scraping started. We sealed the rooms and wet-scraped the ceilings, then repaired the joints the popcorn had been hiding. A light knockdown went on in its place. Six working days after we began, the ceilings were primed.

Project Value:$9,400

Before
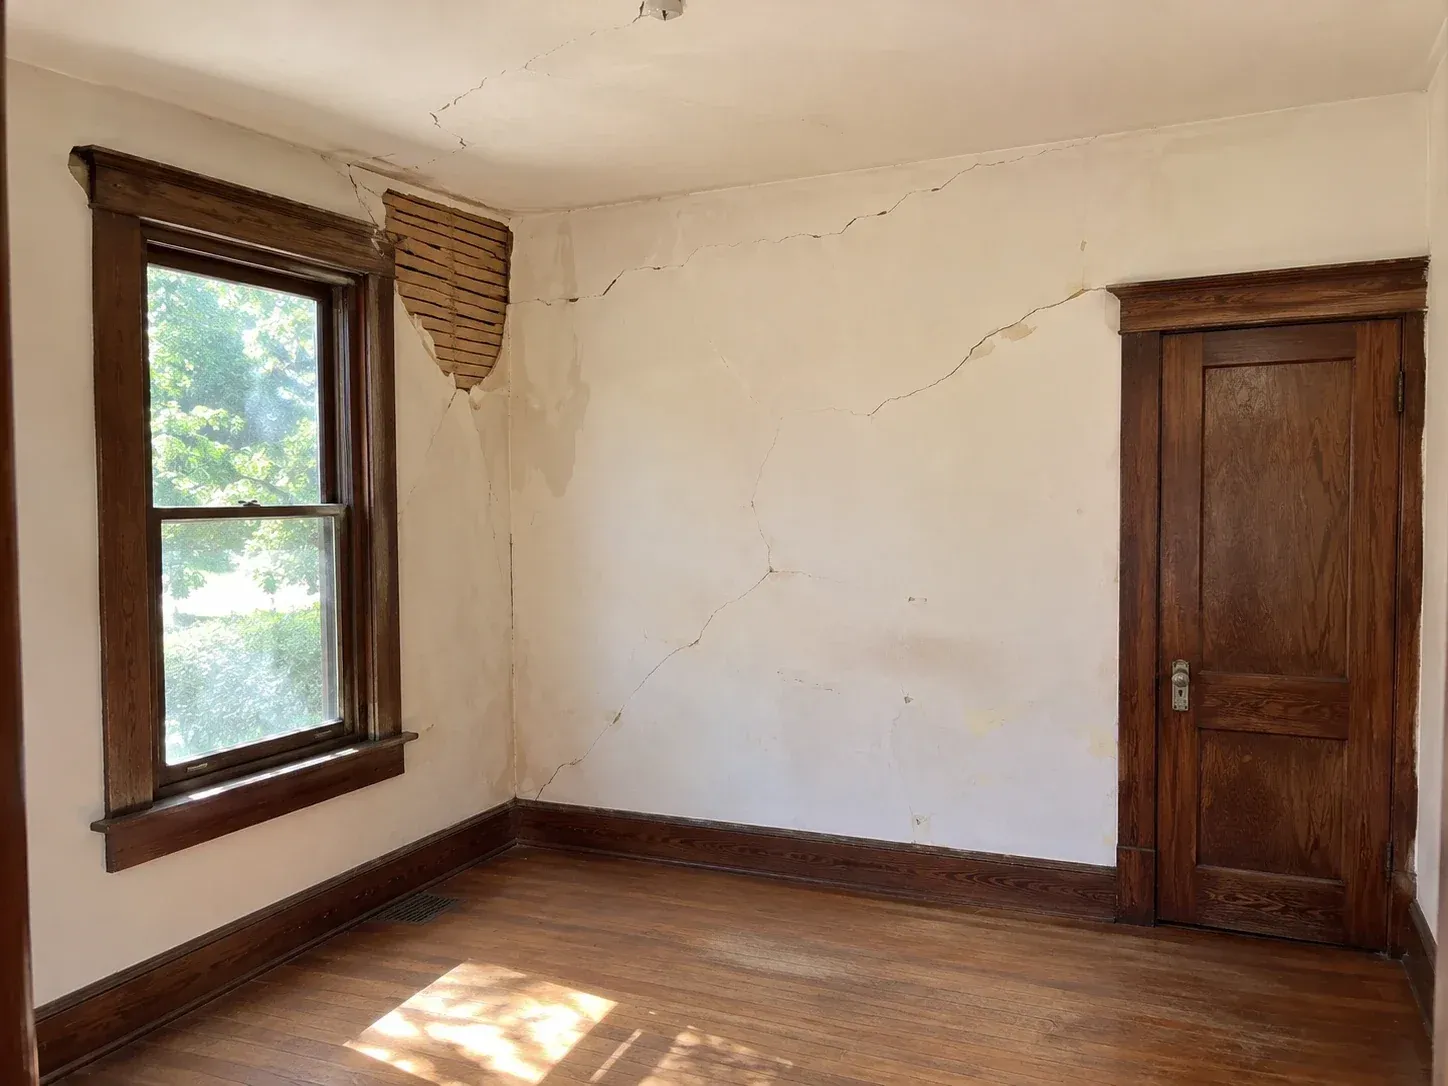
Before: a 1920s bedroom with plaster cracked across the walls and ceiling and a section broken away to the wood lath above the window.
After
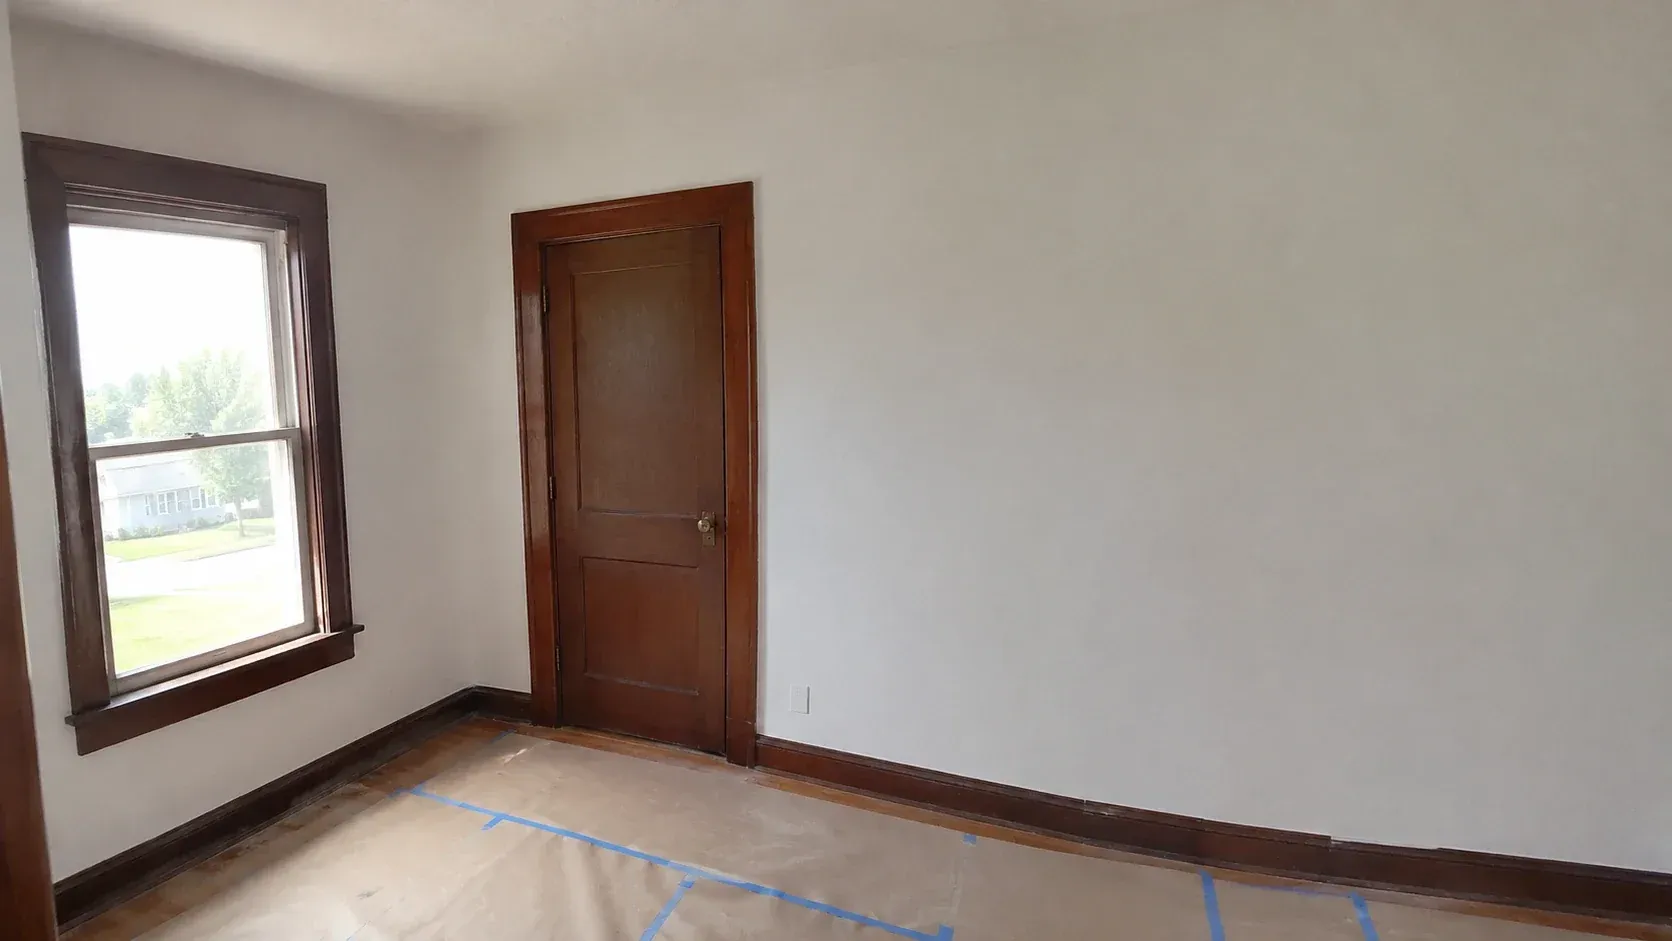
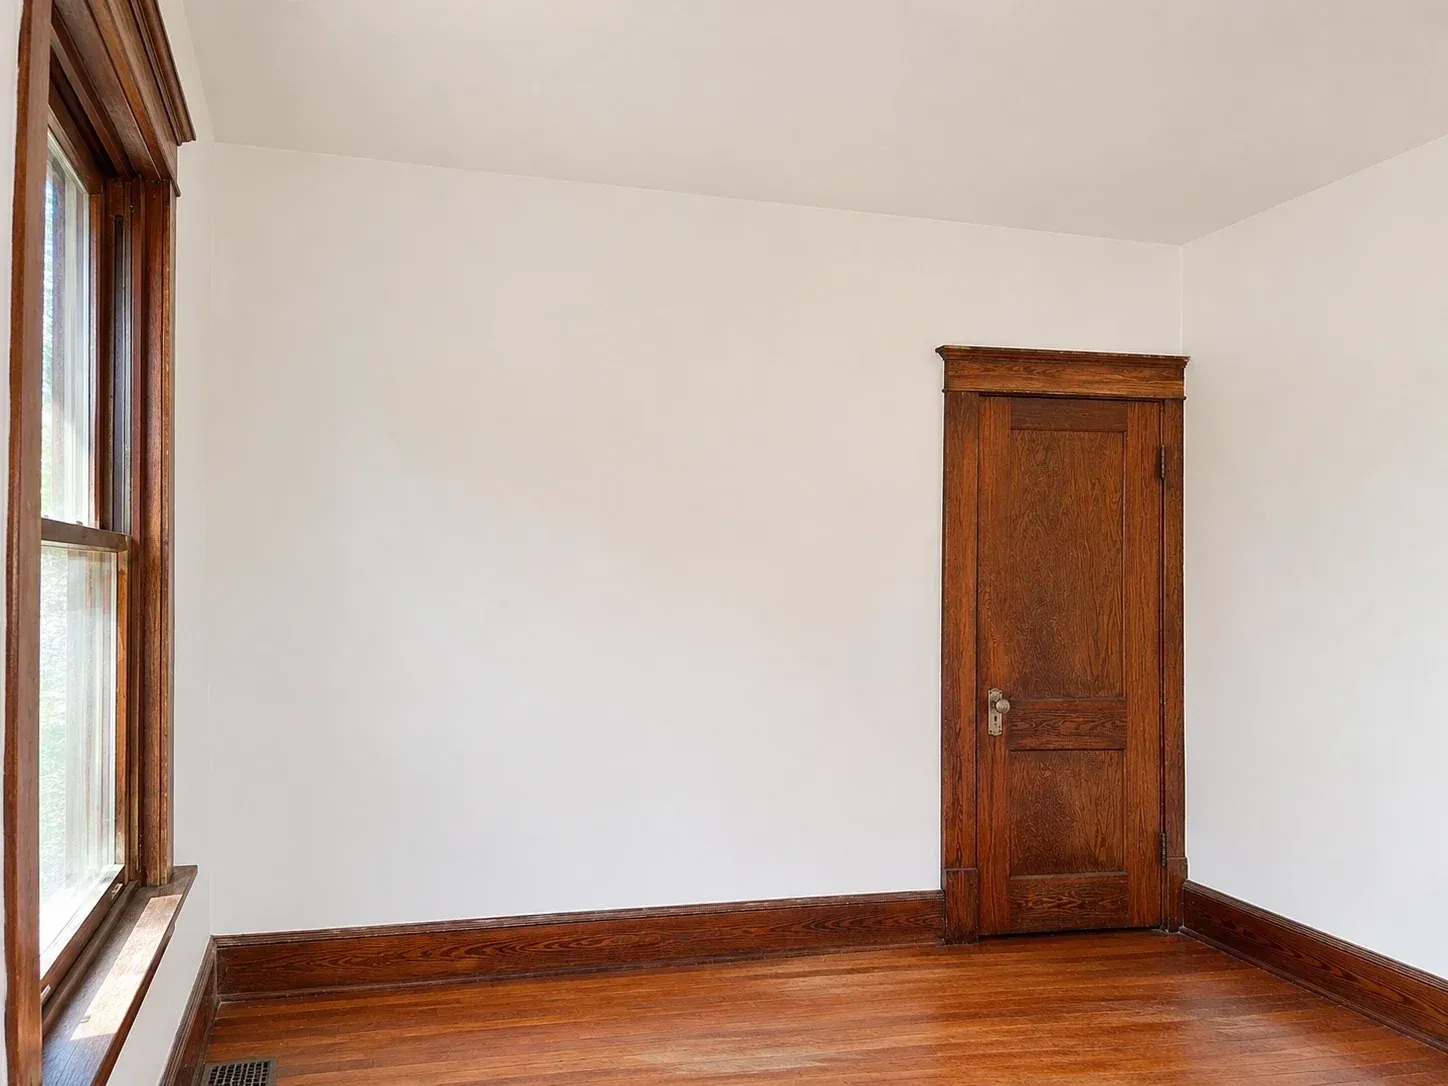
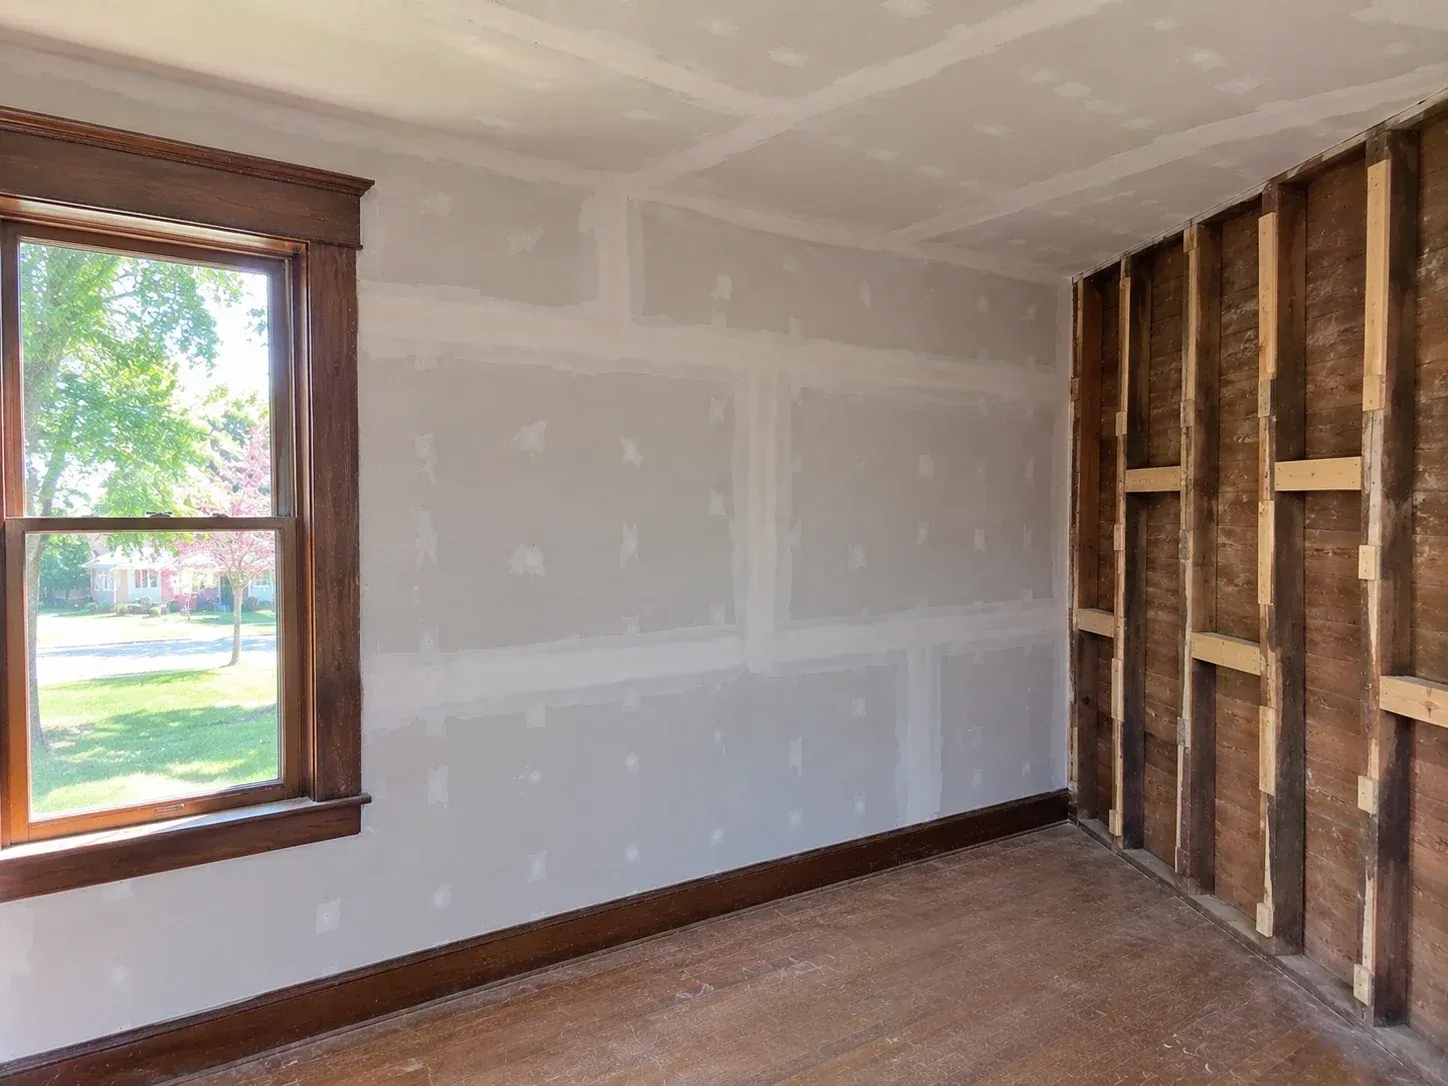
After: a 1920s bedroom with flat, smooth new walls beside the original dark wood window trim, door and baseboards.

Riverside

Plaster to Drywall Conversion in Riverside

Project: Plaster in three rooms of this 1920s bungalow had cracked and pulled loose from the lath. We removed the plaster and lath, then shimmed the studs so new board would sit at the old wall line. That kept the original door and window trim in place. A Level 5 skim coat gave the walls a flat, hard face like the plaster it replaced. The conversion covered about 1,300 square feet and took nine working days.

Project Value:$13,600

Residential Drywall Services in Wichita, KS

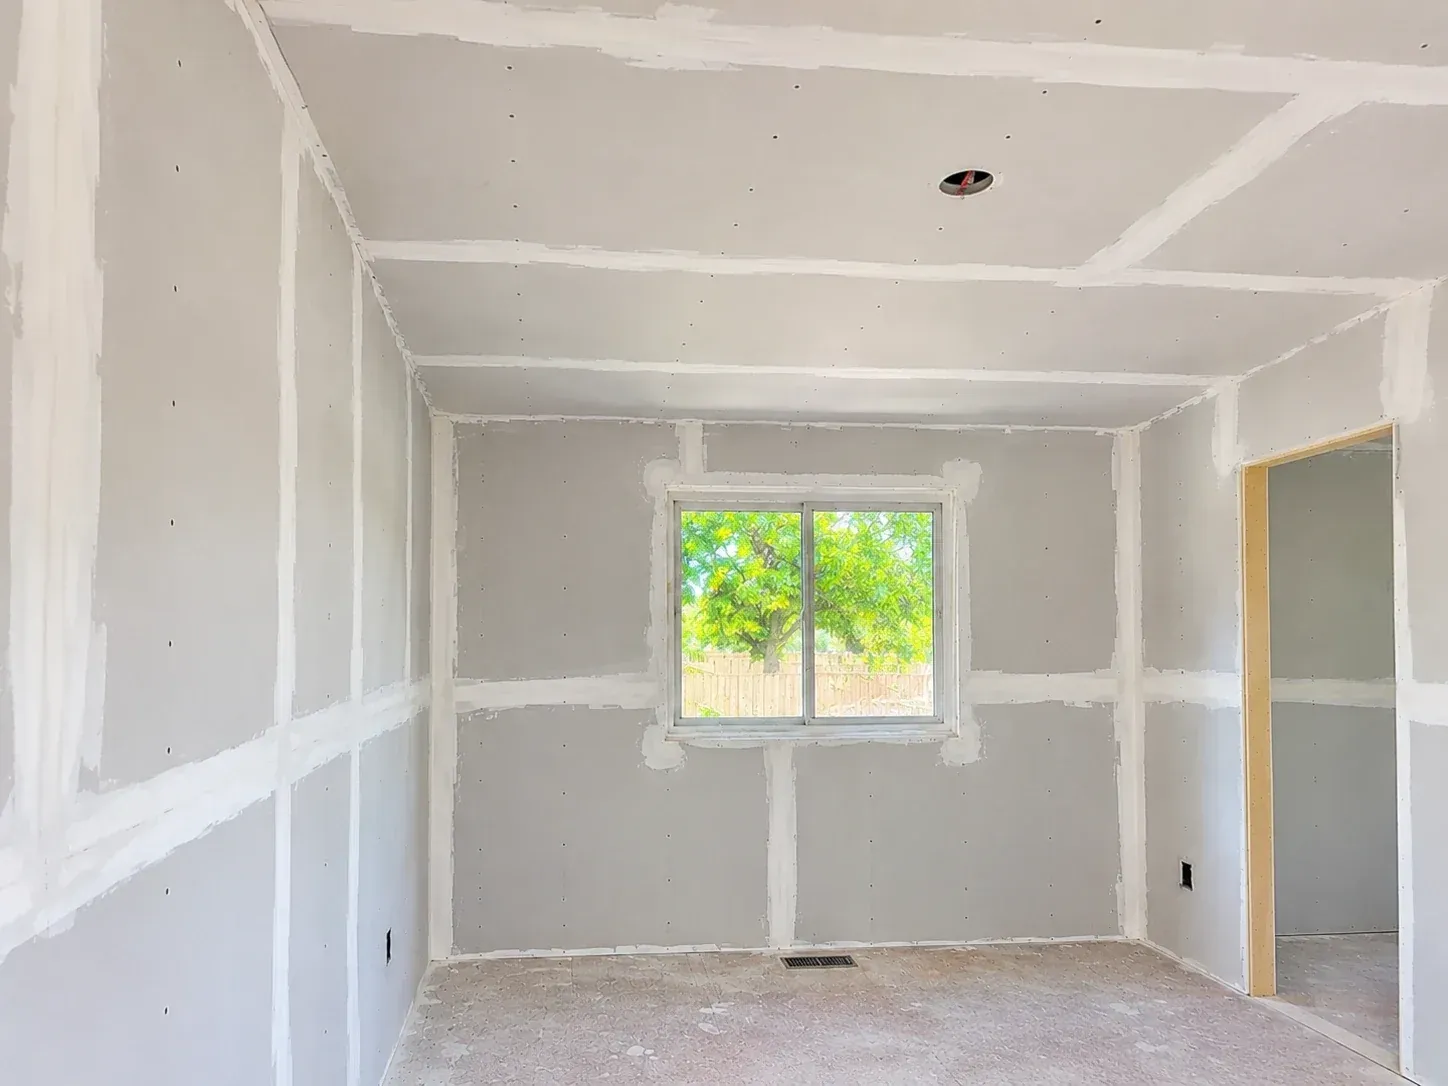
A new room in progress, its walls and ceiling hung with drywall and every joint taped with the first coat of compound.

Drywall Installation

Drywall installation starts with the framing. We check the studs with a straightedge first, since a bowed stud shows up later as a wave in the wall. A standard wall takes board that is 1/2 inch thick. Ceilings take 5/8-inch sheets, which are stiffer and stay flat between joists. Sheets are laid out to keep seams away from the corners of doors and windows, where cracks tend to start.

Hanging is half the job. The same crew tapes and muds every joint to the finish level you chose, so the hang is planned around the finish. We install drywall in new homes and additions, and in remodels where a new wall has to meet an old one. Garages are part of that work, including the fire-rated board that goes under a room above. If you know it as Sheetrock installation, that is the same service.

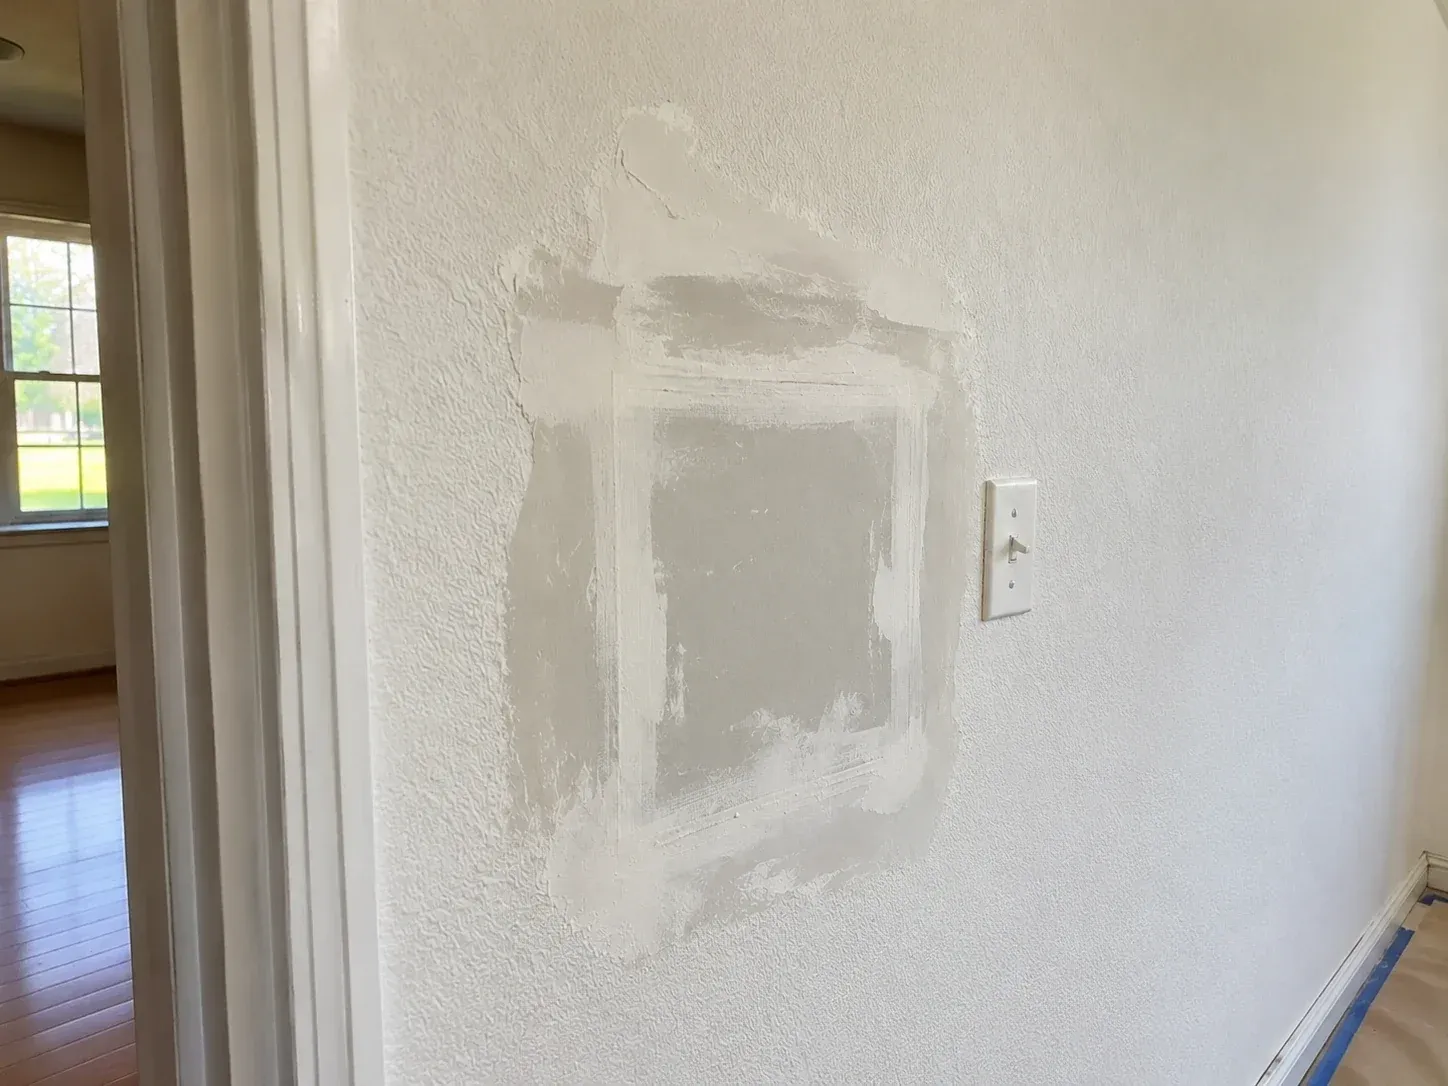
A square drywall patch beside a light switch, its edges taped and the first coat of compound feathered into the textured wall.

Drywall Repair

Our drywall repair starts with one question, which is whether the wall needs a patch or a new section. A small hole gets a backed patch that sits flush with the surface. A crack gets opened and re-taped, because mud alone will crack again along the same line. Damage wider than the space between two studs is usually faster to replace than to patch.

In plain terms, a good repair comes down to a flat joint and a matching texture. We spread each coat wider than the one before so the patch fades into the wall. Then we match the knockdown or orange peel around it and prime the spot. Nail pops and lifted seams are handled the same way, and so are openings left by a plumber or an electrician. Walls left rough by wallpaper removal are sealed and given a skim coat, a thin layer of joint compound spread over the whole wall. You'll know before we start whether we recommend a patch or a replacement, and why. Some customers call it Sheetrock repair, and it is the same work.

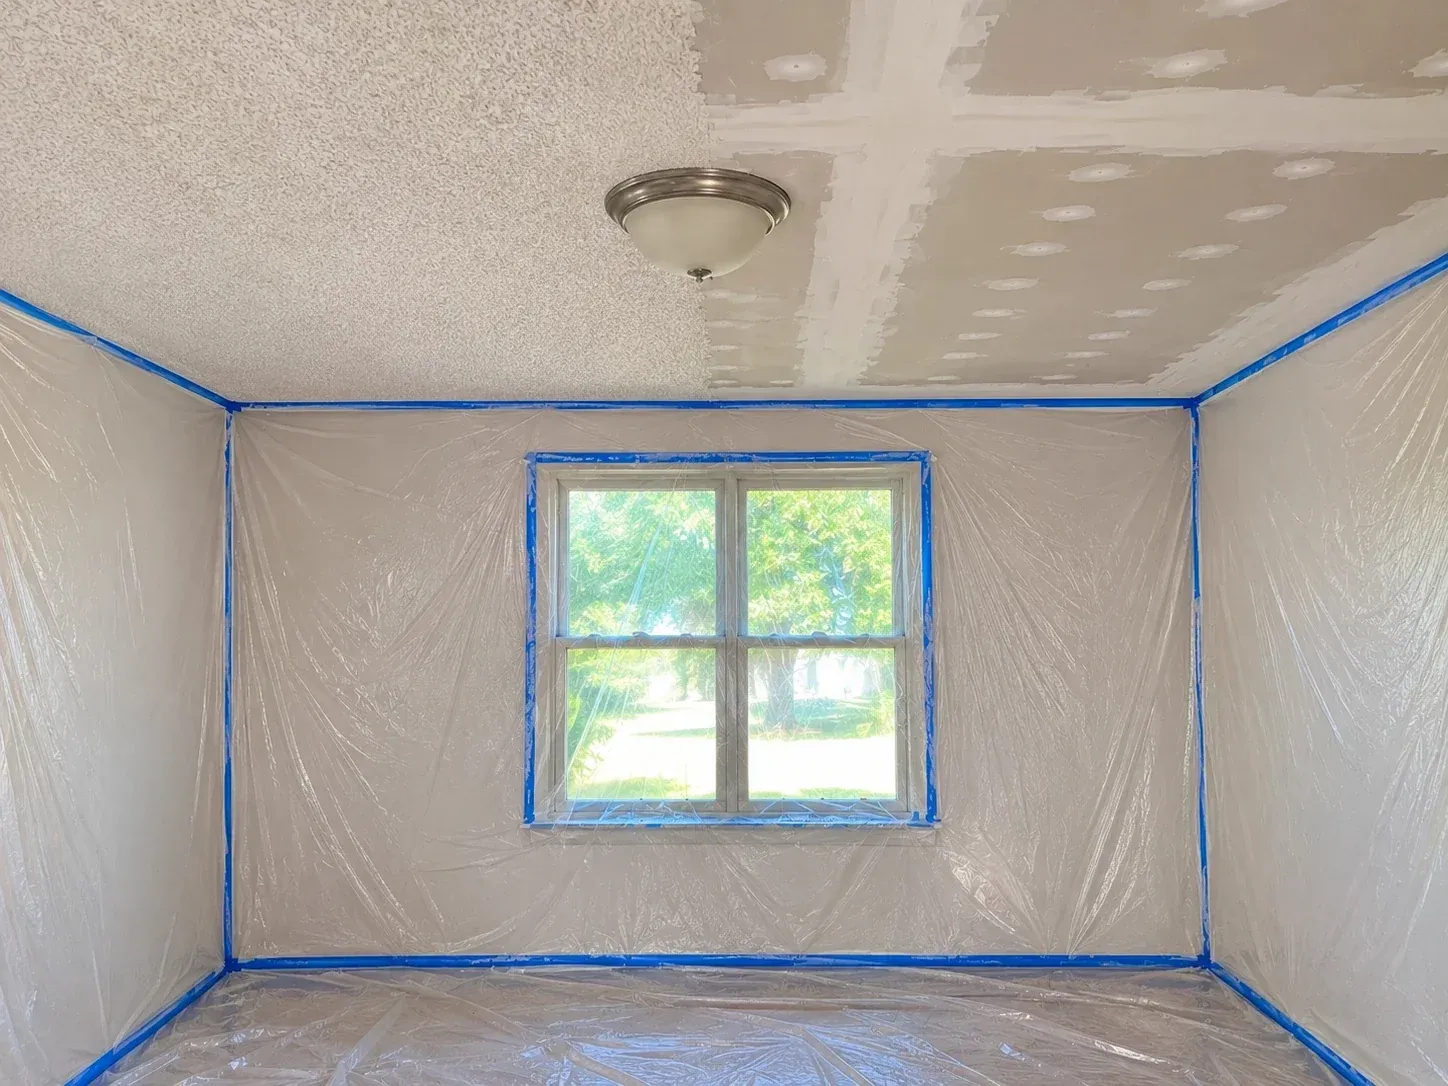
A bedroom ceiling half scraped of popcorn texture, the bare half taped and spotted, the room sealed in plastic and blue tape.

Popcorn Ceiling Removal

Popcorn ceiling removal means scraping off the sprayed texture and finishing the drywall that was under it. Popcorn, also called acoustic texture, was sprayed on many ceilings in older homes. Some of it contains asbestos, so we send a sample to a lab before we scrape. With a clear result, we seal the room with plastic and wet the ceiling one section at a time. Wet texture comes off in sheets and makes far less dust.

What you see next is a ceiling that was never finished to be seen. Builders often taped those joints once and sprayed over them. We re-tape the seams and coat the screw heads. Then the ceiling is sanded flat. From there you have two choices. A light knockdown hides small flaws and suits most rooms. A smooth ceiling takes more coats and looks the cleanest. We've removed more than 300 popcorn ceilings, and we can repair one damaged patch of popcorn if the rest of the ceiling is staying.

A wall halfway through a Level 5 skim coat, smooth on one side and still showing taped joints on the other, in low side light.

Level 5 Drywall Finish

Level 5 is the smoothest grade of drywall finish. The Gypsum Association publishes a standard called GA-214, and it grades finishes on a scale of 0 to 5. Level 4 is the usual finish for a painted wall. Level 5 is one step past that, a thin layer of compound spread across the full wall.

Here is why that step exists. The paper face of drywall and the joint compound soak up paint differently. Under flat paint in soft light, you'll never see it. Under gloss paint, or with sun coming in low across a wall, the joints can show as dull stripes. A skim coat gives the whole wall one even surface, so the paint looks the same everywhere. We suggest Level 5 for rooms with big windows and for ceilings with a sheen. For most other rooms we'll tell you Level 4 is enough.

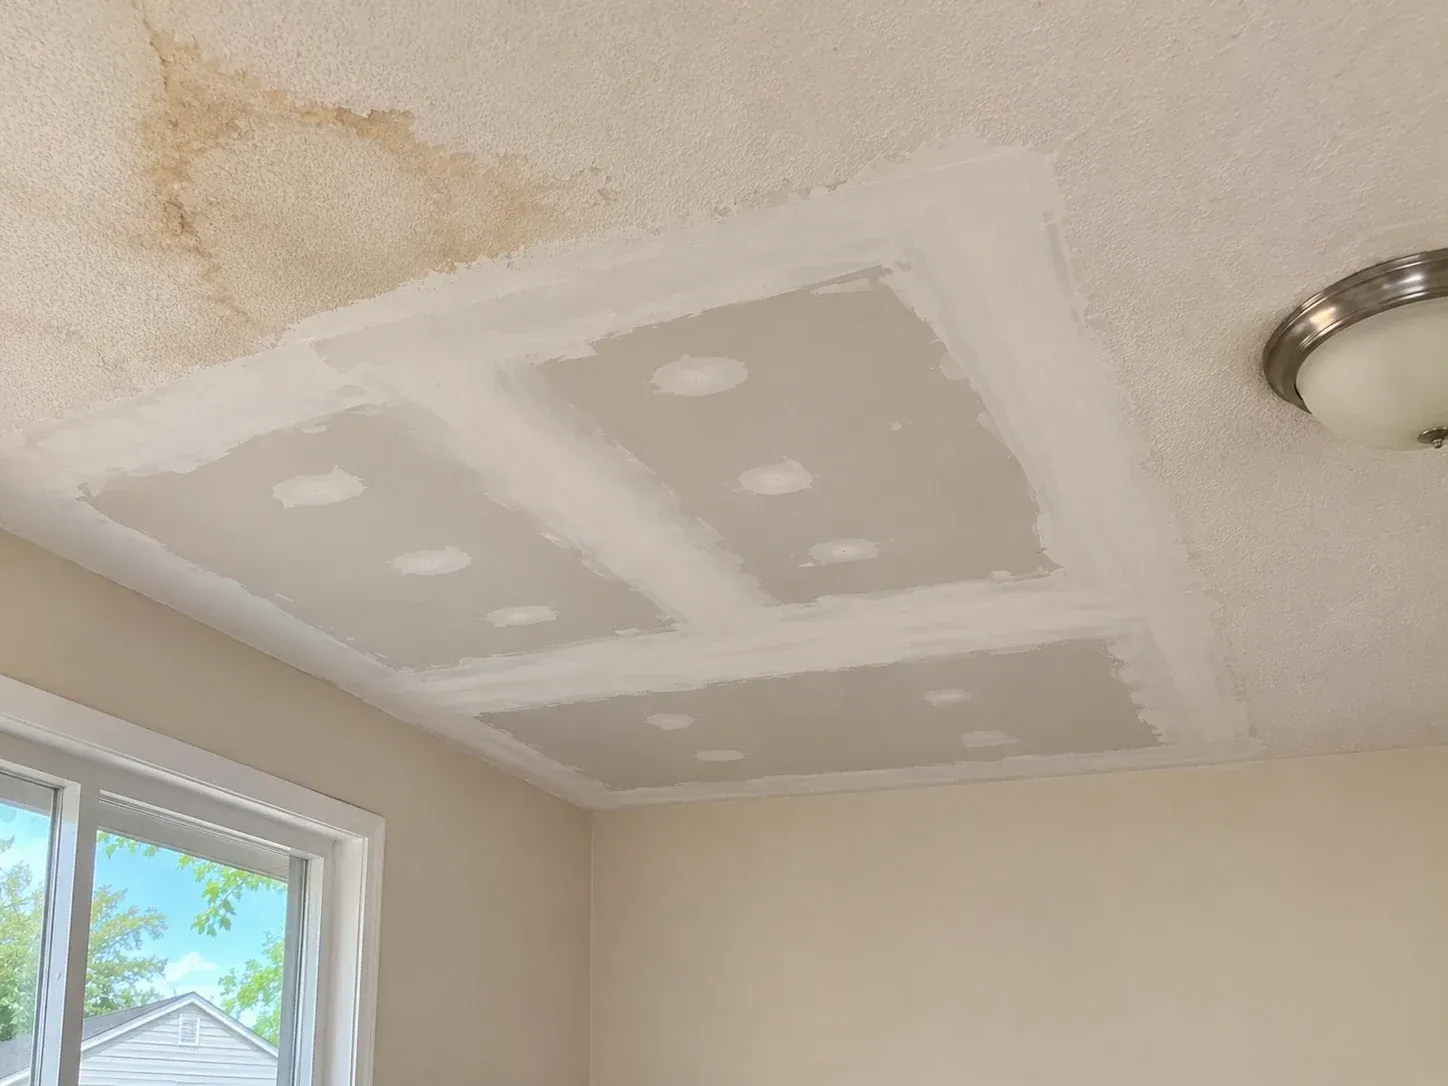
A new section of ceiling drywall taped and spotted beside an old brown water stain on the textured ceiling.

Drywall Ceiling Repair

Drywall ceiling repair covers cracks, sags, stains and loose tape overhead, where flaws are hardest to hide. Daylight runs along a ceiling at a low angle, so every ridge shows. We start with the reason for the damage. A crack that follows a joint usually means the tape has let go. A sag can mean the board was hung with too few screws, or that it got wet at some point. Wichita roofs take hail and high wind, and many ceilings we repair began with a roof leak.

Water damage drywall repair follows its own steps. The roof or the pipe has to be fixed before the ceiling is. Then we take moisture readings on the joists and remove any sheet that still reads damp. Insulation that got wet is pulled as well. Our part of a water damage job is the drywall, and mold testing is left to an independent inspector.

New ceiling board is 5/8 inch thick and screwed on a closer pattern than a wall, because a ceiling carries its own weight. Every joint gets paper tape. A stain on board that is still sound and dry can be sealed with a stain-blocking primer and painted. Texture is the last step, and on a ceiling it is matched across the whole room where a patch would stand out.

A basement room mid-job, walls hung and taped above the concrete slab and a new drywall soffit boxing in the duct.

Basement Drywall

We treat basement drywall as its own job, because a basement is built against concrete and soil. Concrete holds moisture, so the bottom edge of the board stops about half an inch above the slab. That gap is covered by the baseboard later. We use moisture-resistant board at bathrooms and laundry areas. Any foam insulation on the walls gets covered with at least 1/2-inch drywall, which the local code calls for.

The ceiling is where a basement job gets detailed. Ducts and beams hang below the joists, so we frame soffits around them. A soffit is a boxed-in section that drops below the main ceiling. We keep those boxes straight and as shallow as the ductwork allows, which protects your headroom. Access panels go in where a valve or a cleanout has to be reached. Before we hang anything, we look over the framing and the egress window in each bedroom. An egress window is the escape opening the code requires in a basement bedroom. More than 350 Wichita-area basements have our drywall in them.

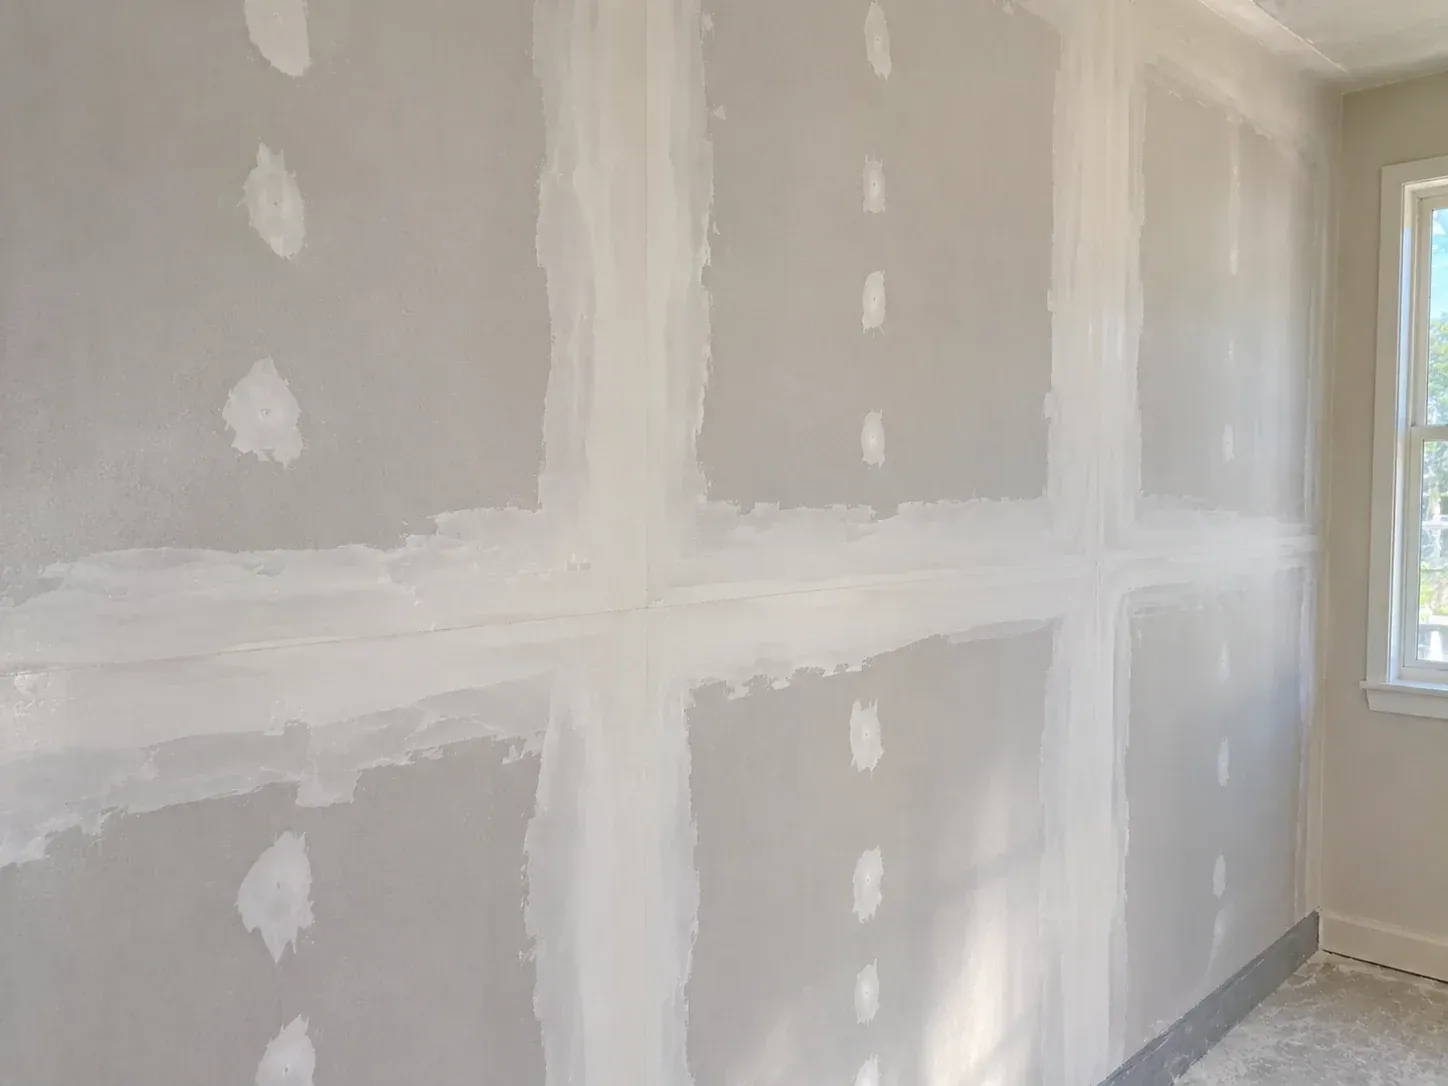
A drywall wall with its seams bedded in wide feathered coats of compound and the screw heads spotted in rows.

Tape and Mud Drywall Finishing

Drywall finishing, or tape and mud as most crews here call it, is what hides the joints between sheets. Paper tape is pressed into a bed of joint compound over each seam. Two wider coats follow, and each one is feathered out past the last. Screw heads get three coats of their own. The goal is a wall where your hand and your eye can't find the seams.

Drying sets the pace. Mud laid over a coat that is still damp will shrink and leave a ridge. So we wait, and in cold months we keep heat and air moving in the house. Sanding is done with sanders tied to a vacuum. Then we hold a work light close to the wall, which shows flaws that room light hides. Builders bring us in to finish whole houses, and homeowners call us to finish board they hung themselves. The finish level on your estimate tells you how smooth the wall will be.

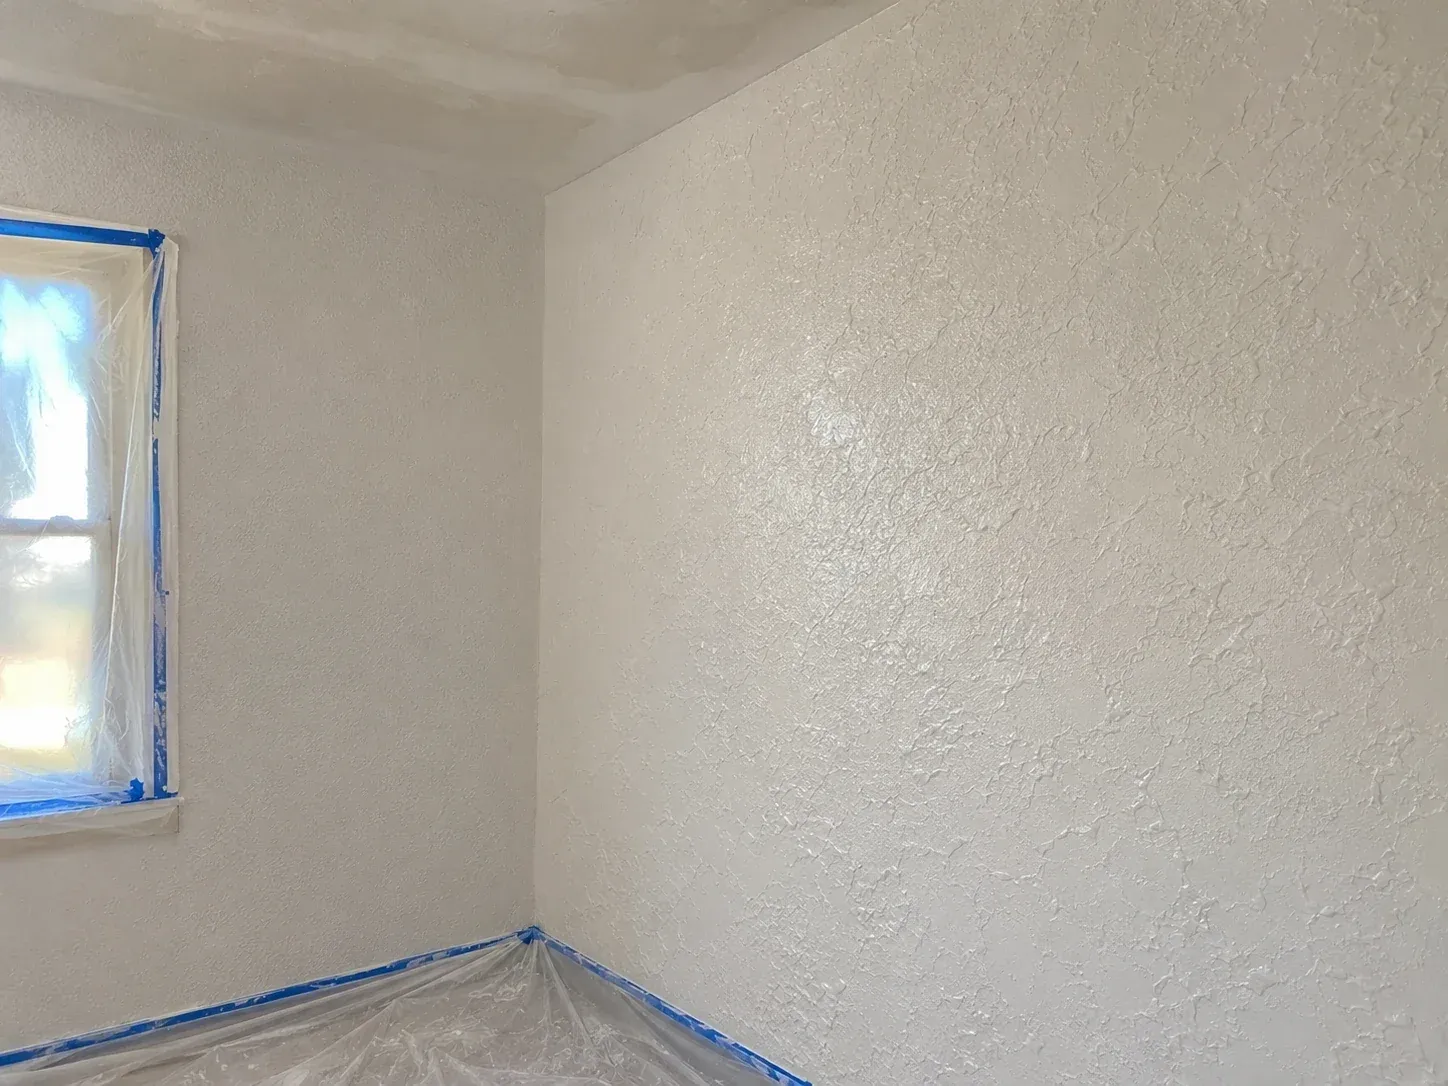
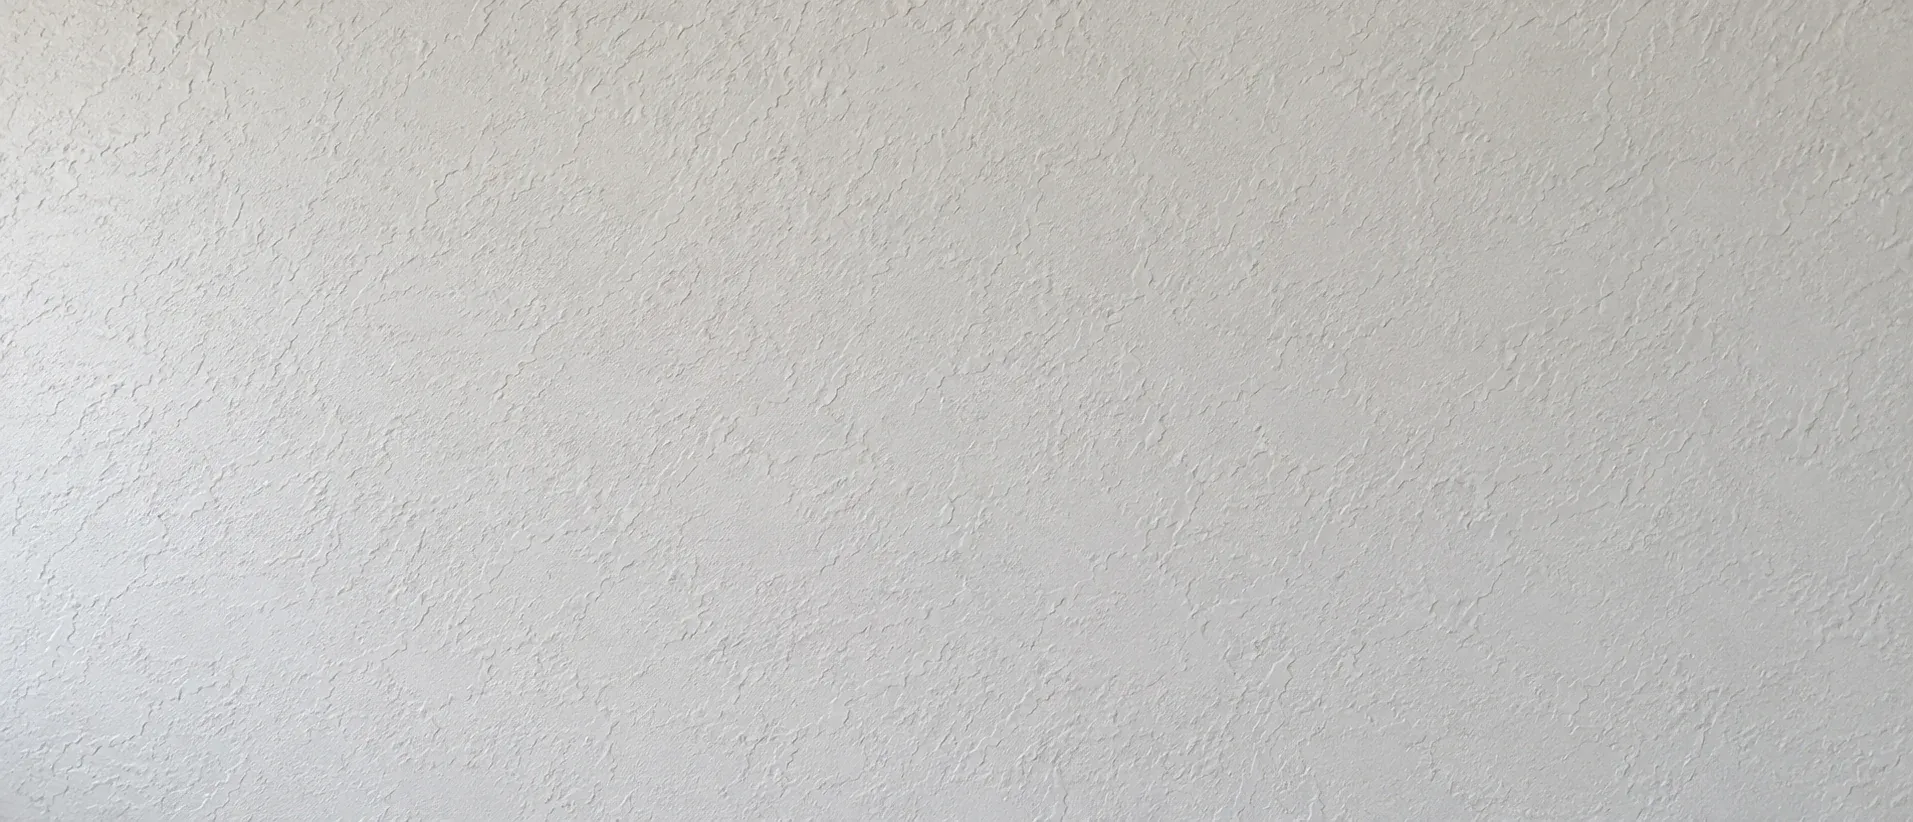
A room corner with fresh knockdown texture on one wall and fine orange peel on the other, the window and floor still covered in plastic.

Knockdown and Orange Peel Drywall Texture

Our drywall texture work covers the two finishes found in most Wichita homes. Knockdown is sprayed on in thick splatters, then flattened with a wide knife once it starts to set. It leaves low, flat islands of texture. Orange peel is a finer spray that is left alone to dry. It looks like the skin of an orange, which is where the name comes from.

An old texture is harder to copy than a new one is to spray. The pattern changes with how thick the mud is mixed and how much air pushes it. We spray test panels until one looks like your wall, and nothing goes on the wall until you approve it. On a repair, the new texture is blended past the patch so no edge shows. We can also remove a texture you're tired of and leave the wall smooth, or change a swirl ceiling to knockdown.

Commercial Drywall Services

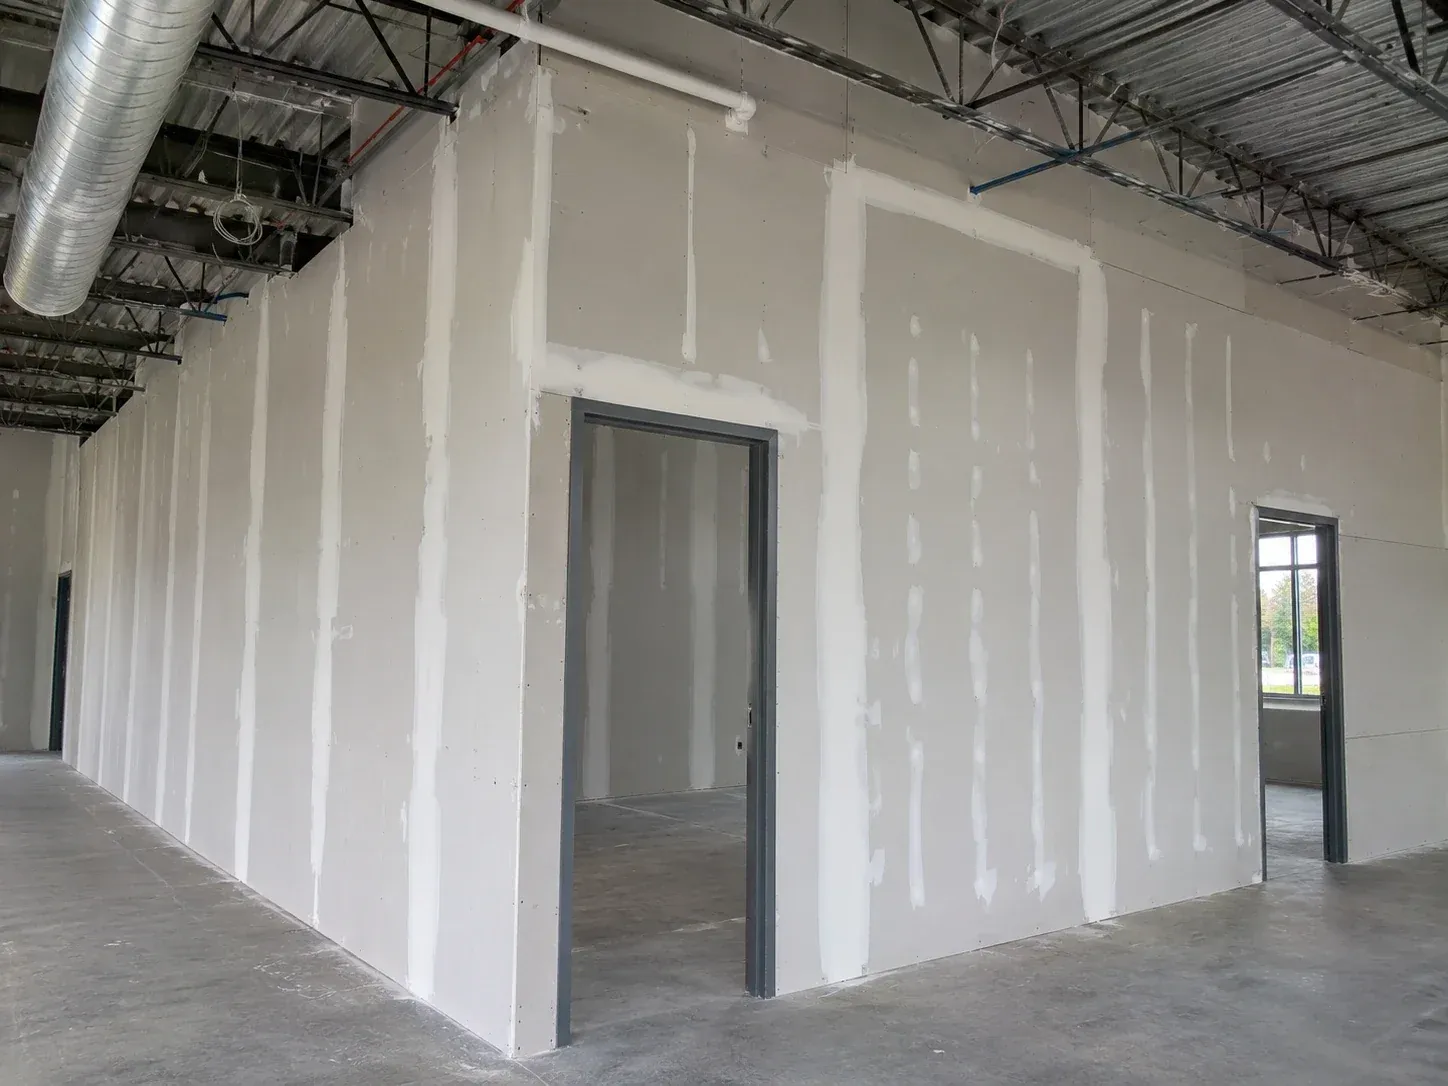
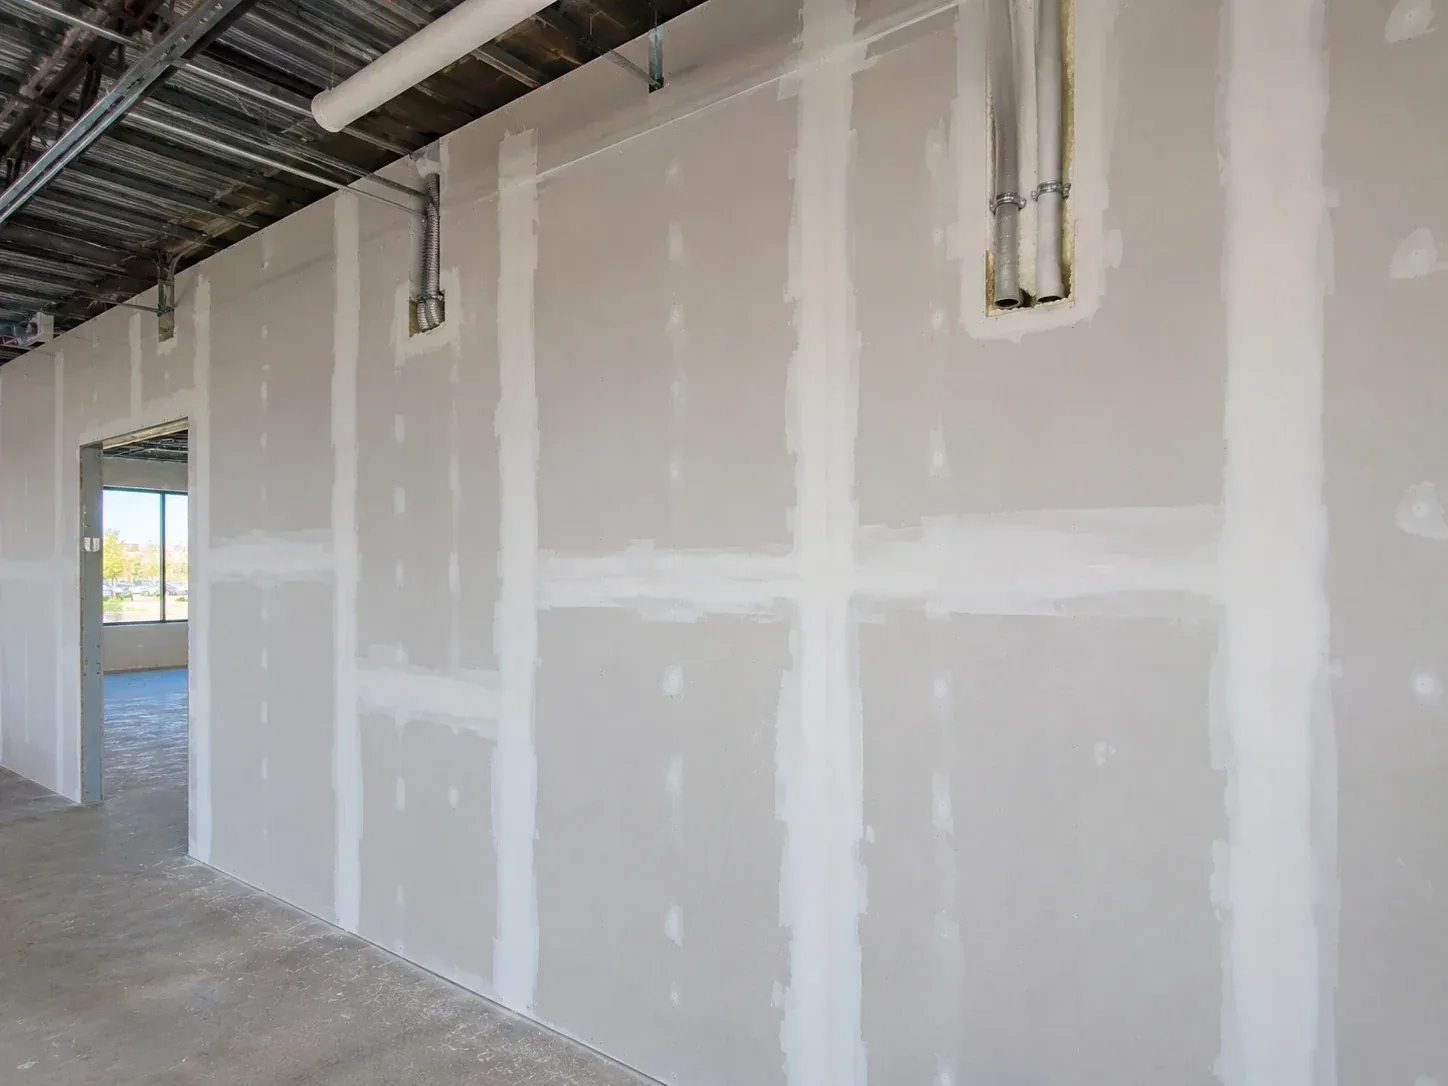
Tall office walls in a commercial build-out, hung with drywall and taped, with steel door frames under an open steel deck.

Commercial Drywall Hanging and Finishing

Commercial drywall is built from a set of drawings and a schedule shared with other trades. Our crew hangs and finishes offices, clinics, retail spaces and apartment buildings for general contractors and owners. The drawings tell us the board for each wall. Rated walls are built with Type X board 5/8 inch thick, and busy corridors can take a harder board that stands up to carts.

On these jobs, the schedule gets as much planning as the materials. We stock material floor by floor so sheets are waiting where they'll be hung. Our foreman meets your superintendent before each phase to confirm which walls are ready to close. In a building that is already occupied, we work evenings or in sections and seal off our area. Most painted commercial walls are finished to Level 4, and we settle the level with you before any mud is mixed. More than 140 commercial interiors in the Wichita area carry our work.

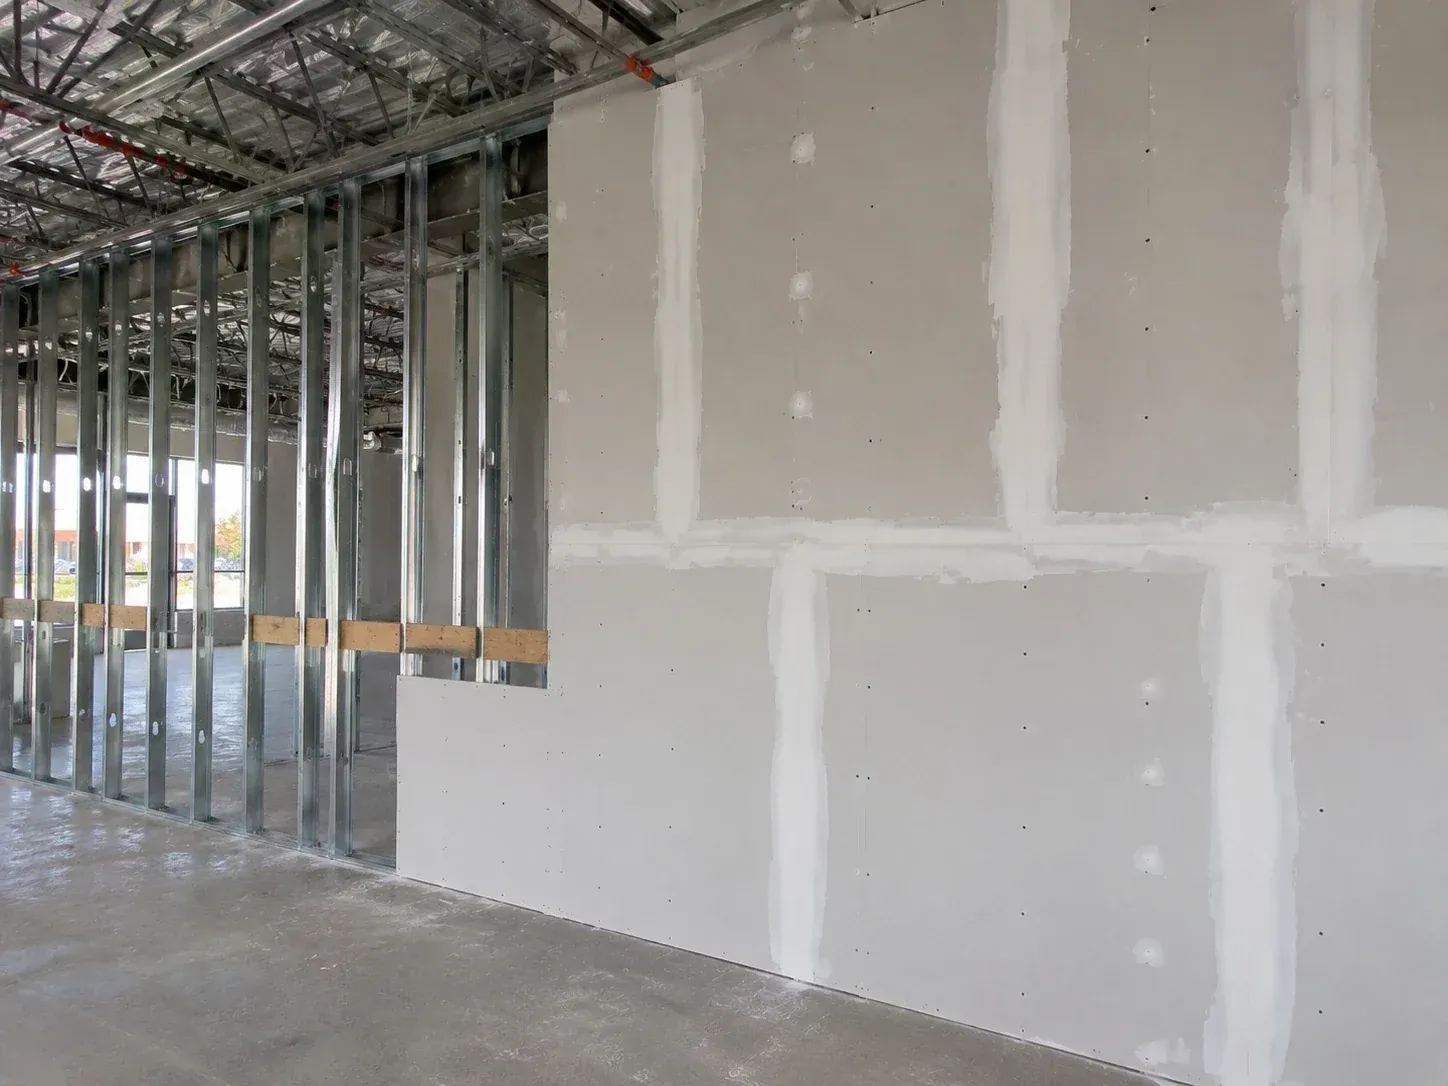
A commercial wall half framed in steel studs with wood backing blocks, the rest boarded with taped drywall.

Metal Stud Framing for Commercial Interiors

We frame commercial interiors in metal studs, which stay straight and don't burn. Steel track is fastened to the floor and to the structure overhead, and the studs stand between them. The drawings set the stud size and spacing for each wall. Taller walls need a heavier gauge, which means thicker steel.

Two details separate a wall that holds up from one that cracks. The first is a slip track at the top, which lets the floor above flex a little while the wall stays still. The second is backing, which is solid material placed inside the wall wherever a cabinet or a grab bar will hang. We set door frames plumb and brace them before any board goes on. Because our crew also hangs the drywall, your contractor deals with one foreman for the whole wall.

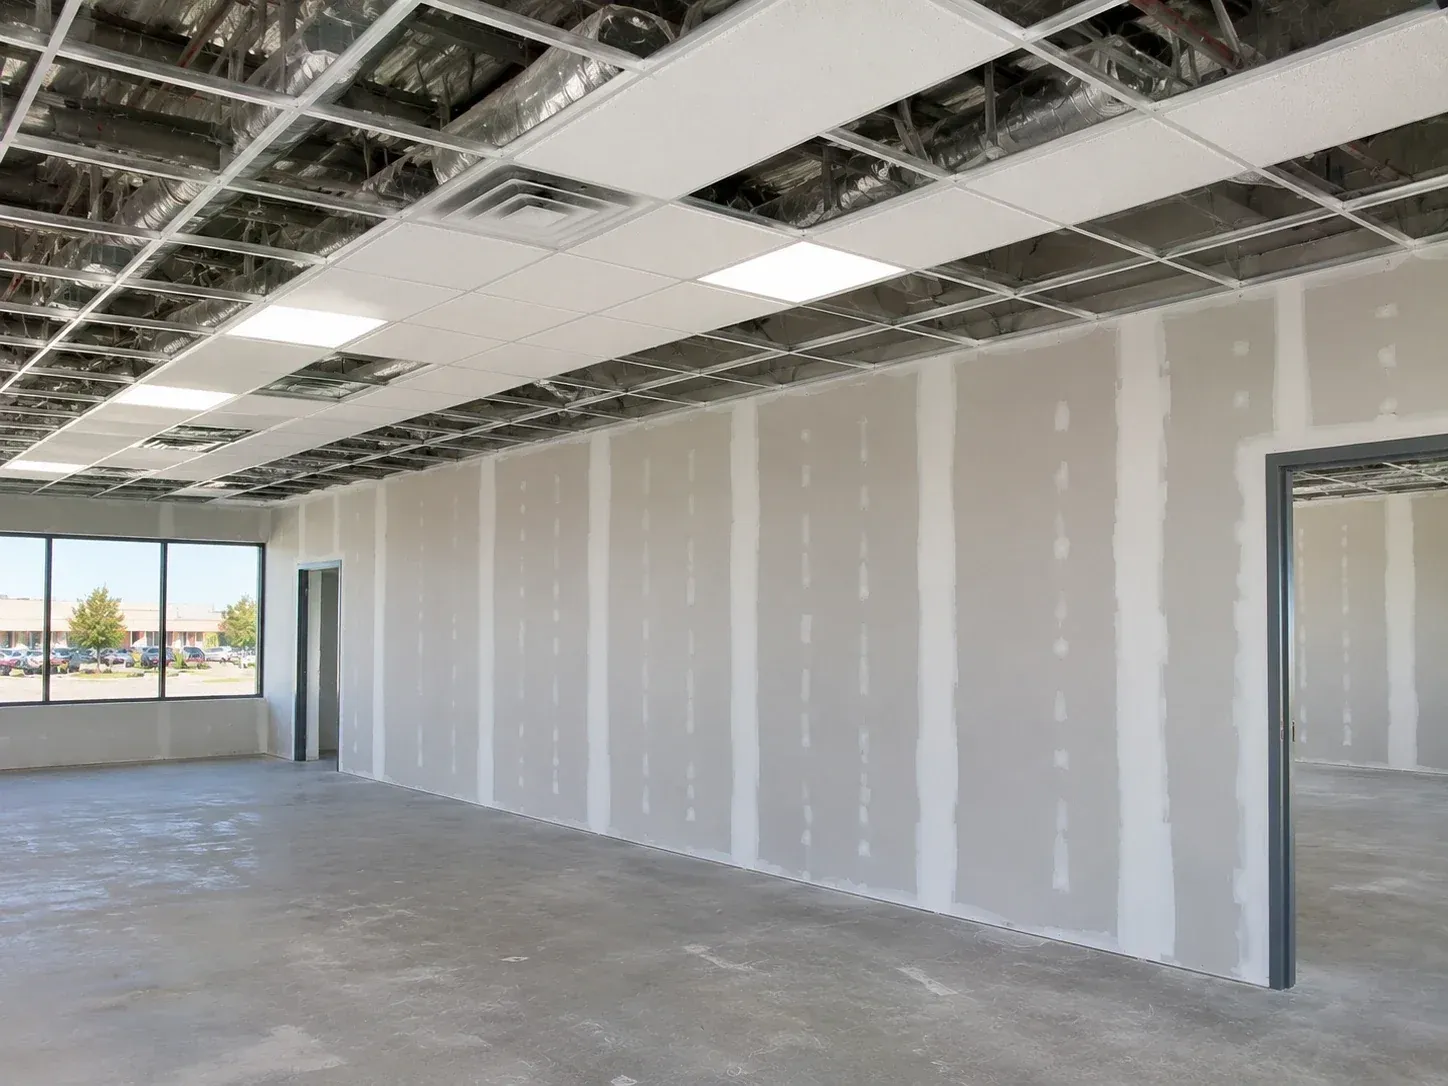
An office build-out with an acoustical ceiling grid partly tiled over taped drywall walls.

Acoustical Ceiling Installation

Acoustical ceiling installation starts with a metal grid hung from the structure, and tiles drop into that grid. Most offices and stores have one. The grid has to be level and square, so we set it with a laser. We center the layout in the room so the cut tiles at opposite walls match in size. Lights and sprinkler heads are planned into the grid before it goes up, along with the air vents.

The tile is picked to suit the room. An open office needs tile that soaks up sound. A kitchen or a clinic needs a face that can be wiped clean. Some spaces leave the structure exposed and still need quieter rooms. For those we hang acoustic clouds, which are sound-absorbing panels suspended in the open below the deck. We install ceilings late in a project, after the sprinkler and electrical work above them has been inspected.

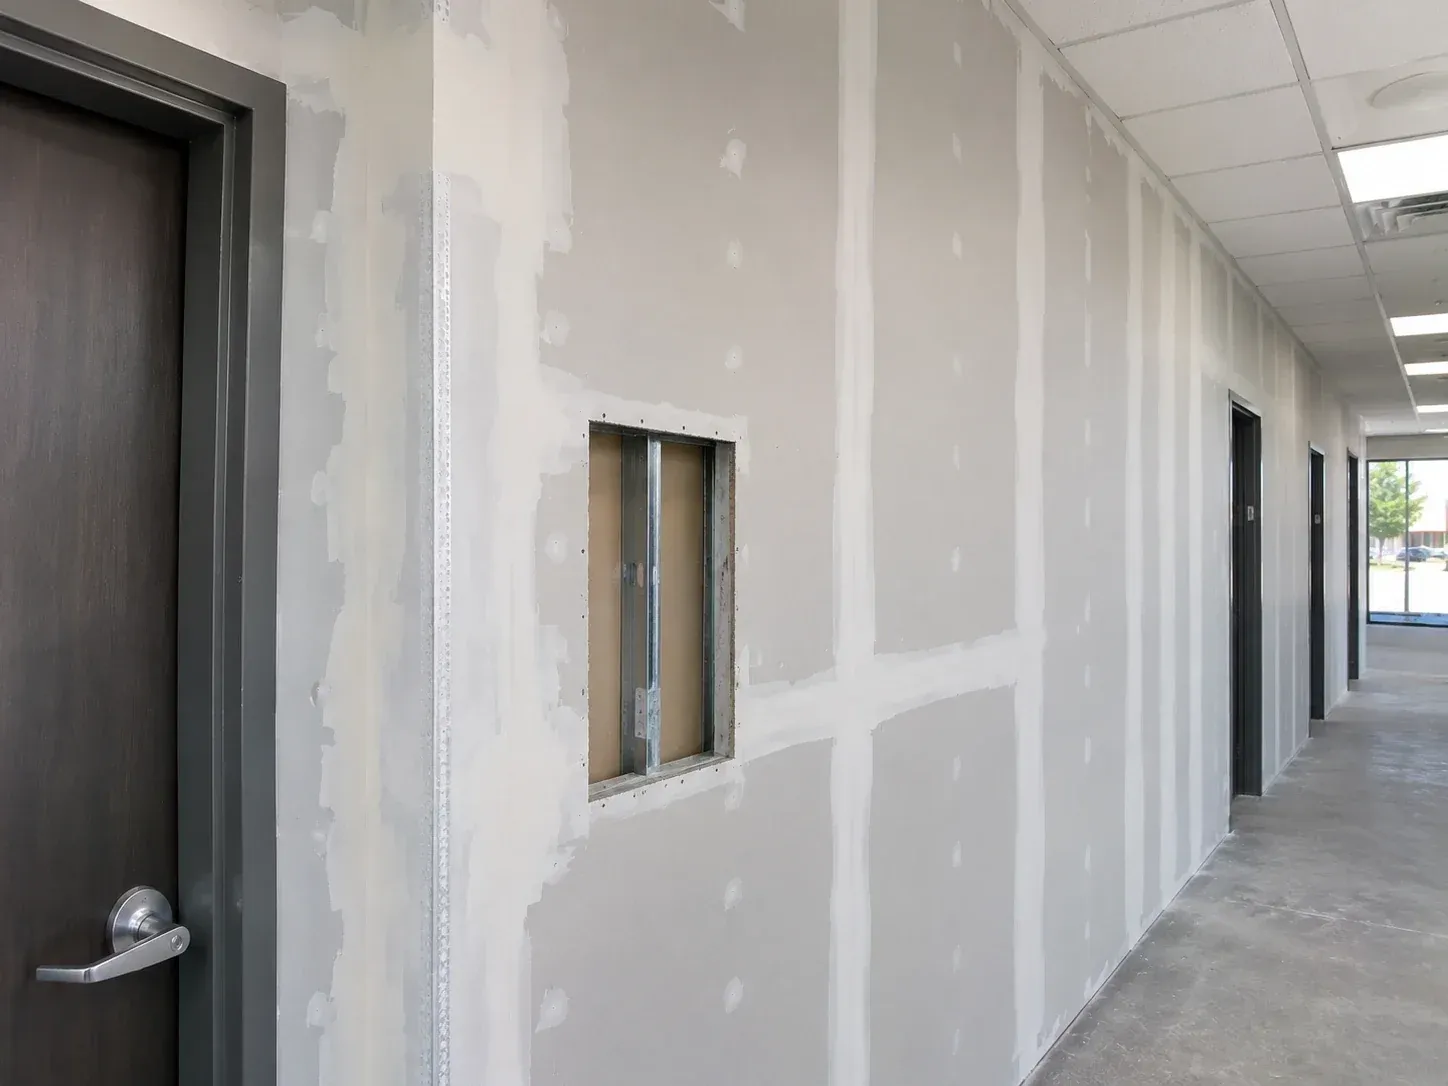
A commercial corridor with a corner rebuilt in new metal bead and a framed opening waiting for an access panel.

Commercial Drywall Repair

Our commercial drywall repair is scheduled around the people using the building. We patch walls in offices, stores, hallways and apartment units, often after closing time or while a unit sits empty. We close off the work area with plastic, and sanding dust is pulled into a vacuum at the tool. That keeps a repair in one suite from becoming a cleanup job in the next.

A repair in a finished space has to match what is around it. The new surface is finished and textured to look like the wall around it, then primed for paint. Corners near doors and loading areas take the most hits. We rebuild those with new corner bead and solid backing behind it. Access panels are a related job. When a valve or a control sits behind a wall, we frame an opening and set a flush panel over it. Property managers can send a list of units, and we'll give back a date for each.

A tall commercial wall taped up to the deck, with clean openings left around pipes and conduit for firestopping.

Fire-Rated Drywall Assemblies

A fire-rated drywall assembly is a wall or ceiling that has been tested to hold back fire for a set time. The rating belongs to the whole assembly. That means four things have to follow the tested design: the studs, the board type, the layer count and the screw spacing. Our crew builds each rated wall from the design number printed on the drawings.

Rated walls are most common along corridors and between tenant spaces. Shaft walls around stairs and elevators are rated too. We tape the joints and cover the screw heads above the ceiling line as well, since the rating depends on it. Openings for pipes and wiring are left clean for the firestopping crew to seal. Rated drywall gets its own inspection after the board is hung and before the joints are taped. We schedule our finishers around that visit so the wall is closed only once.

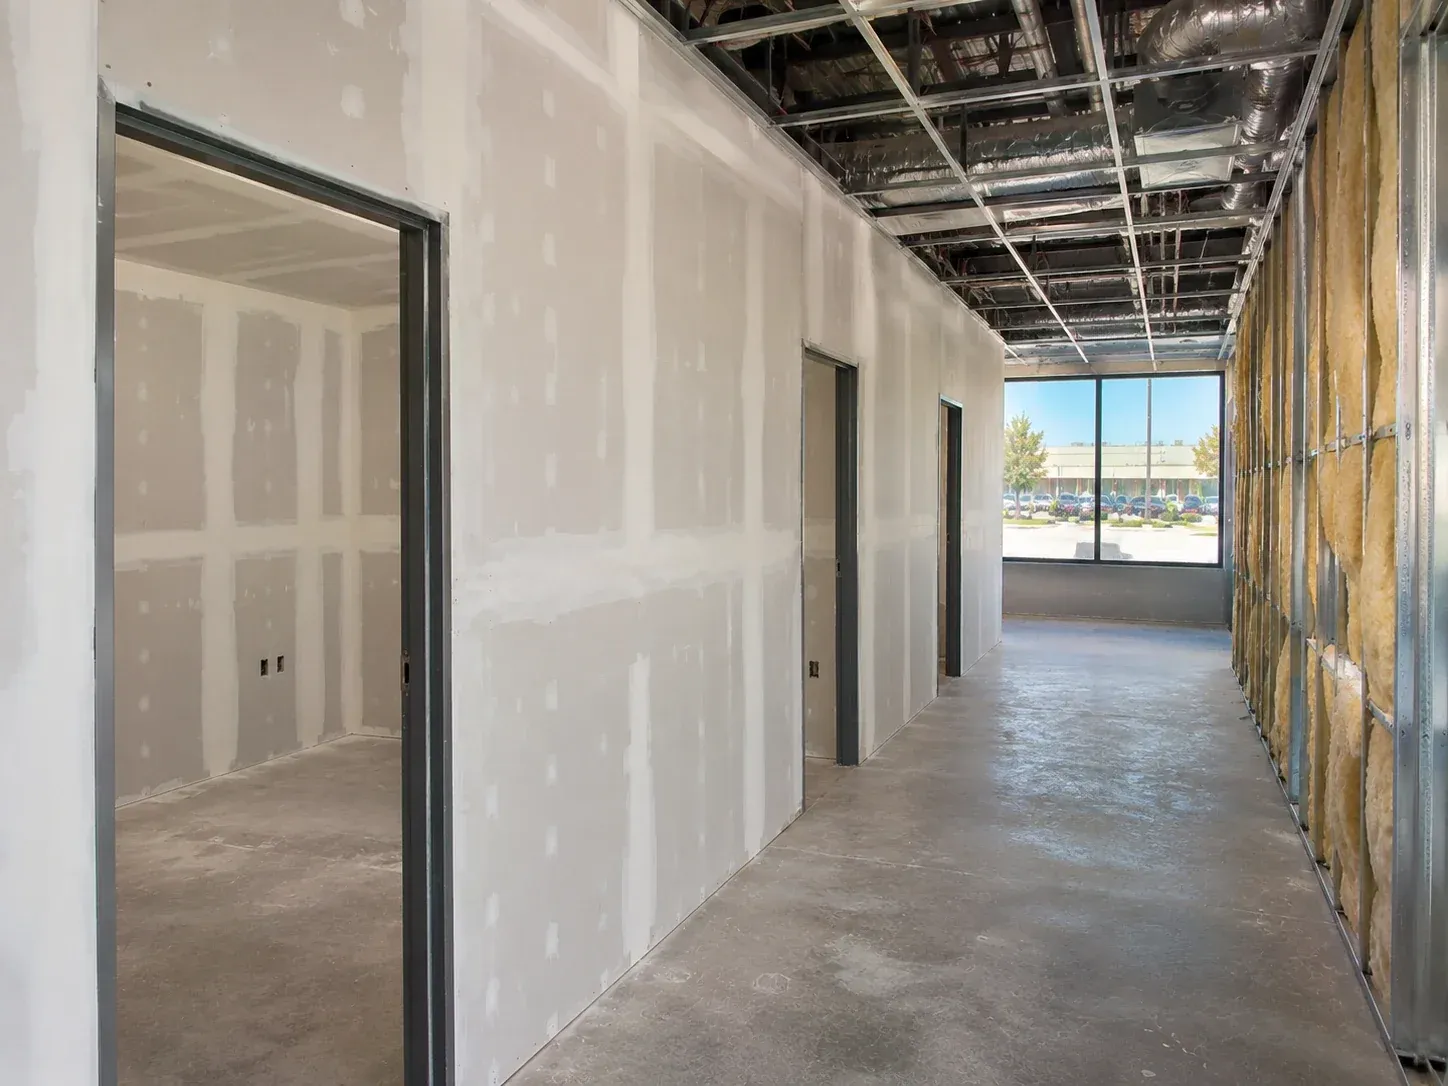
A clinic build-out corridor with exam-room walls taped, one wall still open with insulation, and a storefront window at the end.

Tenant Improvement Drywall for Offices and Clinics

Tenant improvement drywall is the work of fitting out a leased space for a new business. We start with the walls that divide one suite from the next, then build the rooms inside. Each kind of tenant needs something different from its walls. A clinic needs quiet between exam rooms, so those walls get insulation and are sealed at the floor and ceiling. An office needs backing for monitors and shelving. Retail stores and restaurants bring their own details, such as washable board in a kitchen.

Timing drives a tenant job, because a lease date is waiting at the end of it. We work from the contractor's schedule and close each wall as soon as the wiring and plumbing inside it pass inspection. Changes come up on nearly every build-out. When a wall moves or a door is added, we price the change in writing before we build it. One of our recent projects turned a 7,400-square-foot shell into a 14-room clinic in 18 working days.
Specialty Drywall Services

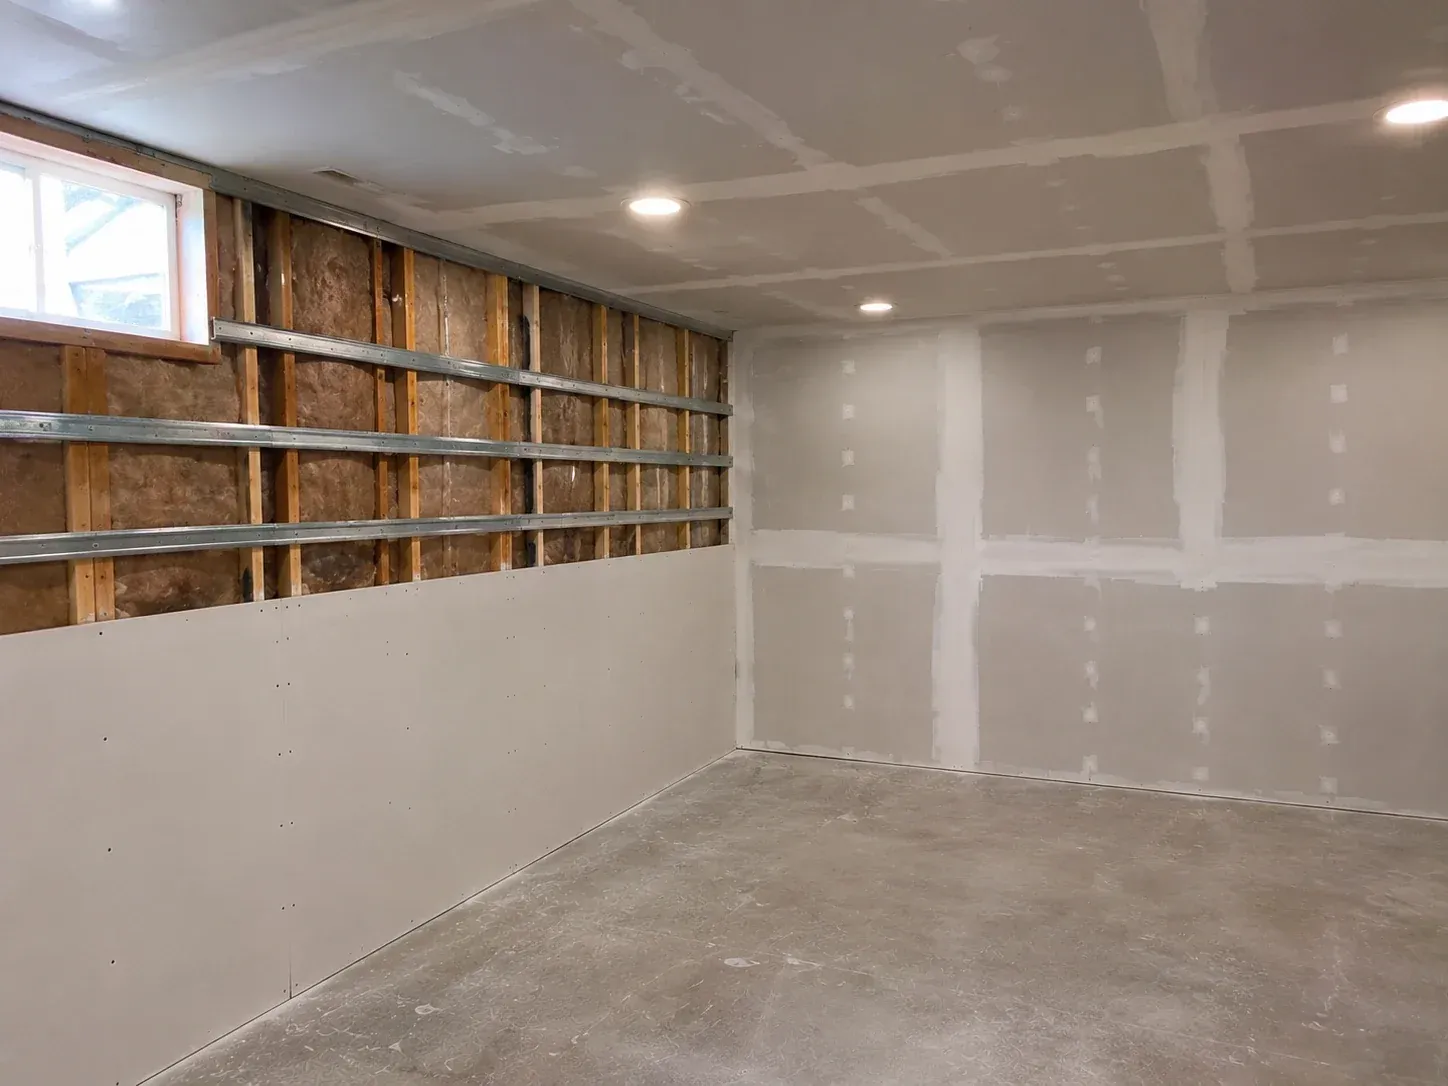
A basement wall with metal resilient channel across the studs and insulation, the first drywall sheets hung on its lower half.

Soundproof Drywall for Bedrooms and Media Rooms

Soundproof drywall is a way of building a wall so less noise passes through it. One board alone won't do it, so think of it as a recipe with four parts. Weight comes first, and it usually means doubling the board. Damping is next, which is a layer that turns vibration into a tiny amount of heat. Some boards are made with that layer inside, and QuietRock is one brand. The third part is separation, where metal channel holds the board off the studs. The last is sealing, because sound slips through any gap that air can.

You don't need all four in every room. We'll explain what each one adds and what it costs, and you choose how far to go. Basement media rooms are where we build these walls most often. Bedrooms over a garage and home offices come next. On commercial jobs, the drawings name a sound rating and we build the wall that was tested to reach it.

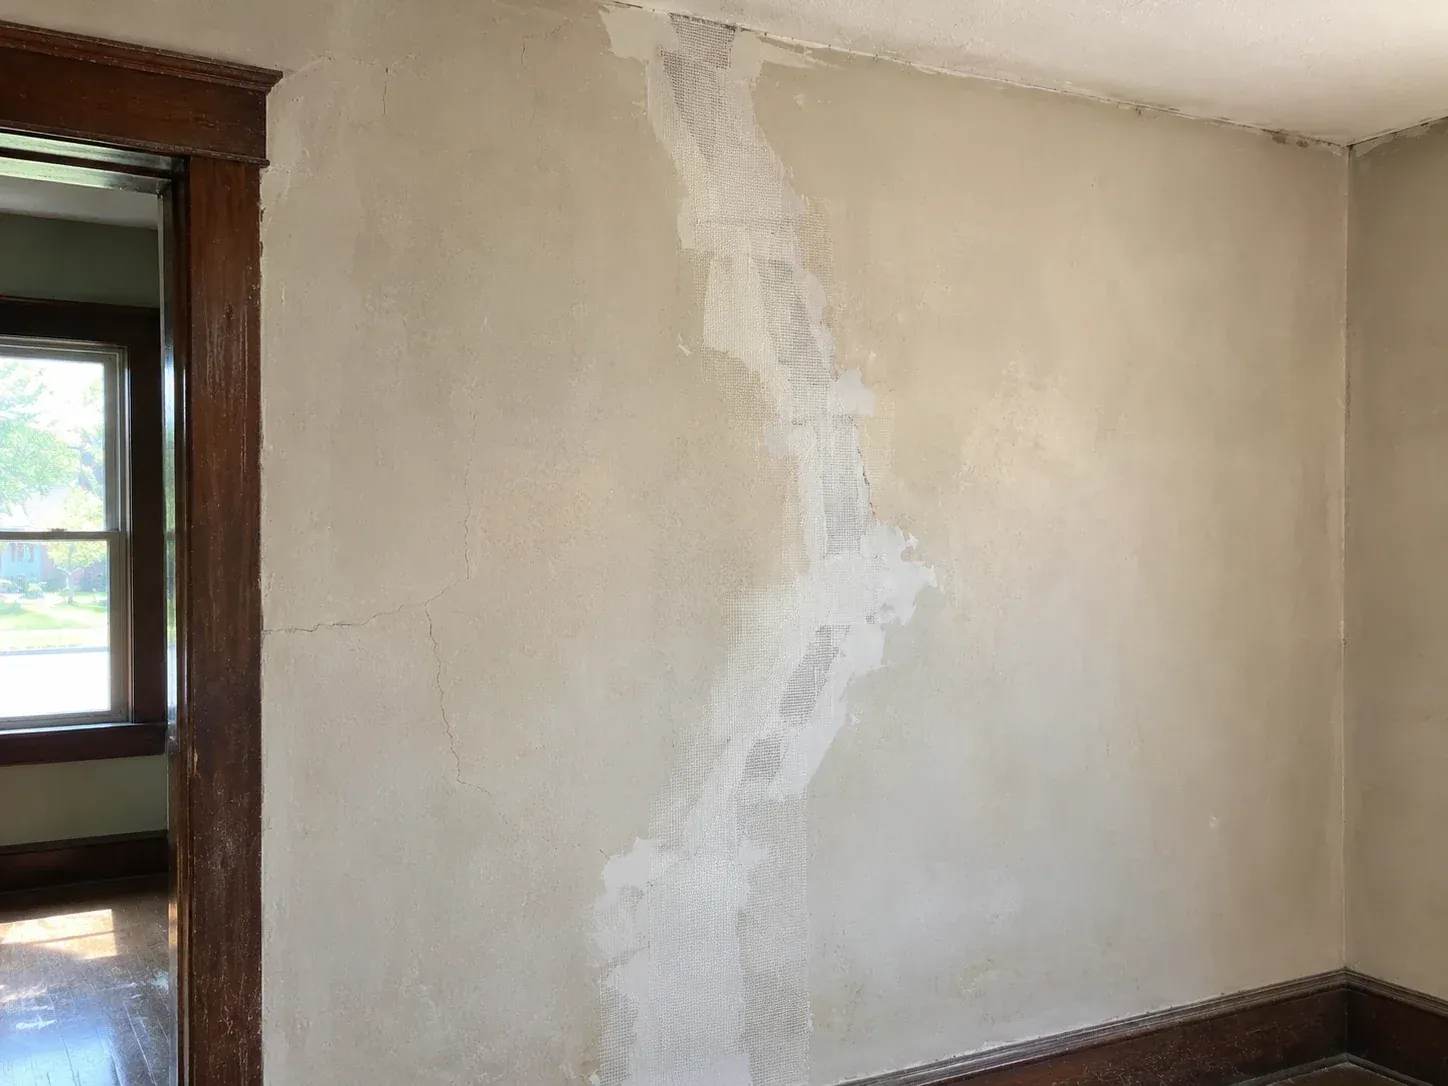
A long crack in an old plaster wall covered with mesh and setting compound beside the original dark wood trim.

Plaster Wall and Ceiling Repair

We repair plaster in Wichita's older houses, where the walls were troweled on by hand over strips of wood called lath. Plaster was the standard wall finish until about the 1930s and 1940s. It is harder and thicker than drywall, and many owners want to keep it. Most plaster problems start when the plaster loses its grip on the lath. The wall cracks, or a section of ceiling starts to sag.

Here is how a repair goes. Loose plaster is pulled back tight with screws and wide plastic washers. Cracks are cut open slightly and filled with a setting compound over mesh. Then a thin skim coat hides the repair in the surface around it. Sound plaster stays where it is. Where the plaster is beyond saving, we cut that area out and fill it with drywall shimmed to the same thickness. We'll show you which areas can be saved before any work begins.

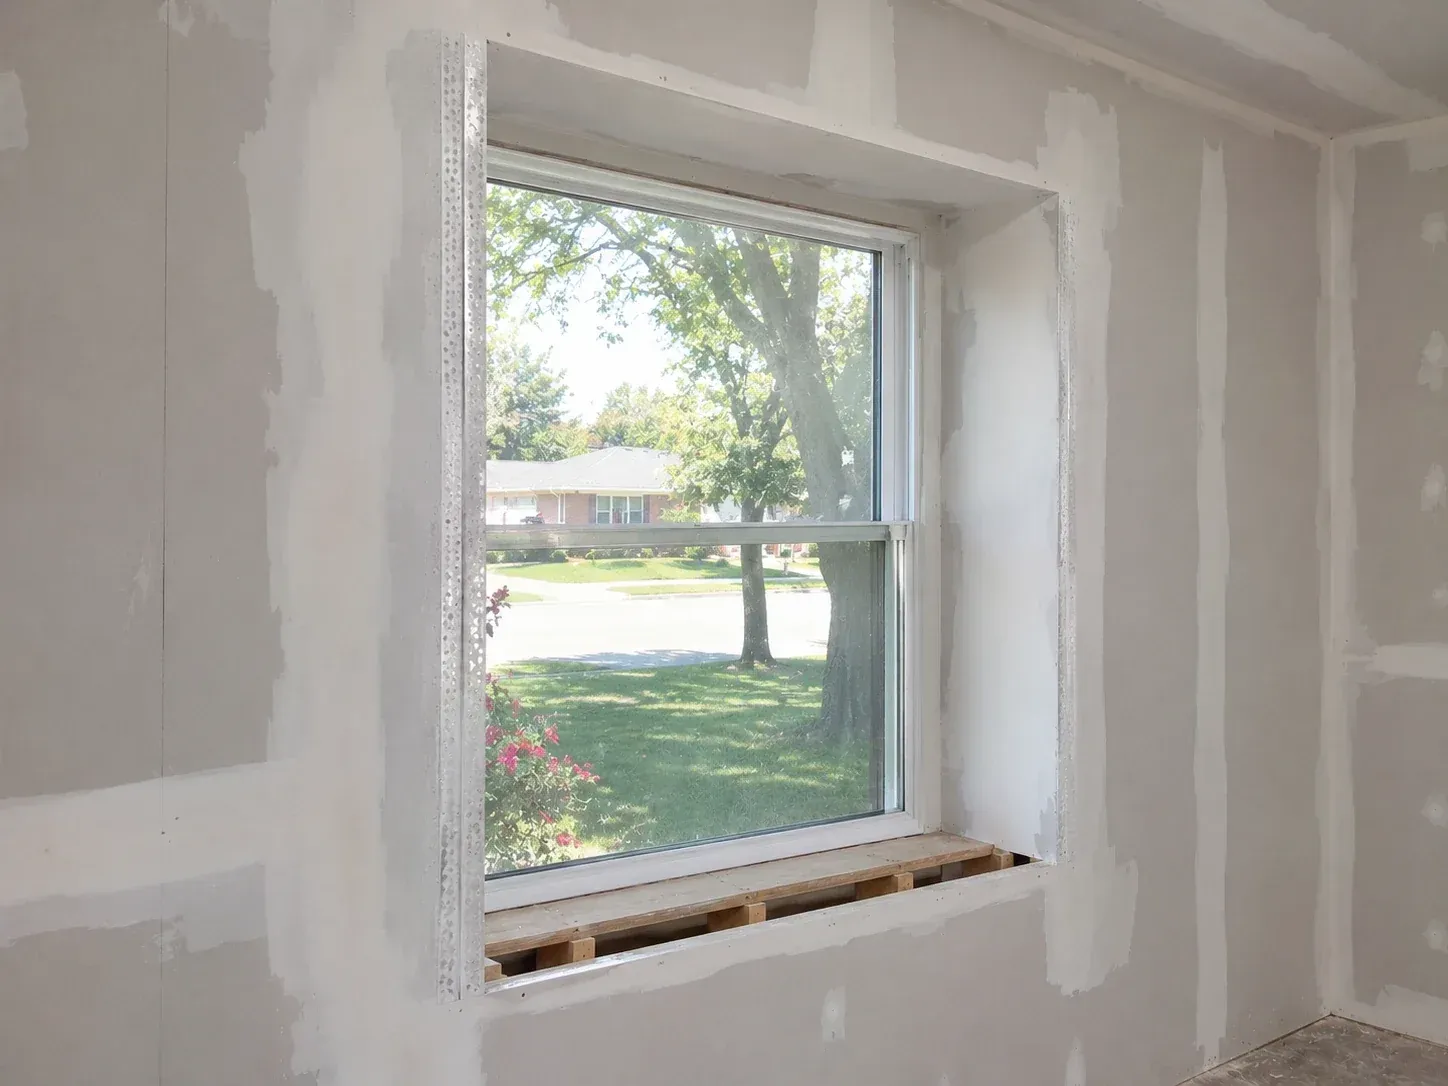
A window opening wrapped in drywall returns with metal corner bead first-coated and the sill still open to the framing.

Drywall Window Returns and Corner Bead

A drywall window return is the strip of drywall that lines the inside of a window opening. It takes the place of wood trim and gives the window a clean, simple frame. Returns look right only when the gap around the window is even, so we shim the framing first. Then we fit the board and cap each edge with corner bead.

Corner bead is a metal or vinyl strip that protects an outside corner and keeps it straight. You have a choice of shapes. Square bead makes a crisp edge. Bullnose bead is rounded and makes a softer one. Whichever you pick, we use the same shape through the room so the corners agree. When furniture or a vacuum dents a corner, we cut out that length of bead and set a new piece. We finish the new piece into the wall so the corner looks like it did before.

A long basement soffit boxed in drywall with corner bead first-coated and recessed light openings cut along it.

Drywall Soffits Around Ducts and Beams

Our drywall soffits box in the ducts and beams that hang below a ceiling. Basements have the most of them, since the main duct and the support beam both run under the floor joists. We frame each soffit with a level line along the bottom, because the eye follows that edge the length of the room. The boxes are kept as small as the duct allows.

A soffit can do more than hide things. Run around a room, it frames the ceiling and gives recessed lights a place to sit. A tray ceiling works the same way in reverse, with the center of the ceiling raised above a border. Both have many inside and outside corners in plain view. We bead every edge and finish the corners by hand. Lighting and speaker locations are settled before we hang board, so the wiring is in place behind it.

An older room mid-conversion, one wall stripped to shimmed studs and the next hung with taped drywall flush to the original window trim.

Plaster to Drywall Conversion

Plaster to drywall conversion replaces failing plaster with new board while keeping the look of the room. It makes sense when plaster is loose across most of a wall, or when wiring and insulation need to be redone inside it. The plaster and the lath both come off, which leaves bare studs. That step is dusty, so the room is sealed and the debris is bagged as we go.

The careful part comes next. Plaster on lath is thicker than a sheet of drywall, often by half an inch or more. If new board went straight onto the studs, your door casings and window trim would stand out from the wall. So we add shims to the studs until the new surface lands where the old one was. A Level 5 skim coat then gives the drywall a flat, solid face that sits well beside the plaster in other rooms. You keep the original trim and the feel of an older house.

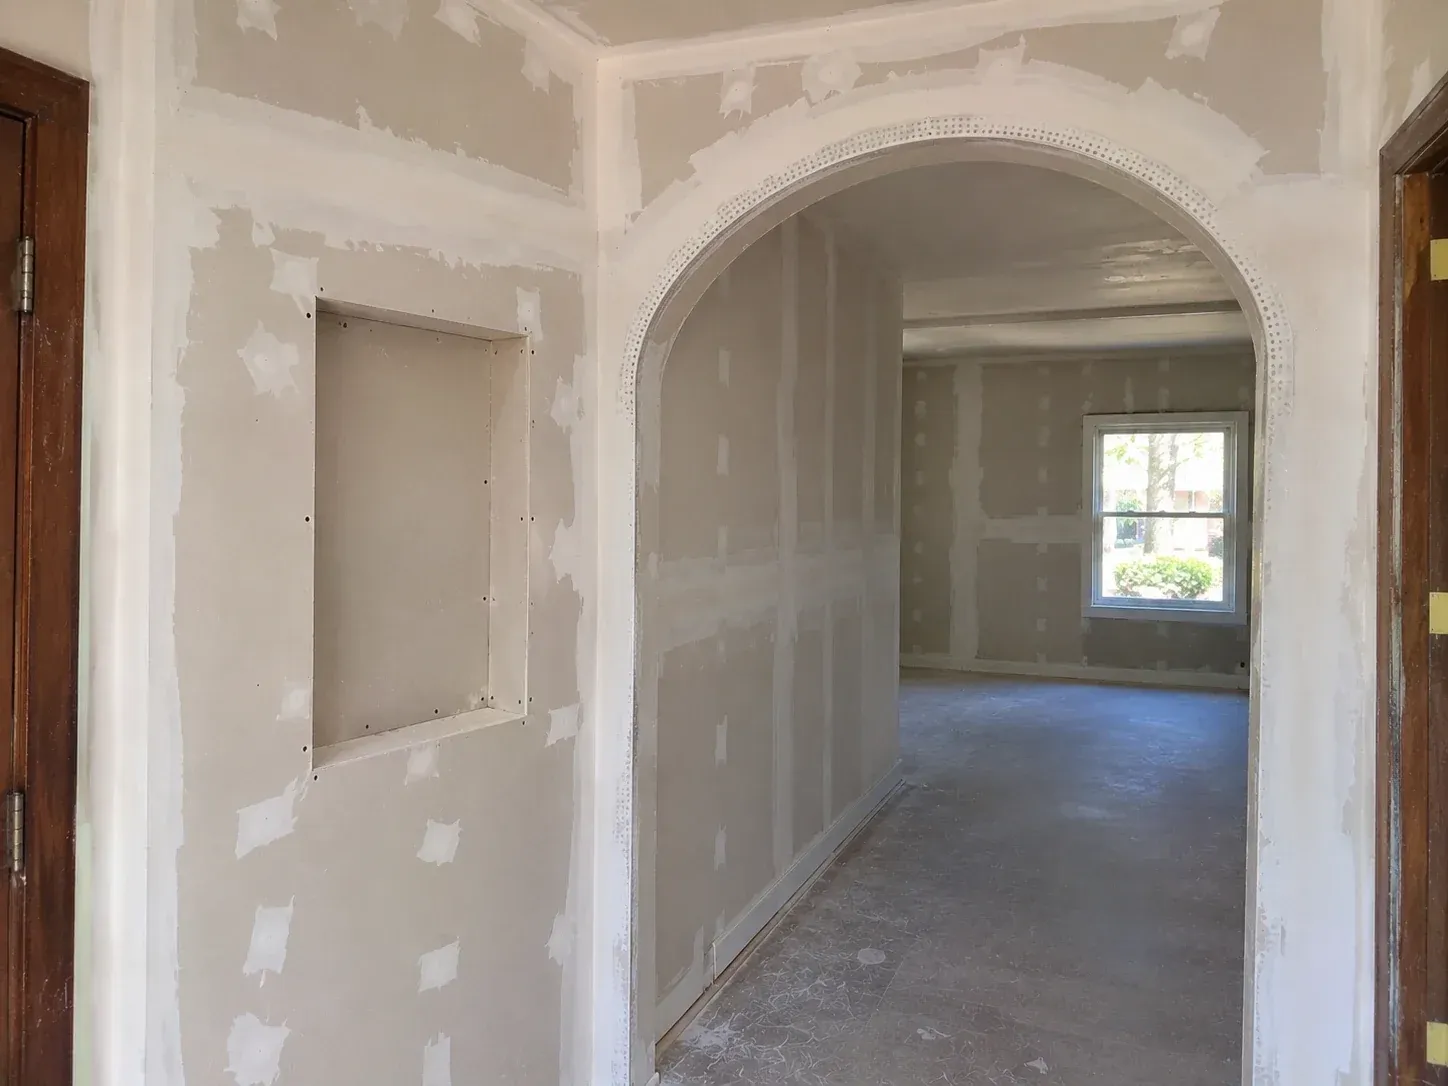
A drywall archway with flexible bead and a first coat of compound, beside a boarded wall niche.

Curved Drywall Walls and Archways

Curved drywall is board bent to follow a rounded wall or an arch. Standard 1/2-inch board will snap on a tight curve. For that reason we switch to flexible board that is 1/4 inch thick, applied in two layers. On a very tight curve, we dampen the board first so it bends without cracking. The studs behind a curve are spaced closer together, which gives the board a smooth line to follow.

An archway is a curve in a doorway. We cut a template so both sides of the arch match, then form the curve and wrap the edge with a flexible bead. Niches are a related detail. A niche is a recess framed between two studs to hold a shelf or a piece of art. It gets drywall on every inside face and a level sill. These are small parts of a house that people look at every day, so we take our time on them.

Drywall Materials in Wichita, Kansas

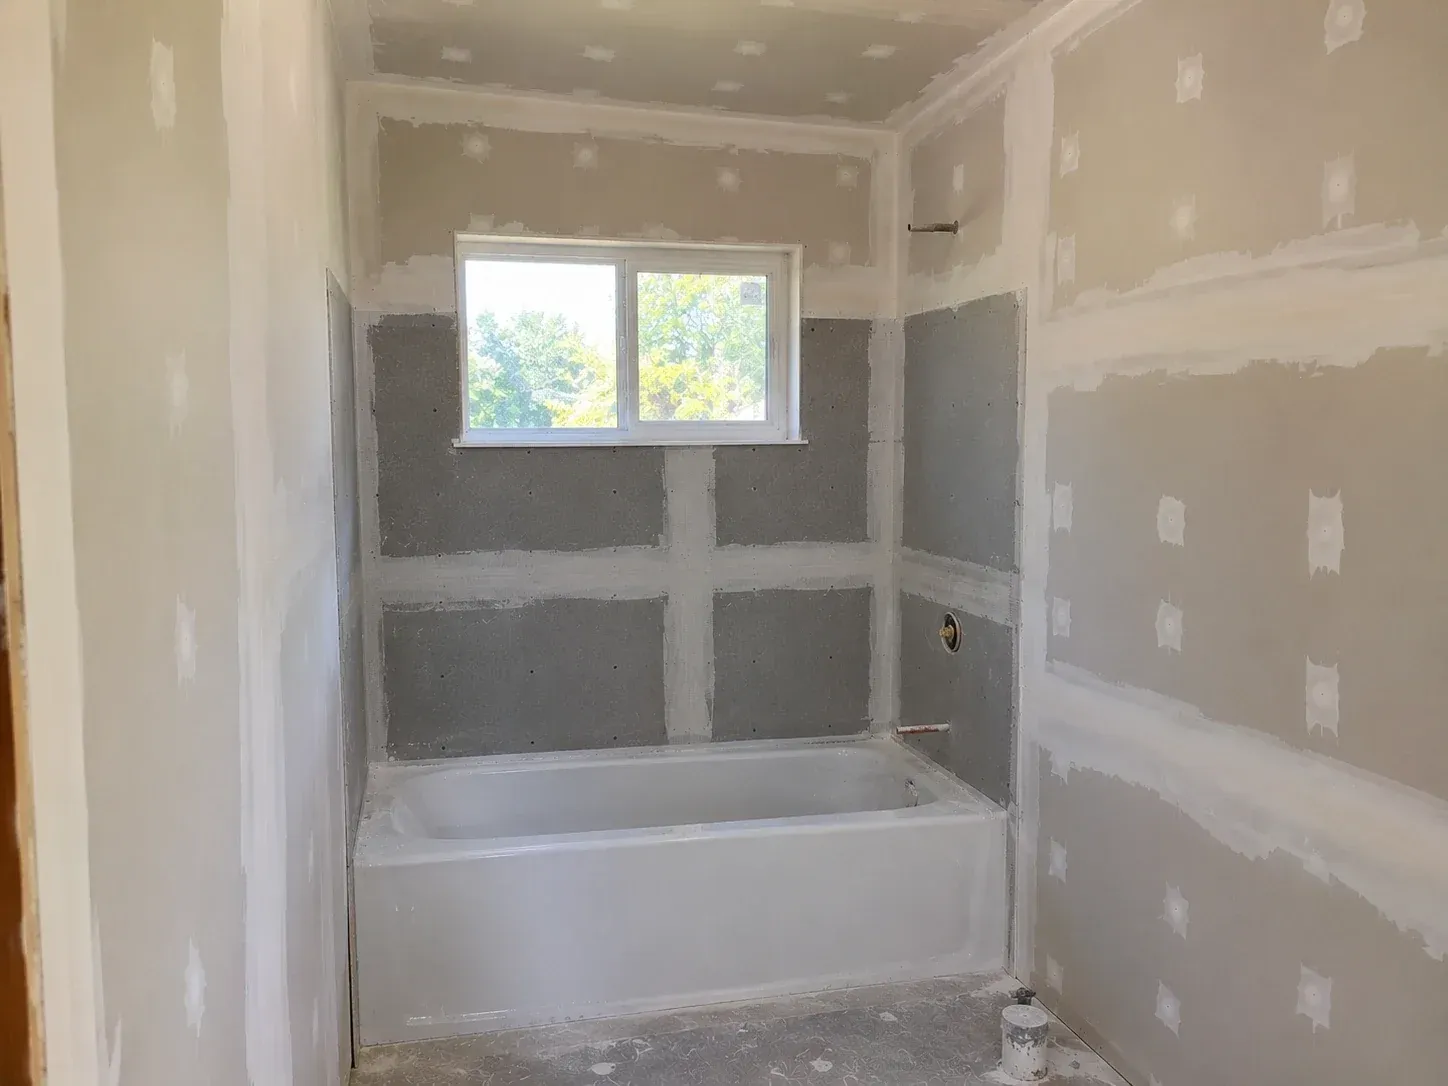
A tub surround of grey cement backer board with mesh-taped seams, with taped drywall above the splash zone.

Cement Backer Board Behind Tile

Cement backer board is a panel made of cement and fiberglass mesh, and it goes behind tile in wet areas. Drywall has a paper face and a gypsum core, and both break down if they stay wet. Cement board does not. That is why it is used inside showers and around tubs, where water hits the wall every day.

When we drywall a bathroom, hanging the cement board is part of the job. It is fastened with coated screws that resist rust, at the spacing the manufacturer gives. The seams are covered with a mesh tape made for cement and a coat of tile mortar. Where the cement board ends and drywall begins, we set that joint outside the splash zone. Your tile setter then adds waterproofing and tile. What we hand over is a flat, firm wall, which is what tile needs to stay put.
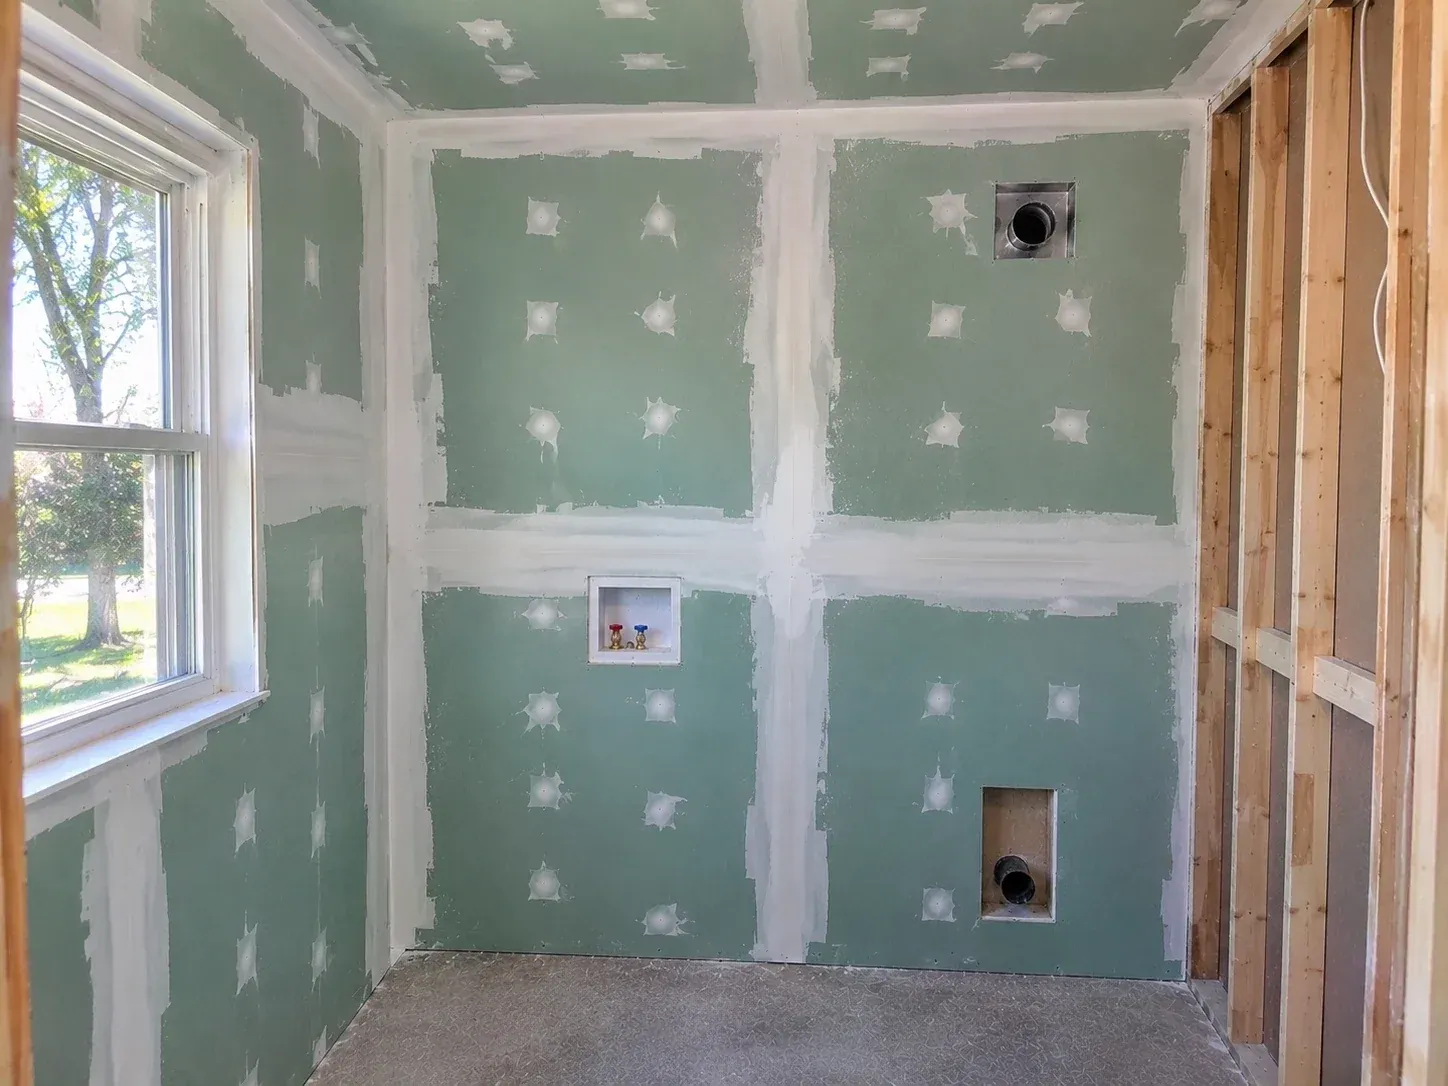
A laundry room hung with green moisture-resistant drywall, taped and spotted, with a washer box and vents cut in and one wall still open.

Moisture-Resistant Drywall and Green Board

We hang moisture-resistant drywall in rooms that get damp but not soaked. Green board is the common name for it, after the color of its face paper. Its core is treated to take on less water than regular drywall. A newer type swaps the paper face for fiberglass, which gives mold less to feed on. Many manufacturers now make one board that does both jobs.

Here is where each one belongs. Bathroom walls outside the shower get moisture-resistant board, and so do laundry rooms. Bathroom ceilings get it too, with a setting compound in the joints because it holds up better in steam. Inside the shower itself, the wall should be cement backer board. Board is only part of the answer in a bathroom. The other part is a fan that sends damp air outdoors, and we'll tell you if yours seems weak.

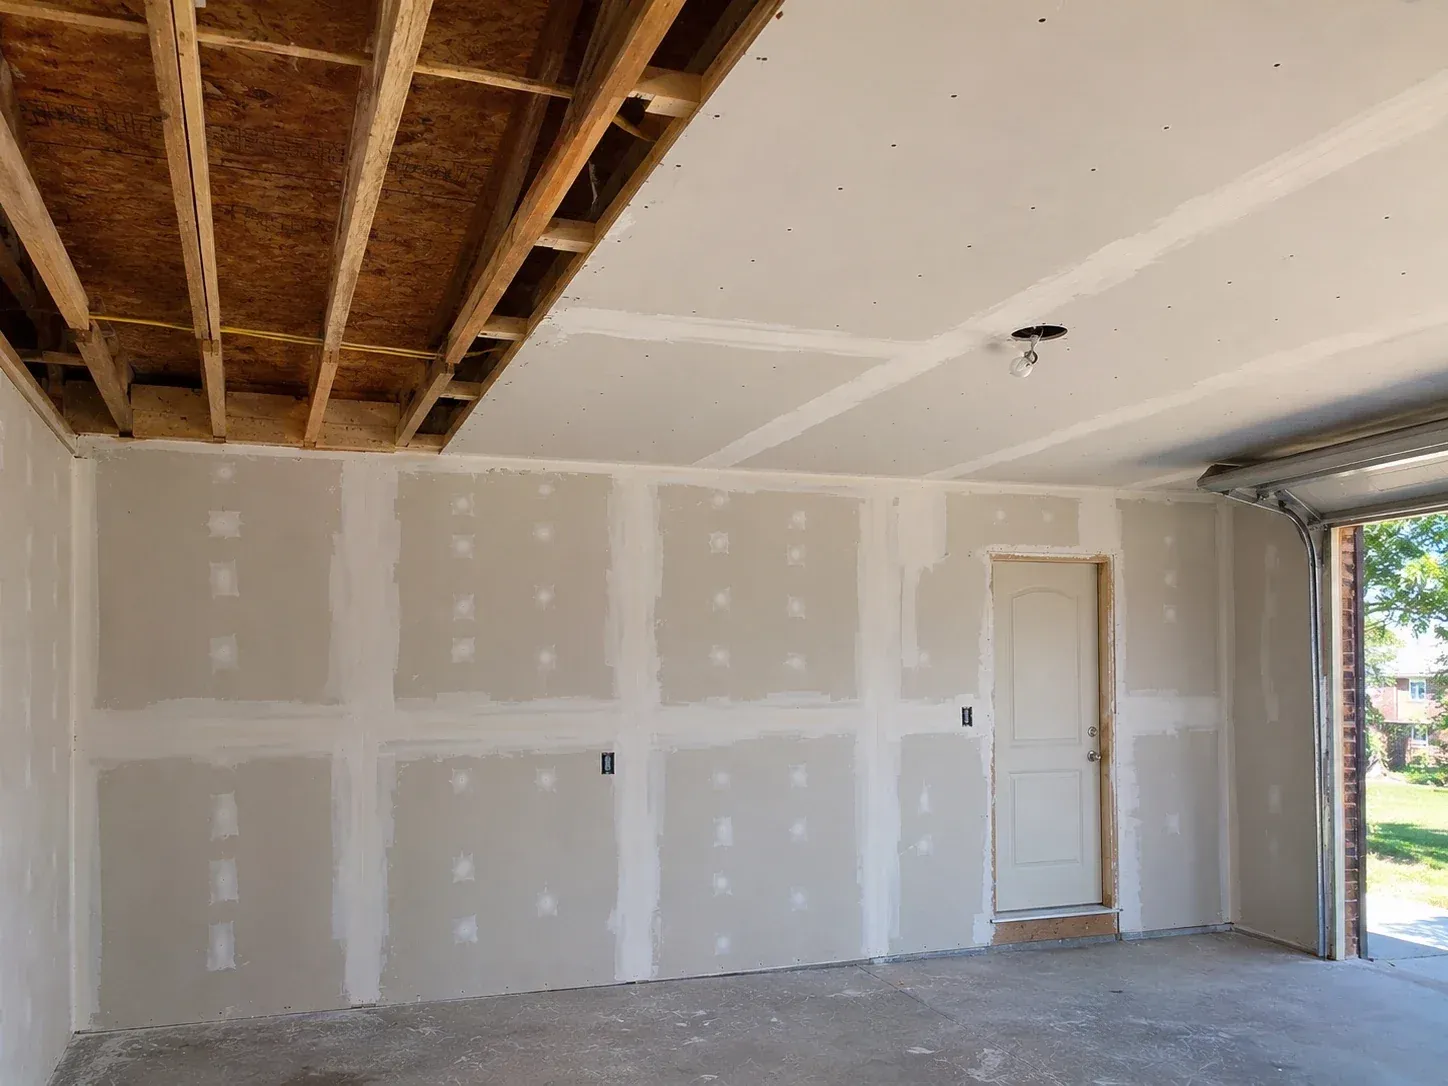
An attached garage with the ceiling half covered in drywall and the house-side wall boarded and taped around the door into the house.

Type X Drywall for Garages and Rated Walls

Type X drywall is a fire-rated board with glass fibers in its core. The fibers help the board stay in place longer in a fire, which slows the spread to the next room. Most homes have it in one place, the garage. When a room sits over the garage, the building code asks for Type X board 5/8 inch thick on that ceiling. The wall between the garage and the house needs board at least 1/2 inch thick on the garage side.

Those rules are there to give people in the house more time. We fasten Type X with longer screws and tape all of its joints, since an open joint is a weak spot in the barrier. The enclosed side of a stairway needs board too, and the code sets it at 1/2 inch. Once it is taped and painted, Type X looks no different from the walls around it.
Wichita Elite Drywall's Drywall Expertise in Wichita, KS

Basements are common in this part of Kansas, and a basement wall has concrete and soil behind it. Footings in Wichita go at least 24 inches down to get below the frost line. Concrete holds moisture for years, so drywall is kept about half an inch above the slab. The U.S. Department of Energy's building research also advises against plastic sheeting on the inside of basement walls, because the wall needs to dry toward the room. Under the local code, foam insulation has to be covered with at least 1/2-inch drywall.
The age of a house tells us what we'll find inside the walls. The 1950s were Wichita's biggest building decade, and about a third of the city's homes went up before 1960. The oldest of them have plaster over wood lath. Homes from the decades after often have popcorn ceilings, and their texture and compound should be lab tested before anyone sands. The median Wichita home was built in 1976.

Weather does the rest. In an average year, Wichita sees about 65 afternoons reach 90 degrees and about 103 nights drop to freezing. Joint compound dries by evaporation, so those swings change how long each coat takes. The city has recorded hailstones more than seven inches across and wind gusts past 100 miles an hour. Roofs take that weather first, and a ceiling stain is often the first sign indoors. Reading that stain correctly, and knowing when the framing is dry enough to close, is a regular part of our work.

Why We're the Best Drywall Company in Wichita, KS

Upfront Pricing and a Written Estimate

We share our price ranges up front, so you can see where a project like yours tends to land. The exact price comes after a free visit, because the square footage and the finish set the price of drywall. Your written estimate reaches you within 2 business days of that visit. Each room is listed with its finish level and its texture, plus the board we'll use. It also says how the walls will be left, whether that is ready for primer or already primed. If the job changes after we start, we write up the change and its price before doing the added work. Every line on the final bill will match a line you've already seen.

Ten In-House Hangers and Finishers

Wichita Elite Drywall employs ten hangers and finishers, and the crew that hangs your first sheet also sands your last coat. That matters for the finish. A finisher who knows how the board was hung knows where to look for trouble. Our crews have completed $6.1 million in drywall work across the Wichita area. We buy board and compound from 3 local suppliers, which helps when a job needs fire-rated or moisture-resistant board on short notice. Each year we send people to BUILD, the convention of the Association of the Wall and Ceiling Industry, to see new products and methods. Wichita Elite Drywall is licensed, bonded and insured.

Explained in Plain Words Before You Decide

Drywall comes with its own vocabulary, and you shouldn't need to learn it alone. Before you sign anything, we explain each choice on your estimate. That includes what a finish level is and why a basement wall is built differently from one upstairs. We bring a sample board so you can see knockdown and orange peel side by side. When a repair is enough, we'll say so. When replacement is the better value, we'll show you why in terms of time and cost. Questions are welcome at every step, from the first visit to the final walk. Our customers rate their satisfaction at 99 percent, and we think clear answers are a large part of that.

A 5-Year Written Workmanship Warranty

Our workmanship is covered for five years, and the terms are given to you in writing before the job starts. The warranty covers the board we hang and the joints and texture we finish. At the end of the job, we walk every room with you under good light. Anything you point out is fixed before we call the work complete. If a question comes up later, call us and we'll answer it in writing. We'll tell you plainly what we find and what the warranty covers. A written warranty is useful only if it is easy to read, so ours is written in plain language and fits on one page.

Drywall Installation Timeline in Wichita, KS

How Long Does Drywall Installation Take?

Most of a drywall schedule is drying time. Here are the working days for common Wichita projects. A single room takes 4 to 5 days. A basement of about 1,150 square feet takes about 7 days. A new house near 2,700 square feet takes about 8 days, counted from the day board is delivered. Removing popcorn and spraying knockdown across 1,900 square feet takes about 6 days. A commercial suite near 7,400 square feet takes about 18 days with framing and ceilings.

A few things add time. Cold or humid weather slows each coat. Choosing Level 5 puts 2 or 3 more days on the calendar for the skim coat, and texture adds one. Rated walls on a commercial job wait for the inspector before taping starts. All of that is counted before we give you dates, which is why the dates on your estimate hold.

Project Timeline & Milestones

  1. The visit.

    An estimator measures the space and sees the framing or the damage firsthand. This is where we learn what the job needs.

  2. Your choices.

    We explain each finish level and texture, and you pick. Making those choices early keeps the price from changing later.

  3. The written estimate.

    It reaches you within 2 business days, with the price and the dates. A written scope protects both of us if questions come up.

  4. Protection.

    Floors are covered and doorways are sealed before material comes in. Dust is easier to keep out than to clean up.

  5. Framing check.

    We look for bowed studs and missing backing and fix them. Board copies whatever is behind it.

  6. Hanging.

    The ceiling sheets are hung before the wall sheets, and seams are kept off door and window corners. Those corners are where cracks begin.

  7. Tape and mud.

    Our lead finisher tapes each joint and builds two more coats. Each coat dries before the next, since damp mud shrinks.

  8. Sanding and texture.

    Sanding is done with vacuum-attached sanders, and a work light held to the wall shows what's left to fix. Then the texture you approved goes on, with primer where the estimate includes it.

  9. The final walk.

    You go through every room with our crew lead. We fix what you find and haul off the debris, and you get the warranty in writing.

Good drywall is mostly patience, and we have plenty of it.

Drywall Cost and Pricing in Wichita, KS

What Affects Cost?

Drywall is priced mainly by the square foot of wall and ceiling, so size comes first. A few other things move the price up or down. Tall ceilings need scaffolding. Fire-rated and moisture-resistant boards are priced higher per sheet than the standard kind. The finish level matters, since Level 5 means skimming every wall. Texture is one more step, and copying an existing pattern is slower than spraying a fresh one. Basements add soffits around ducts and beams, which take time to frame and finish.

Older ceilings add a test. Asbestos is a mineral fiber that was once mixed into building products, including popcorn texture and some joint compounds. It can't be identified by eye. A lab looks at a sample under a polarized light microscope and reports whether asbestos is there and how much. The test matters because scraping sends those fibers into the air, where they can be breathed in. Exposure to asbestos raises the risk of lung disease. With a clear result, removal goes ahead as planned. With a positive one, we stop and talk through your options.

How Much Does Drywall Installation and Repair Cost?

These are the price ranges for drywall work in Wichita. Rows priced by the square foot count the wall and ceiling surface being covered. Rows priced by the project show the range of work we take on. Your written estimate uses the same terms, so you can read it next to this table. The standard row is board hung and finished to Level 4. The Level 5 row is the full price for the same work taken to Level 5, so you pay one rate or the other. Texture is the one row that adds to another.

ServicePrice RangeWhat Drives the Price
Standard drywall hang and finish$1.40 to $2.00 per sq. ft.Standard 1/2-inch board in open rooms sits at the low end. Ceilings and thicker board sit at the high end.
Drywall hung and finished to Level 5$1.75 to $3.50 per sq. ft.The full price with hanging included, in place of the standard rate. The skim coat and the added sanding make up the difference.
Drywall textureAdds $0.80 to $2.00 per sq. ft.A sprayed texture costs less. Matching an existing pattern costs more.
Basement drywall$1.50 to $3.50 per sq. ft.Soffits around ducts and the number of small rooms.
Typical drywall installation project$5,000 to $85,000+ per projectThe low end is one large room or an addition. The high end is a whole house or a commercial suite.
Basement drywall project$6,000 to $30,000+ per projectThe size of the basement and how much soffit work the ceiling needs.
Ceiling repair$1,200 to $22,000+ per jobThe low end is one room with matched texture. The high end is new ceilings through a whole house.
Water-damaged drywall repair$1,400 to $18,000+ per jobHow many rooms the water reached and how much insulation has to be replaced.
Popcorn ceiling removal$2 to $6 per sq. ft.Removal with a new finish. Popcorn that has been painted costs more to remove, and so do tall ceilings.
Asbestos lab test$250 to $850 per testThe number of areas sampled.

A range tells you where a project tends to land. Your written estimate gives one number for your rooms, measured in person. If you're comparing two finishes, we'll price both so you can see the difference. Every range includes labor and material together. For commercial jobs, we build the price from the drawings.

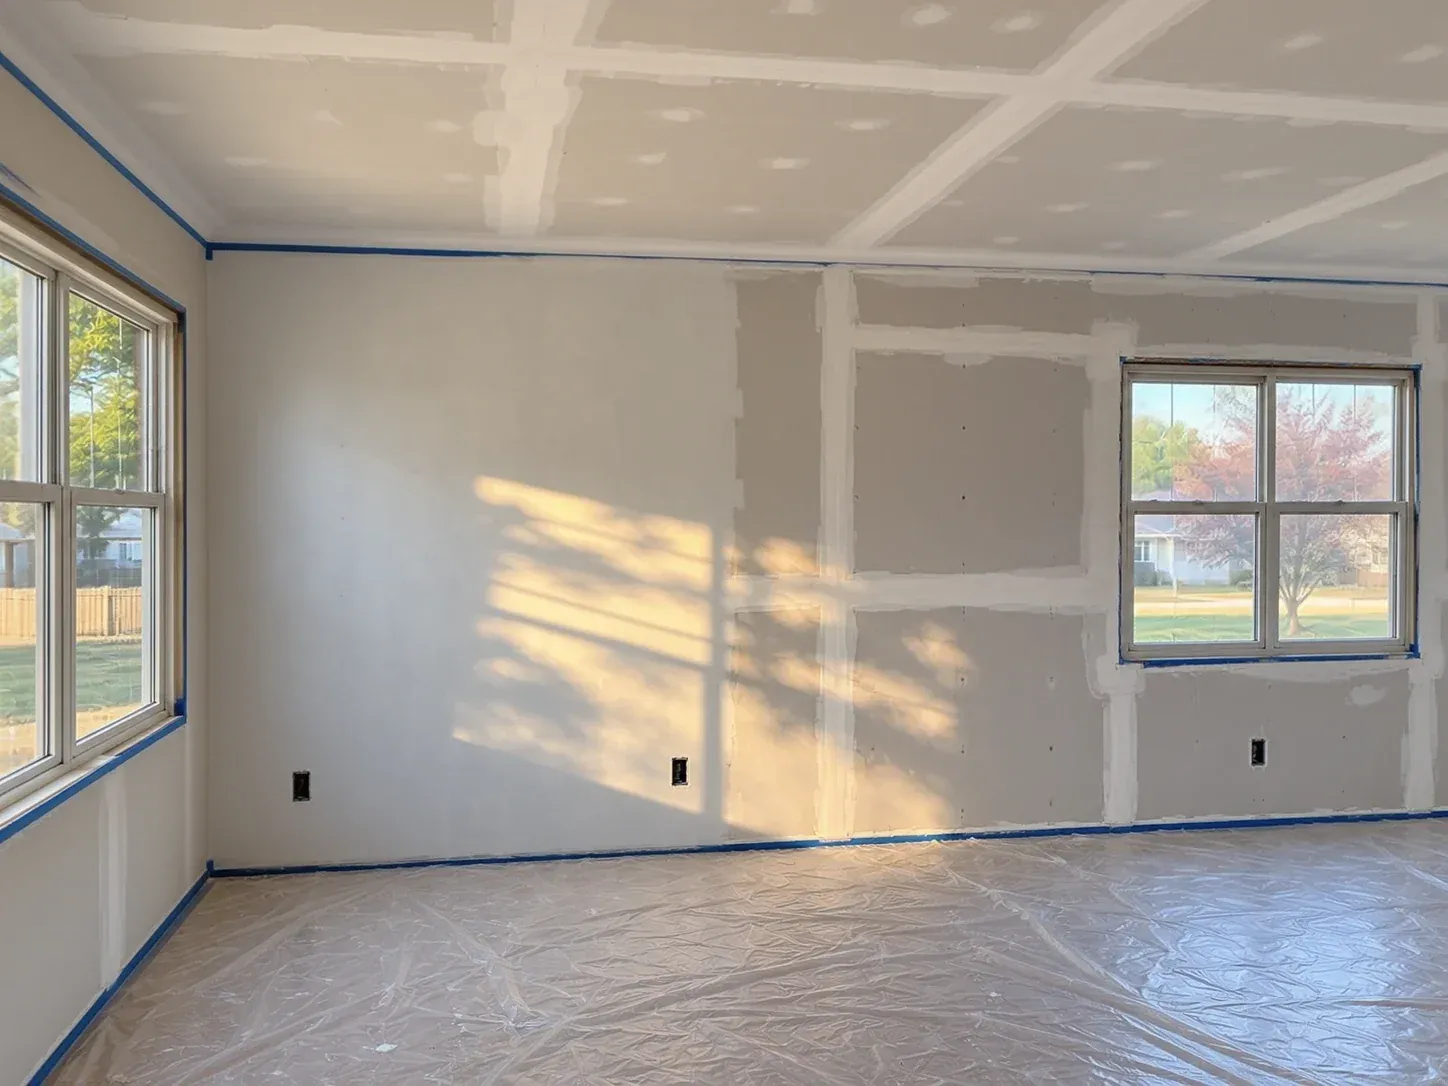
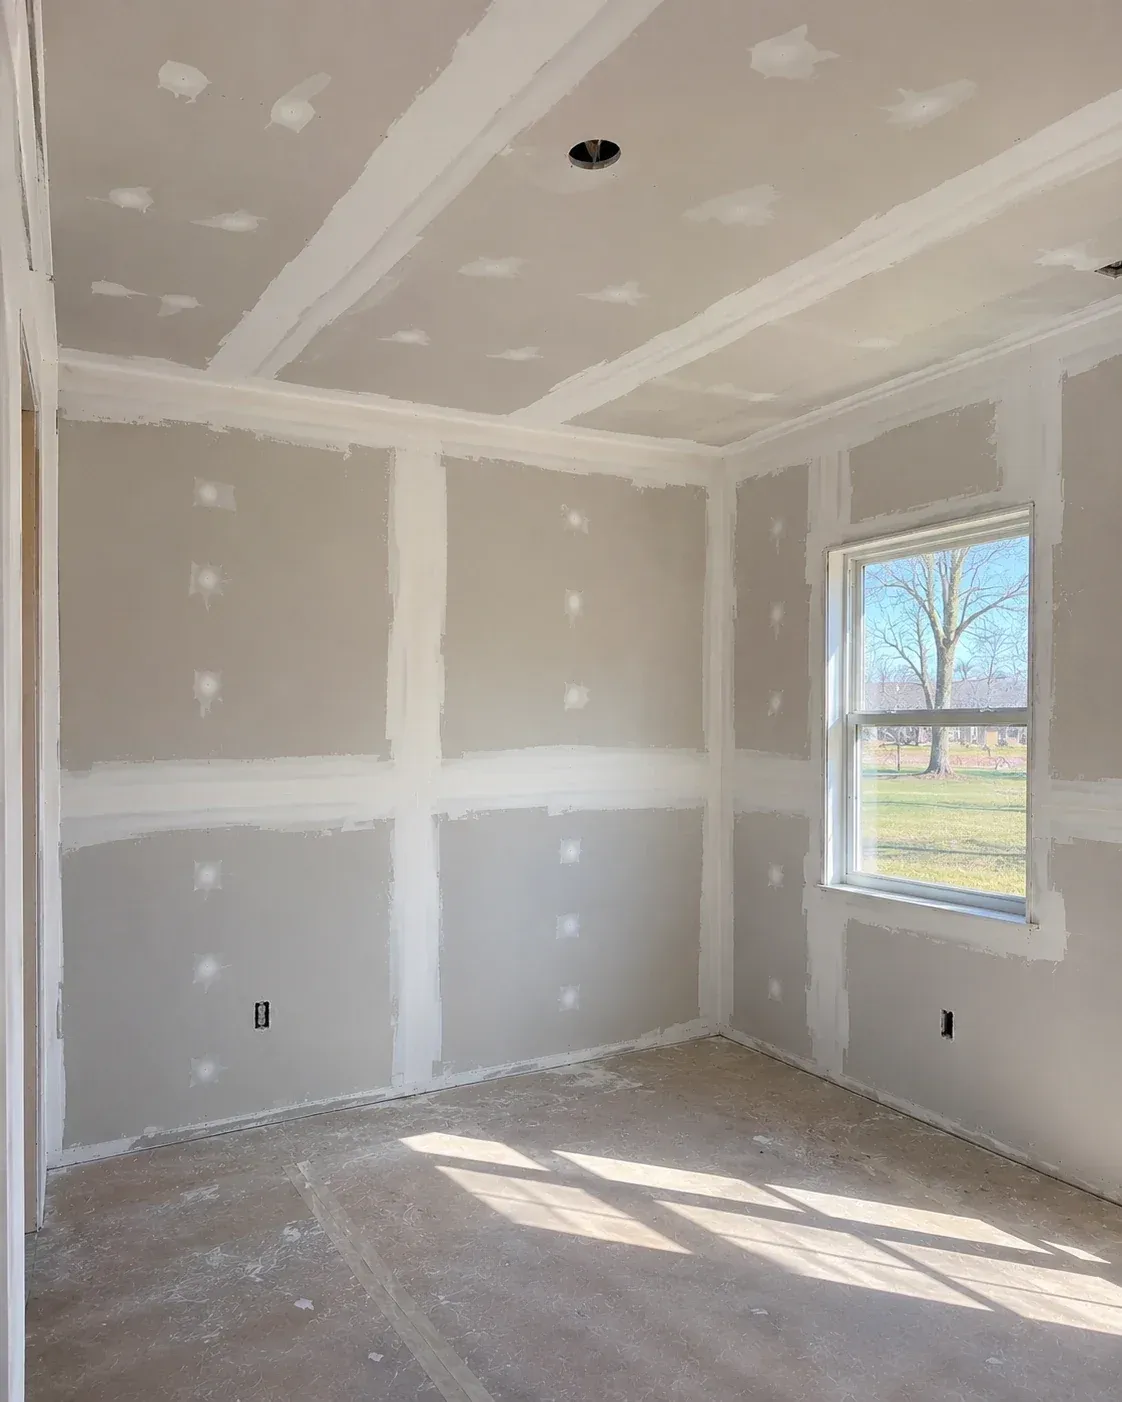
A bedroom mid-job with its walls and ceiling hung and taped, sun from the window falling across the floor.

Proudly Serving Wichita and the Surrounding Towns

Wichita Elite Drywall works in every part of Wichita and in the towns around it. We take on projects in Derby, Andover, Haysville, Park City, Bel Aire, Goddard and Maize. Our crew also works in Valley Center, Mulvane, Rose Hill, Kechi, Augusta, El Dorado and Newton. Recent jobs include a basement in Andover and a new home in Maize. Permit rules change from one city to the next, so we check with the right office for your address. If your town isn't named here, call us. We likely work there too.

Downtown Wichita at dusk, with the Century II dome beside the Arkansas River and the city's towers behind it.

What Wichita Homeowners and Builders Say About Our Drywall Work

Drywall Installation and Repair FAQs

How Much Does Drywall Installation and Repair Cost in Wichita?
  • Standard drywall hang and finish: $1.40 to $2.00 per sq. ft.
  • Drywall hung and finished to Level 5: $1.75 to $3.50 per sq. ft., in place of the standard rate
  • Drywall texture: adds $0.80 to $2.00 per sq. ft.
  • Basement drywall: $1.50 to $3.50 per sq. ft.
  • Typical drywall installation project: $5,000 to $85,000+ per project
  • Basement drywall project: $6,000 to $30,000+ per project
  • Ceiling repair: $1,200 to $22,000+ per job
  • Water-damaged drywall repair: $1,400 to $18,000+ per job
  • Popcorn ceiling removal: $2 to $6 per sq. ft.
  • Asbestos lab test: $250 to $850 per test

These are ranges. The visit to measure is free, and it ends with one price in writing.

Can I Put Drywall in My Basement Without a Permit?

Usually not, when the drywall is part of finishing the basement. Finishing adds framing and wiring, and that work typically needs a permit from the building department that serves Wichita and Sedgwick County. A bedroom in a basement also needs an egress window, which is an opening large enough to climb out of in an emergency. We check the framing and the windows before we hang board, and we'll tell you if something needs attention first.

Do I Need a Permit to Repair Drywall in Wichita?

It depends on the size of the repair. The local code exempts repair or replacement of up to 100 square feet of drywall in a 12-month period. That holds as long as the wall or ceiling isn't fire-rated and no framing or wiring is changed. Bigger replacements may need a permit, and so may work on a garage ceiling under a bedroom. Other cities in the area set their own rules, so we confirm what applies to your address.

Is It Better to Patch or Replace Drywall?

Patch when the damage is small and the board around it is solid. A hole or a crack can be repaired so it disappears under paint. Replace when the board has been wet or has started to sag. Replacement is also faster when several patches would sit close together on one wall. We'll recommend one or the other after we see it, and explain the reason.

What Is the Difference Between a Level 4 and a Level 5 Drywall Finish?

Level 4 means the joints and screw heads are taped and coated until they are flat, and it is what most painted walls receive. Level 5 goes one step further and skims the whole wall with a thin layer of compound. That extra coat keeps joints from showing under gloss paint or in strong side light. Most homes need Level 5 in only a room or two, and we'll point out which ones.

Should a Basement Ceiling Be Drywall or a Drop Ceiling?

It depends on what is above it. A drywall ceiling looks like the ceilings upstairs and keeps more headroom. A drop ceiling, which is a grid with removable tiles, gives easy access to pipes and wiring. Many of our basement customers choose drywall with a few access panels at the valves. We'll look at what runs through your joists and help you weigh the two.

What Is the Difference Between Knockdown and Orange Peel Texture?

Both are sprayed textures, and the difference is what happens after the spray. Orange peel is left to dry as a fine, bumpy surface. Knockdown is sprayed heavier and then flattened with a knife, which leaves wider, flatter patches. Knockdown hides flaws a little better, and orange peel is often easier to touch up. We bring samples of each so you can choose by eye.

How Long Does It Take to Drywall a Room or a Basement?

Plan on 4 to 5 working days for a single room and about 7 for a basement of roughly 1,150 square feet. Hanging the board goes quickly. Most of the time is spent waiting, because each coat of joint compound has to dry before we add another. Cold or damp weather can add a day, and we count that in when we set your dates.

Start Your Wichita Drywall Project

Wichita Elite Drywall is ready to look at your project. We handle drywall installation, repair, popcorn ceiling removal and Level 5 finishes, along with basement drywall and commercial interiors. Bring your questions to the first visit, and we'll answer them in plain words. You'll have a written price and a schedule within 2 business days.

Call (316) 243-2085